
Do you want to accept payments with Stripe on your WordPress website?
Although there are several payment gateways, Stripe stands out for its simplicity and developer-friendly features.
In this article, we’ll show you how to accept payments with Stripe on your WordPress site.
Accepting Stripe Payments With WordPress
To be able to install Stripe, your website needs to have an SSL/HTTPS encryption. This ensures that the payment details that your customers will be sharing on your site are safe.
If you don’t have an SSL/ HTTPS already, here’s how you can get it for free within a matter of minutes.
Let’s now check out how to prepare your website to accept payments with Stripe.
Step 1: Installing WPForms
The first step is to install and activate the WPForms plugin on your website. WPForms is a form builder plugin that lets you build any kind of online forms, including payment forms to accept payments from your customers using PayPal or Stripe.
For reference, check out how to install a plugin on your WordPress site.
Step 2: Installing the WPForms Stripe Addon
Next, activate the WPForms Stripe addon by going to your website dashboard and click on WPForms » Addons.
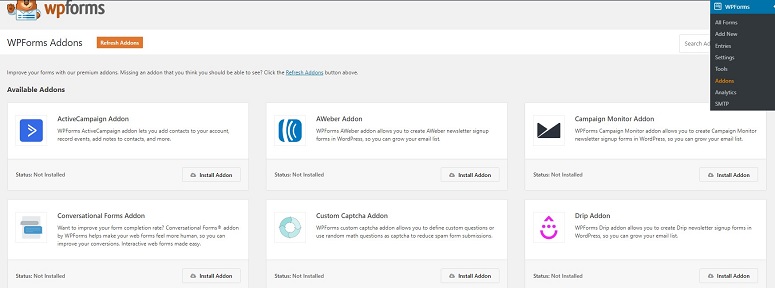
Now using the search field look for the Stripe addon. Once found, click on the Install Addon button.
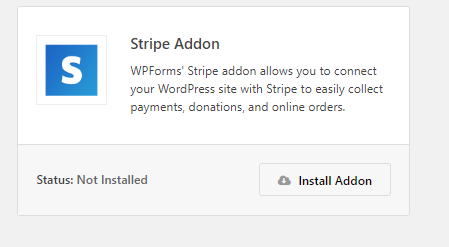
Step 3: Preparing WPForms to Accept Stripe Payments
Once the addon is installed, you can now move on to the Settings page by navigating to WPForms » Settings » Payments.
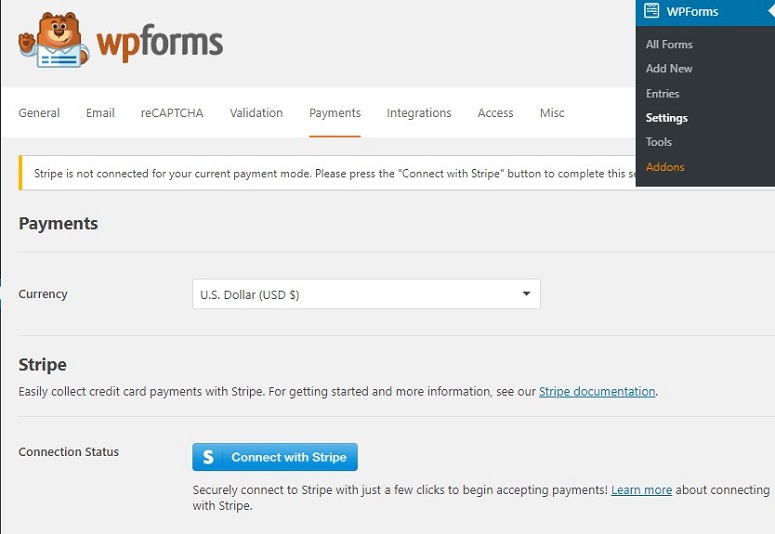
Now click on the Connect with Stripe button. In the next step, you need to authorize the connection between your forms and Stripe.
If you have a Stripe account already, you can use the button on the top right corner to sign in.
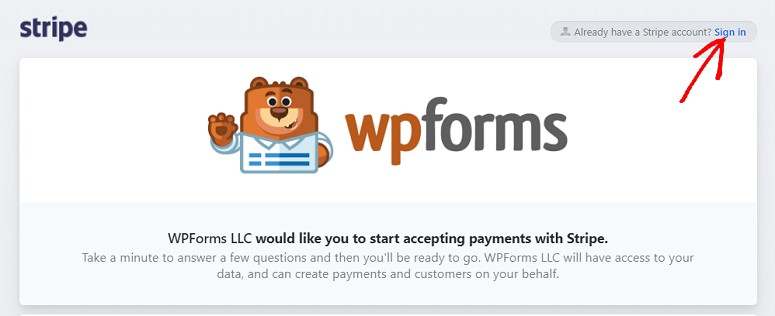
If you don’t have a Stripe account, you can simply create it by using the options below.

Once you’ve agreed to the requirements, you’ll be redirected back to your WordPress admin area.
Step 4: Create a Payment Form With Stripe
Now that you’ve set up Stripe addon with WPForms, let’s go ahead and start creating your Stripe payment form. For that, you first need to create a form. Here’s how you can create your form.
You can also edit an existing one and integrate it with the Stripe option.
While creating your form, make sure you add the Stripe Credit Card field to your form from the Payment Fields section.
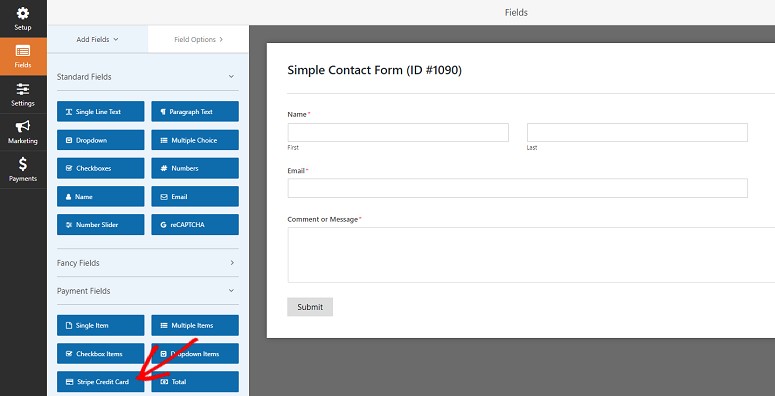
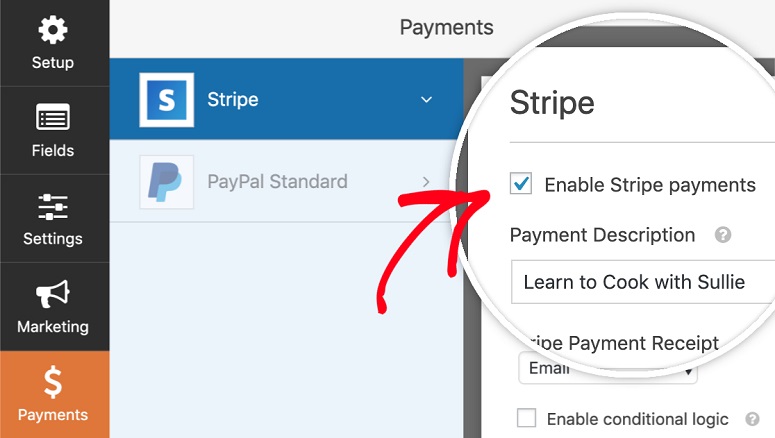
Once you’ve added all the fields you want to your form, go to Payments » Stripe. Now from the Stripe panel, select the Enable Stripe Payments option.
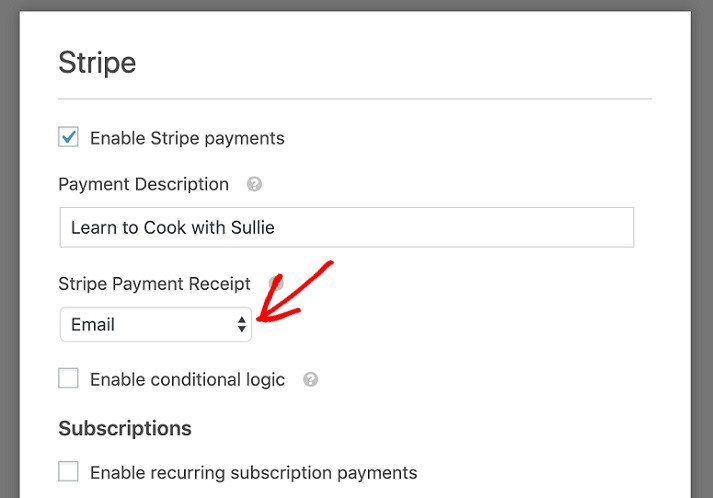
Now under the Stripe Payment Reciept option, click on the dropdown and select Email. That’s where your customer’s payment reciept will be sent to.
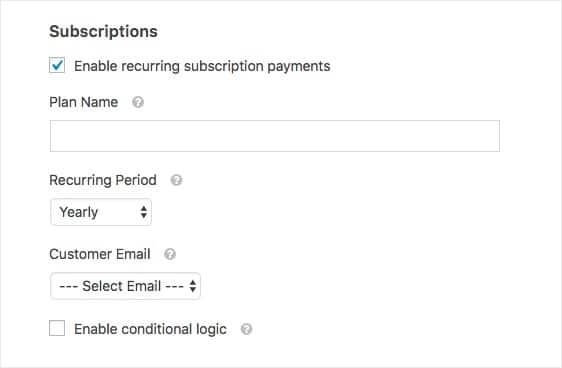
If you want to set up a recurring or subscription payment, then you’ll also need to select the Enable recurring subscription payments option under Subscriptions.
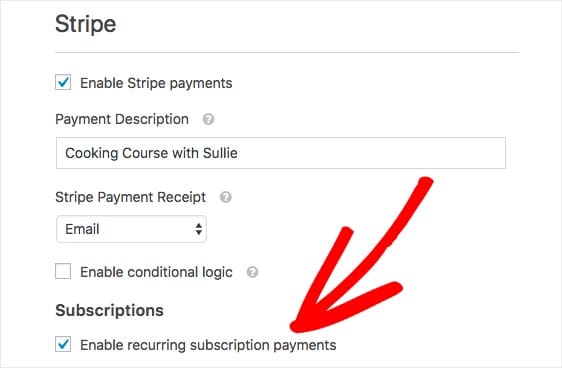
Configure your recurring payment options and save your form.
Step 5: Publishing Your Form
WPForms is a Gutenberg-friendly form plugin, so you can quickly add a payment form to your post or page by using a block.
In your post editor, add a new WPForms block by clicking the + (plus) icon in the upper left corner.
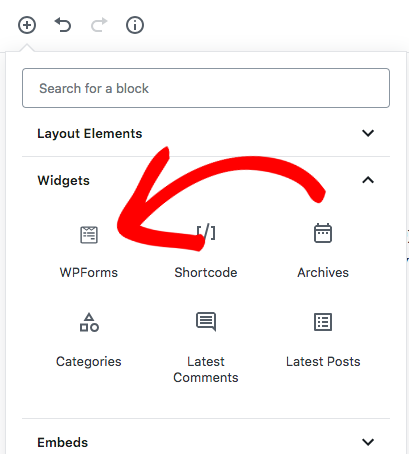
Now, you’ll be given a few different menu options. Search WPForms to locate the block and click on it.
You’ll now see the WPForms block in the editor screen. Next, go ahead and select the form you want from the Select a Form dropdown.

Now, you can see the complete form in your editor. Once done, publish or update your article.
If you’re still using the legacy classic editor, you can publish the form by clicking on the Add Form button above your toolbar.

Clicking on it will trigger a popup. Select the payment form you created from the dropdown menu. Then, click Add Form.
You’ll now see that a shortcode is added to your post editor. You can now go ahead and publish your article.
That’s it. We hope you liked this guide on accepting payments with Stripe. You might also want to check out the best Stripe payment plugins for your WordPress site.
Keep reading the article at IsItWP – Free WordPress Theme Detector. The article was originally written by Editorial Team on 2020-03-23 06:39:12.
The article was hand-picked and curated for you by the Editorial Team of WP Archives.

