Since WordPress came out in the early 2000s, it covered a large share of market websites by providing themes and plugins on top of the CMS. It certainly didn’t require building other CMS systems, but some nerdy minds like Brandon Kelly already had different ideas in mind. His team developed a CMS system that instantly got huge praise in the market, known today as Craft CMS.
What is Craft CMS?
Craft is not just a CMS. It provides a complete digital experience to content creators, developers, and front-end designers. The main feature that makes Craft CMS stand out is the flexibility it offers to the developers. CraftCMS simplifies the entire website development with scalability that allows you to extend your application’s functionality. Craft CMS offers a range of advanced dev features to streamline the web development process.
Craft CMS offers users with a complete digital experience that they can quickly adapt to. In the subsequent paragraphs of the article, I’ll explain about the major Craft CMS plugins, how to perform templating in Craft CMS and other potential features that are useful for anyone using it.
Craft CMS is powered by PHP v7.0 and above, and is built on the top of Yii2 Framework. For templating, it uses Twig to render the content.
Check out some of the key advantages of using Craft CMS:
1- A user-friendly dashboard for creating content and managing admin tasks
2- Traditional modeling for content and server-side rendering useful for front-end developers
3- Plugin store with hundreds of free and paid plugins
4- Clean codebase framework and a vibrant community
Now, let’s get down to more details about how the Craft CMS works.
How Craft CMS Works?
Craft CMS has ditched the traditional CMS systems that come with pre-built Craft CMS themes, CSS frameworks, and ready-to-go websites. It provides a bespoke solution to developers. Craft CMS neither offers pages or posts nor it offers any themes and bootstrap features to spin up the frontend.
If you are new to Craft CMS, you might face some issues using it for the first time. As soon as you’ll understand the essence of clean state systems, where you can build anything on your own, and provide customized solutions for your clients including HTML, CSS or Javascript (React and Vuejs also), you will eventually love this CMS.
If there is no page/post like structure, then how can developers build sites using Craft CMS? Check out some of the building blocks you need to know about.
Entries, Sections & Fields
Let’s mention the Entries first with some examples for clear understanding.
Entries are like buckets that hold content data, you want to display on a website. You can add multiple entries for holding different content sets and reuse them again and again on web pages. Also, the Entries contain the author name, status, and content that you add. Each entry has a separate URL; hence, you can fetch any entry with a specific URL. You can assign URL to entries as per the site requirements.
The typical URL of entry looks like this: {{ author.username }}/{{ slug }}
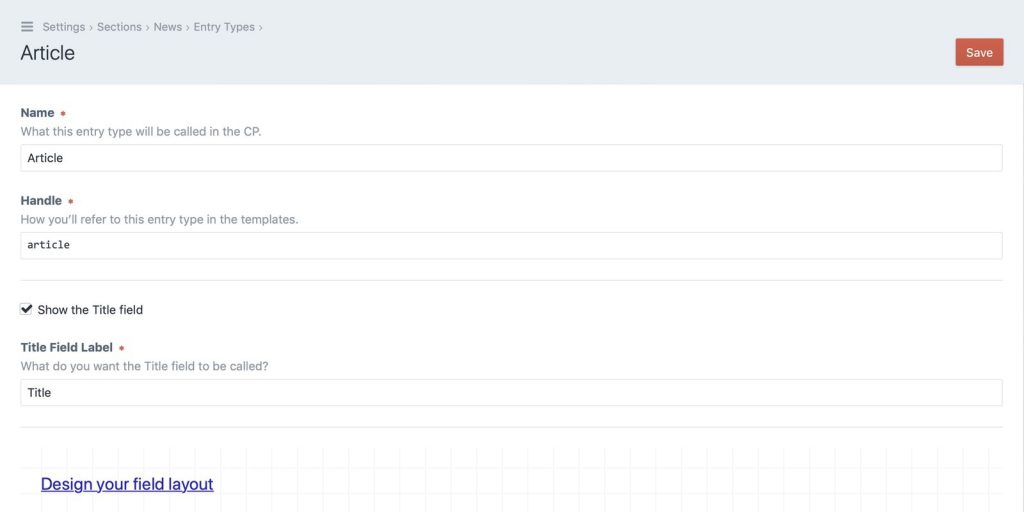
You can divide the whole web page into different entries like featured images, paragraphs, sliders, product features, etc. Now, where and how can you show these entries?
Before creating entries, you must create the Sections to hold them. Each Section can hold multiple Entries with or without URLs having the template attached. But, how many Sections can you use with Craft CMS? There are three types of Sections:
1- Singles: Used for pages like Home Page, About and Contact Us page.
2- Channels: Used for the streams of similar content, such as a Section showing related blogs.
3- Structures: Used for storing and organizing multiple entries into a specific order.
Some of the other significant features you need to consider, include:
Fields: Inject custom data and can be assigned to content
Categories: Allow you to add taxonomies for the entries, users, and assets
Assets: Manage documents and media files or any uploadable file
Searchable: All elements can be indexed and automatically searchable
Routing: To check the incoming request and return response with twig templates.
Deploy Craft from GitHub to Cloudways
In the preceding paragraph, you have learned about the structure and major building blocks of Craft CMS. Now that you have built your projects for customers, the question is: how will you deploy them on Cloudways?
Signup & Generate SSH Key
First of all, you need to sign up on the Cloudways Platform. You can launch your first server with a custom PHP application. Once the application is installed, you can deploy Craft websites from GitHub in a few clicks.
Meanwhile, if you want to install Craft CMS on Cloudways yourself, here’s the guide that will let you know how to install Craft CMS via composer on the platform.
Now, navigate to the Application Settings from the dashboard and go to “Deployment via GitHub” tab on the left side. Click it and then download the SSH key. You can see or copy the SSH key by clicking View SSH Key. Copy the key because it will be added to the GitHub account.
Upload key on GitHub Account
On GitHub, navigate to the repository which you want to deploy. Go to Settings -> Deploy keys and click Add Deploy Key to add the SSH key you have downloaded. You can give a name to this key in the title field and can copy it to the box. Click Add Key to save the SSH key.
Deploy to Root Directory
Now, copy the SSH address of the repository and put it in the Git Remote Address field and click Authenticate. The connection will be created, and repo branches will populate in the Branch dropdown list. Select the desired branch and add the deployment path for root, which is /public_html. Then, hit Start Deployment.
Keep a check on the progress bar. In a few minutes, your GitHub repo will be deployed on the root of the Cloudways server. You can also see the deployment logs as well.
It is quite easy to deploy Craft CMS websites on Cloudways Platform. You must also change the DB credentials in .env file and generate a security key. If you get a duplicate .env file then rename it from .env-example to .env file.
CraftCMS Dashboard Overview
Now that you’ve installed Craft CMS on Cloudways server, you can see the website name and the menus on the left side as shown in the image below.
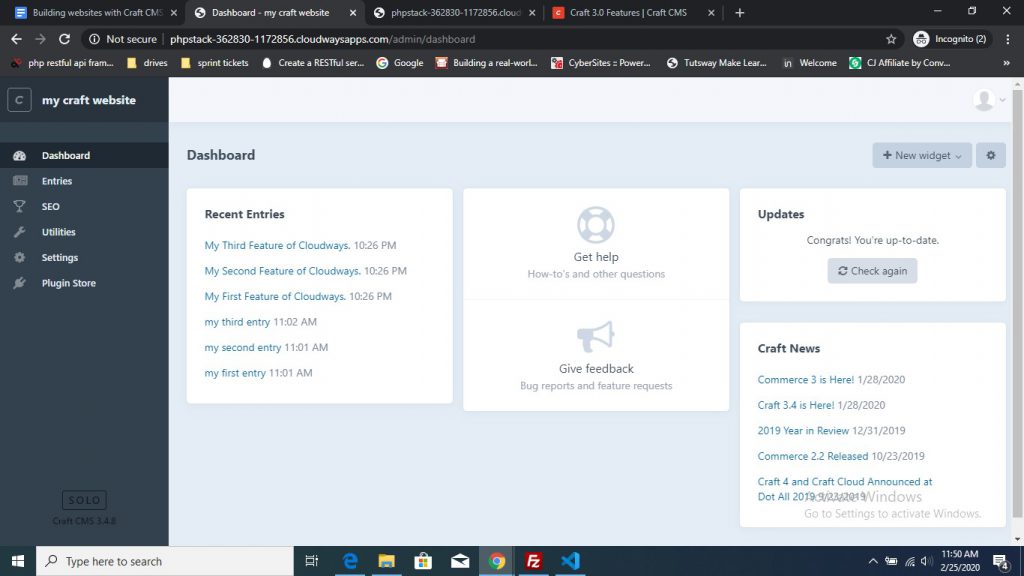
Now, navigate to the Utilities Tab, which contains the vital information about application/server and other requirements. Here, the Craft CMS will also point out errors in requirements as shown below:
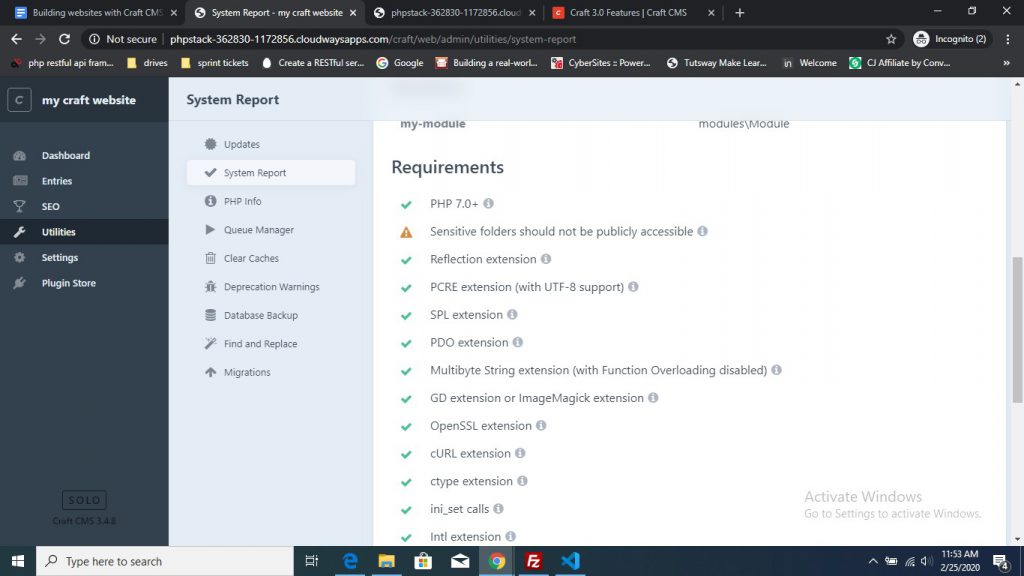
Your important folders should not be publicly accessible. You must set up the webroot. On the Cloudways app page, navigate to the Application Settings tab and add craft/web in the webroot. Now, your complete webroot will be public_html/craft/web. To resolve the other two errors, navigate to Server Settings and Packages tab and update these values:
Execution Limit: 120
Memory Limit: 256
Update settings now and navigate to the dashboard to see if that is fixed or not.
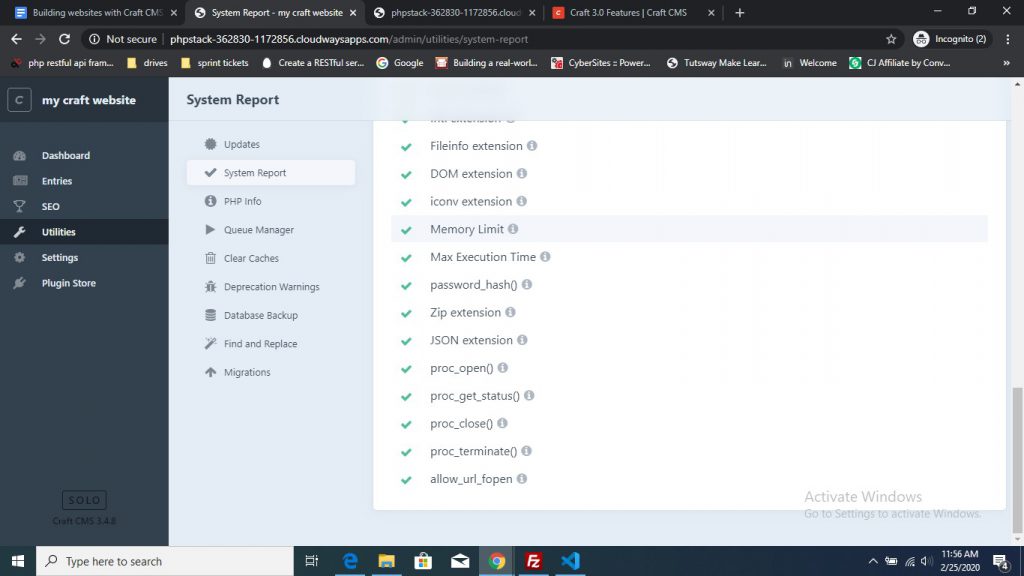
Once it’s done, the next step is to setup PHPinfo, which contains all the packages, libraries etc. If you are using Supervisord, you will see the jobs in the queue manager. Cloudways also provides the Supervisord stats in the Platform. Next, you will have to clear caches, backup databases, and manage migrations.
Navigate to the Settings tab. As discussed above, the Settings tab allows users to create fields, sections and entries as per the requirements of the project.
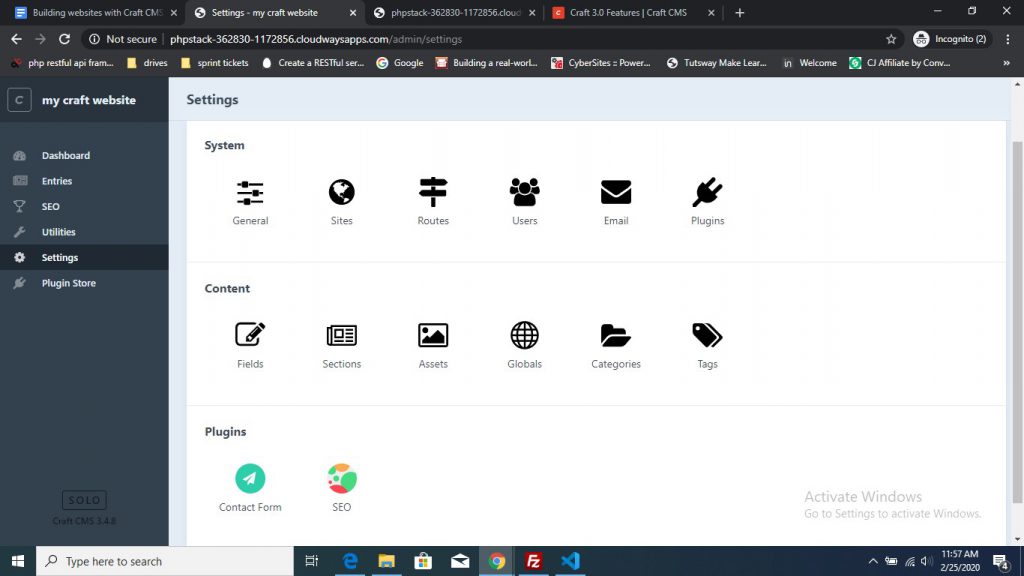
There is a Plugin tab that contains hundreds of advanced Craft CMS plugins. You can find plugins for SEO, image optimization, templating, forms and others.
Now, let’s discuss the concept of templating in the Craft CMS.
Templating in Craft CMS
Like other PHP frameworks, Craft CMS also uses Twig for templating as it provides complete control over HTML coding. Note that when you execute the staging URL in the browser to access the Craft CMS site, the template shown will be index.html, which will come from /templates folder.
You can create multiple templates using Twig. Let’s say, you can create a folder called features and within it create a file called cloudways.html. You can add some HTML code to it and access it in a browser like http://mycraftsite.com/features/cloudways.html. You can see the HTML layout there. You might have a question: how can I show entries in the browser? For this, you need to work with dynamic URLs.
First, you need to create a section Features. As you are not creating a complete page but a content section, you can set Section Type -> Channel. Now, in the site setting section, the Entry URL Format will be features/{slug}, and then finally in the template section, you will call the template that is: cloudways.html
Let’s put some content entries like titles and assign them to the Features section. Open the Entries tab from the left panel and click create a new entry. From the dropdown, select features/{slug} to ensure that the template looks like features/cloudways.html.
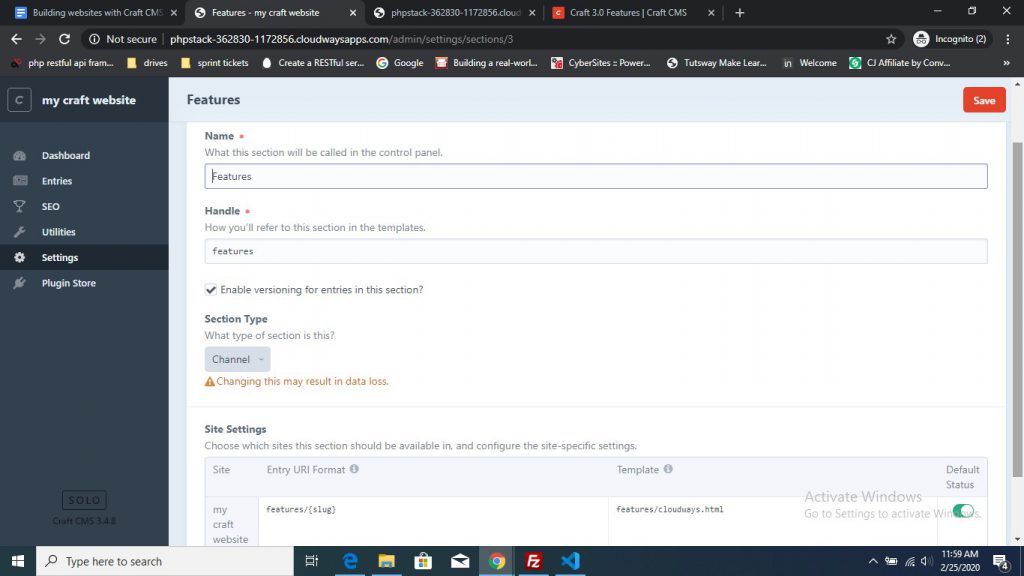
Now, let’s create some other content entries and assign them to the Features section. Click the Entries tab on the left panel, click Create Entry, and select Feature from the drop down menu. You will see the Create New Entry page, enter the Title, and note the slug created on the right side. Save the entry.
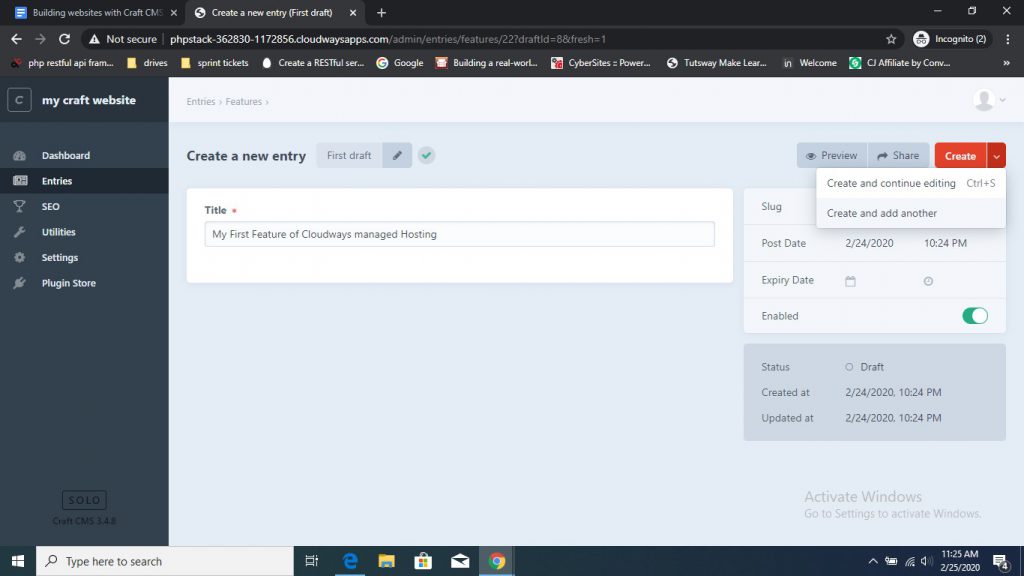
Now open cloudways.html file from templates and add the following Twig code adding entry title attribute for getting the title content.
<h1>{{ entry.title }}</h1>
In browser, type the following URL:
http://phpstack-362830-1172856.cloudwaysapps.com/features/my-first-feature-of-cloudways
You will see the entry title content on the browser. Change the slugs and check all entries.
This is the basic templating mechanism for Sections and Entries in Craft CMS. You can discover this in more details on official Craft CMS templating docs.
How to Install Craft CMS Plugin
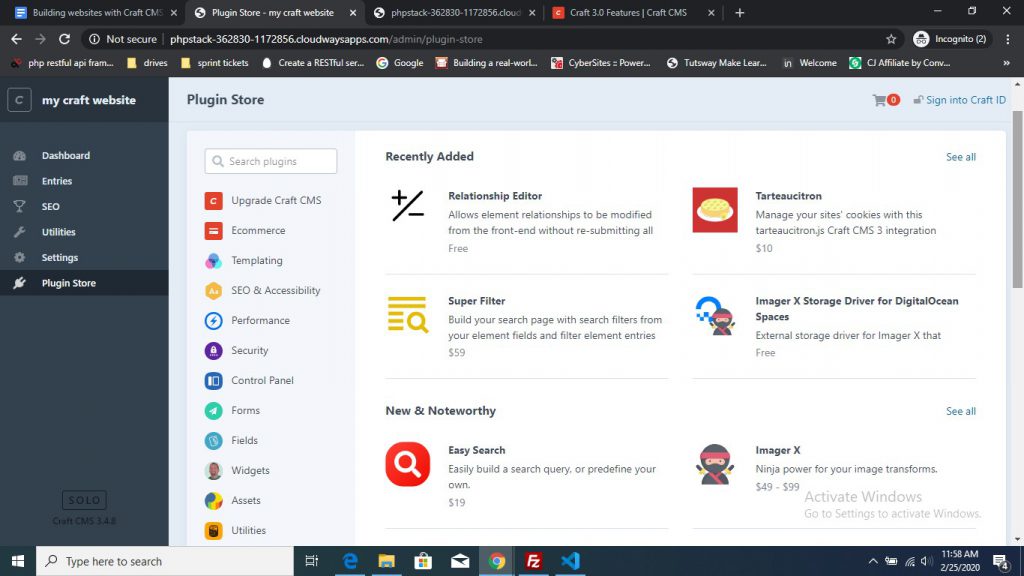
Like WordPress, Craft CMS offer a plugin store from where you can download and add plugins for various project requirements. You can visit the store and check out for free, paid, and commercial plugins and can pay directly for them from the dashboard.
Now the next question is: how to install a plugin?
In the Craft CMS dashboard, you will see a Plugin menu on the left side. Click it, and you will be redirected to the Plugin Store.
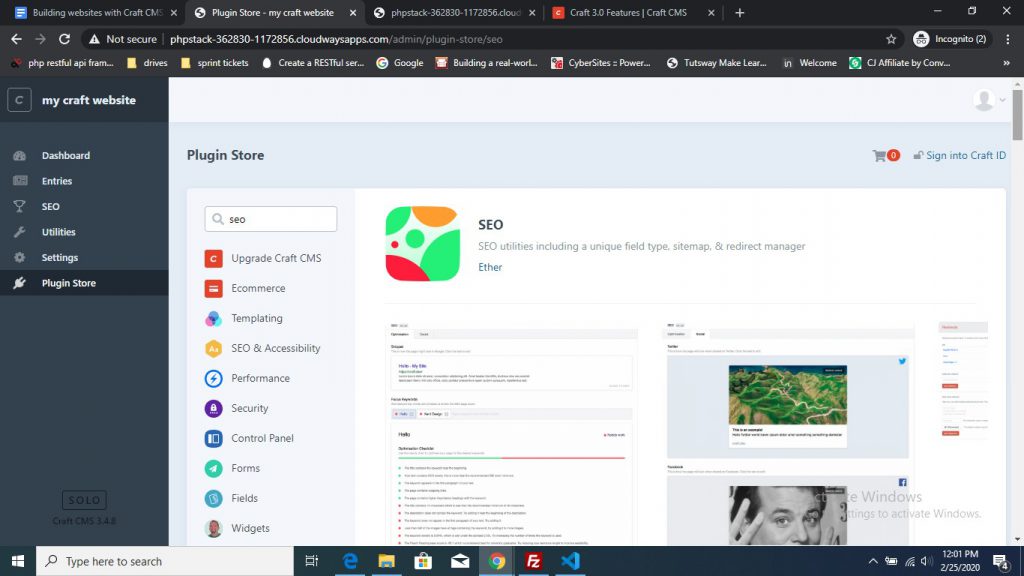
You can see plugins listed in different categories based on their core functionalities. Let’s select any free plugin like “SEO” for doing SEO of Craft CMS websites. Just select it and navigate to the details page, you will find Install option there. Click Install to update the composer dependencies instantly. You will see the plugin added on the dashboard.
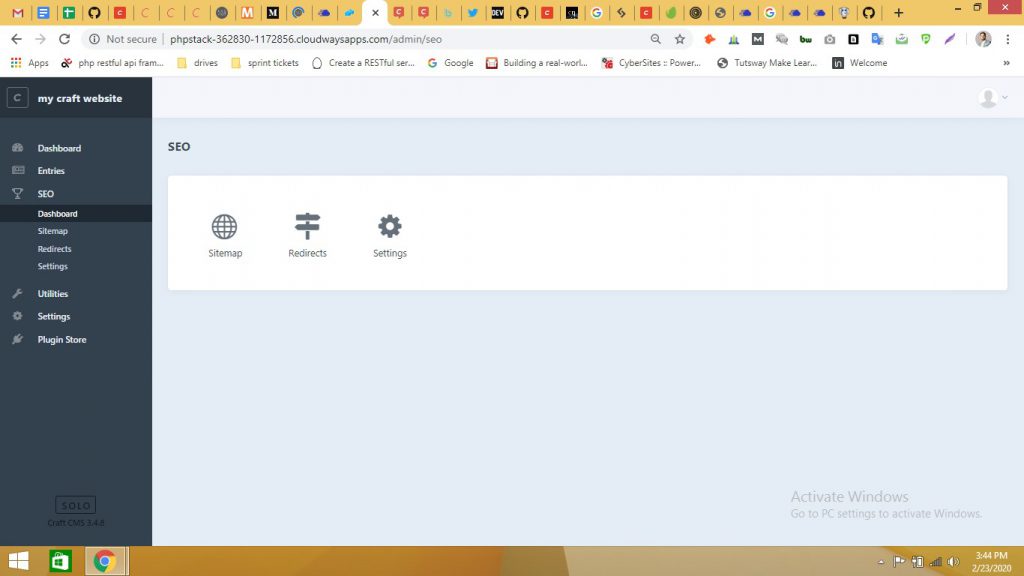
Now, let’s have a look at some of the best Craft CMS plugins that you might want to install on the website.
Top Craft CMS Plugins
Check out the top Craft CMS plugins you need to know about:
- Embedded Assets: This plugin allows you to make your site a bit fancy and personalized by adding Insta images, Youtube, Vimeo videos, Twitter posts, and Google Maps, etc
- Craft Commerce: Craft Commerce is a powerful ecommerce plugin that helps users create advanced ecommerce websites within minutes. It provides ease in building optimized Craft CMS ecommerce stores and is super-customizable as well.
- SEOMatic: This plugin is essential for technical SEO needs. It perfectly combines with Craft CMS architecture and facilitates on-page and off-page SEO techniques.
- Super Table: Are you bored with typical textual fields? This plugin will use the Craft native field structure and provide you with important tabular data with dropdowns. You can easily show Entries, Users, and Assets data using it.
- ImageOptimize: This plugin allows you to create optimized and responsive images from Assets automatically. It works perfectly with native Craft CMS optimization also.
- Blitz: Craft uses Yii2 as a backend framework and inherits the caching system too. To extend it a little and work with different stacks like jamstack, you can use Blitz to create flat page cache and boost the TTFBs and load time though it.
- Amazon S3: Assets can directly be saved to your desired cloud storage like Amazon S3, Google Cloud, and DigitalOcean. This plugin will store assets data to S3.
Final Words
In this article, we’ve discussed the details about what is Craft CMS and how it is different from traditional CMSes. You wouldn’t find any themes and templates to create websites in Craft CMS. Alternatively, you will have the freedom to mold it as the way you want. If you are building sites with Craft CMS, I will suggest you to start installing/migrating your Craft CMS sites to the Cloudways Platform and leverage the best cloud hosting environment.
If you have any further questions or queries regarding this article, please feel free to ask them in the comments section below.
Launch PHP websites without the worry of Server Management.
Pre-Installed Optimized Stack with Git, Composer & SSH
Umer Jalil
Umer Jalil is a Digital Content Producer at Cloudways. He is passionate about digital marketing and the latest happenings in the tech world. He is an avid gaming enthusiast from heart and loves playing Cricket in happy hours!
Keep reading the article at The Official Cloudways Blog. The article was originally written by Umer Jalil on 2020-03-20 07:19:51.
The article was hand-picked and curated for you by the Editorial Team of WP Archives.

