Have you ever tried using Facebook Messenger to connect with your customers?
Facebook Messenger is a wonderful platform for marketers to engage current clients or potential leads with your brand. That’s why more and more businesses are turning to Messenger marketing to increase brand awareness and boost their sales.
Using Facebook Messenger is a very effective way of getting more followers, growing your email list, and boosting your conversions.
In this tutorial, we’ll tell you how to use Messenger to connect with your customers. But before we get started, let’s learn a bit more about the benefits of Messenger marketing.
Why Messenger Marketing Is Effective
Although Messenger marketing is relatively new, it’s become one of the most effective strategies around. Here are 3 reasons why Messenger marketing is one of the best tools at your disposal:
- Compared to traditional email marketing, Messenger marketing allows you to engage with your leads in a more conversational way. This offers you the possibility of speaking with your users on a more personal level. That makes it easier to build relationships with them.
- You can engage with your users on a platform they’re already familiar with. There’s no wasted time and energy trying to teach users how to use a new system of communication. This makes conversations move more quickly.
- Facebook Messenger is easy to use. For example, your clients don’t have to specify any information like name, email, and so on if they’re already logged into Facebook. This makes it convenient for both the marketer and the clients to jump into the conversation right away.
Now that we know why Messenger marketing can create deeper relationships with your customers more quickly, let’s get into the specifics about how to use this marketing strategy.
How to Effectively Use Messenger Marketing
Like we said earlier, Messenger marketing is a great way of boosting your sales and conversions. But not knowing the right way of approaching your audience can adversely affect your marketing efforts.
To make sure all your hard work doesn’t go waste, we’ve listed 4 ways you can use Messenger marketing to grow your business.
1. Deliver Resourceful and Problem Solving Content
Users love resourceful and problem-solving information. You can use Facebook Messenger to directly offer them valuable content rather than asking potential leads to hand over their email address.
And because you’re using Messenger, it’s easier to personalize your content, too. You can even let them pull content themselves. For example, TechCrunch allows users to get news stories based on keywords.
Under the initial message, a user can simply type a category or term like Facebook, and get a Facebook-related article sent directly to them:
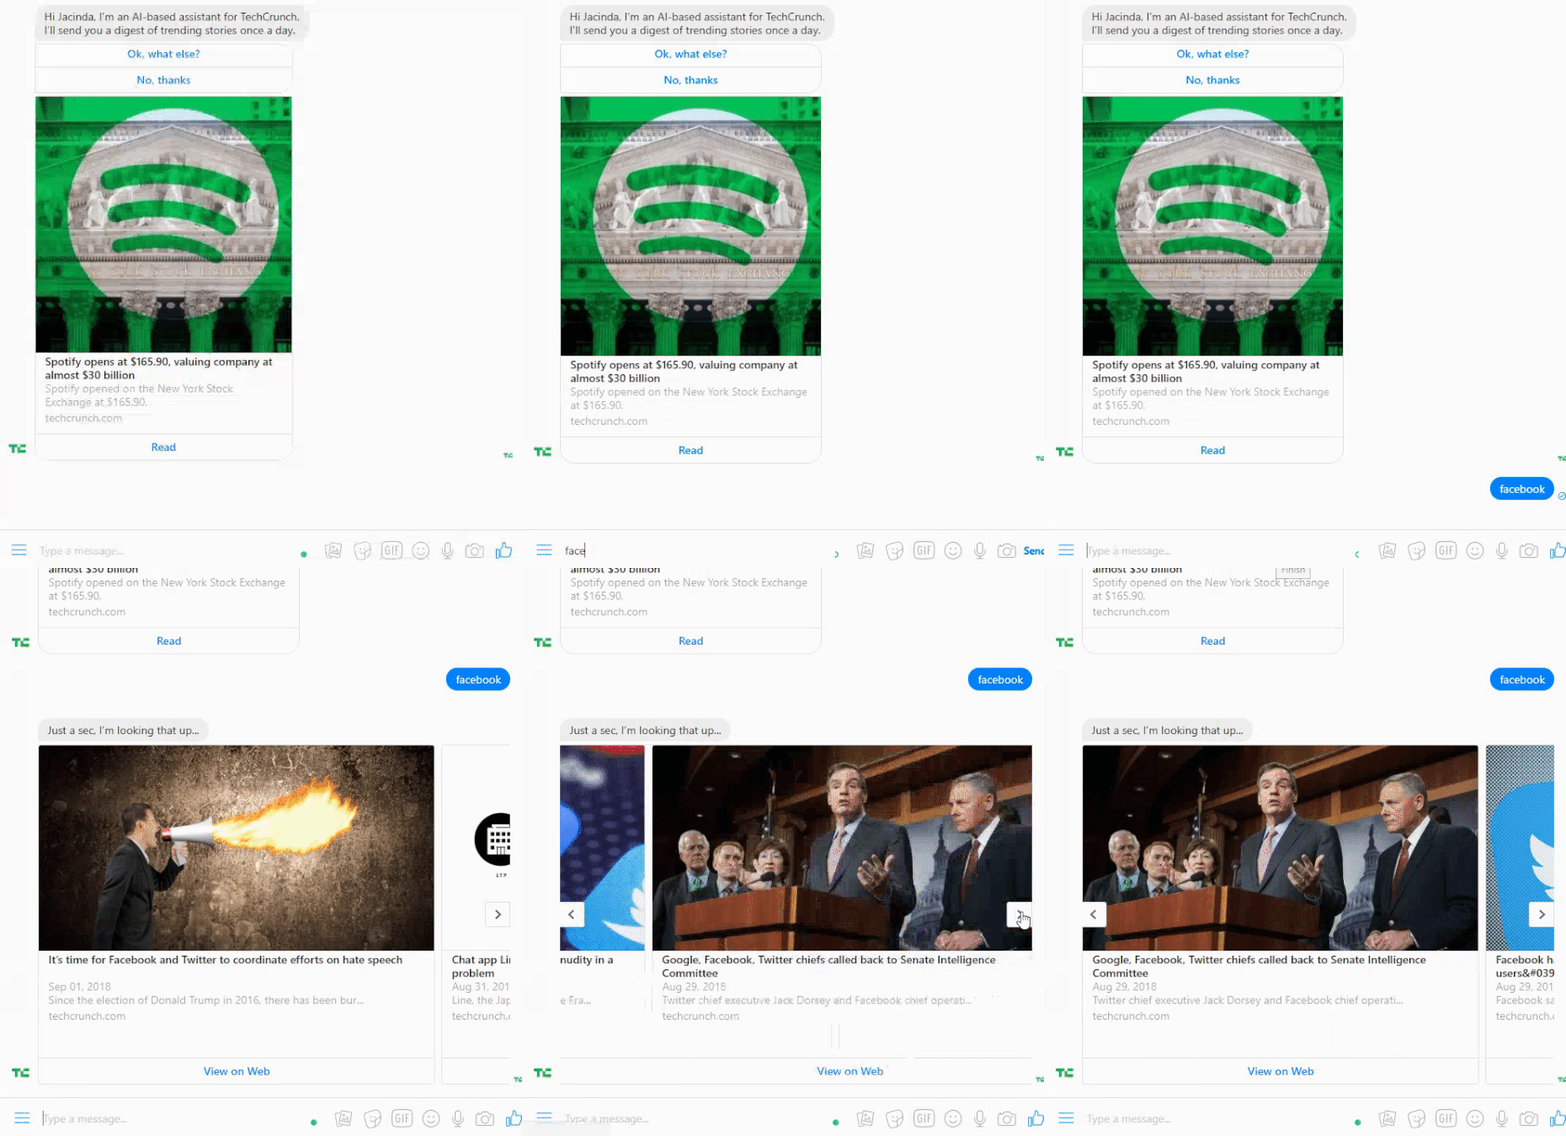
This personalized type of communication is highly useful for building stronger relationships with your clients.
If you find this interesting, you may also like this post on how to create highly converting content upgrades.
2. Organize Events and Engage Your Users
Another way of interacting with users is to organize events. You can then notify your followers and even send them reminders leading up to the event. For a smoother interaction, you can give them real-time updates about the events or hold live streams.
This is incredibly helpful as more companies are shifting big events online. If that’s something that interests you, check out this resource if you’re interested in hosting a virtual summit or similar online conference.
3. Reach out to Your Target Audience
You can also reach out to your exact target audience by creating Facebook ads with a link to your website or Facebook Messenger.
When a user taps on these ads, they will be redirected wherever you’d like, such as a homepage, landing page, or a Messenger conversation. You can then use this opportunity to tell them about the business in a one-on-one conversation.
4. Offer Quick Customer Support
You can also use Messenger as a medium to offer customer support and receive feedback. Instead of asking customers to reach out to you via email, your clients may find it more convenient to get in touch via Messenger.
That’s because Messenger’s platform doesn’t require users to fill out any tedious form or write long emails. Instead, they can have a real-time conversation and get quick solutions.
Let’s now look at how to connect with customers via Facebook Messenger.
Step 1: Signup for LiveChat
The first step to get started is to go to the LiveChat website and signup for an account.
LiveChat is an online customer service software with online chatting, help desk software, and web analytics capabilities. This app lets you keep your chats organized in one place.
The best thing is that you can interact with your users right from the software dashboard without logging in to your Facebook Messenger account.
LiveChat is a premium software, but it offers a 14-day free trial to all its new users. You can test out the free version before upgrading to a premium plan.
Once you get to LiveChat’s homepage, click on the Signup free button.
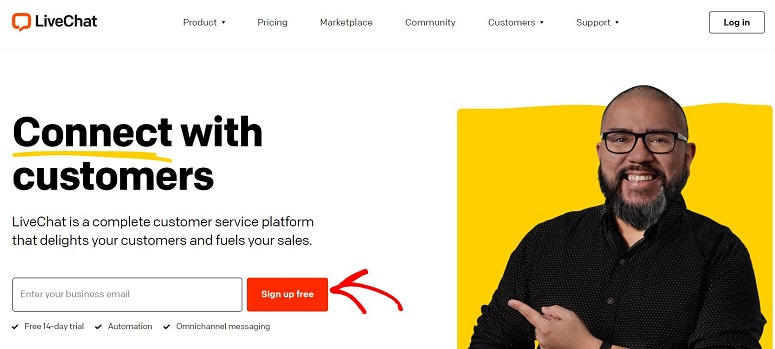
This will take you to a new page where you can install LiveChat on your WordPress website.
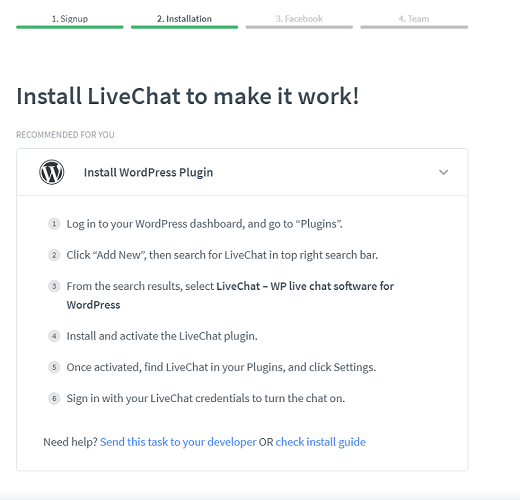
If you’re in a rush, feel free to skip this step and click on the I’ll do it Later option at the end of your page.
Then you’ll be ready to sync LiveChat to your Facebook account.
Step 2: Connect LiveChat to Facebook
The next step is to connect LiveChat to your Facebook account. After hitting the I’ll do it later tab from the last section, you’ll be directed to a new page. Here you’ll see a Connect to Facebook tab. Click on that.
You’ll now be redirected to your Facebook login page. Enter your details to log in. You also need to select a page in which you want to use LiveChat.
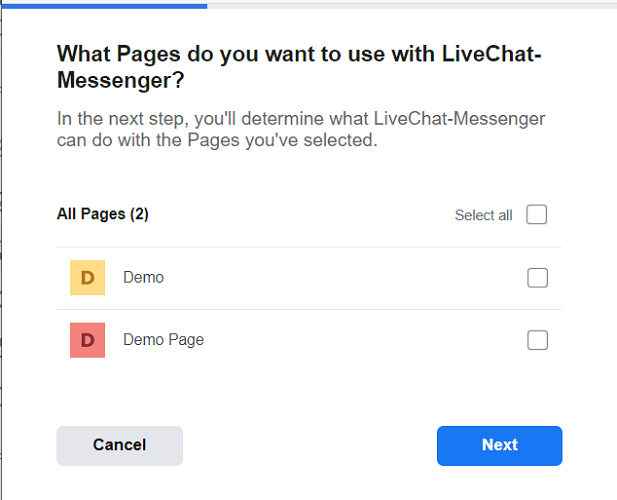
Select the page that you want to connect with LiveChat and click on the Next button. On the next page, you’ll select what LiveChat is allowed to do on your Facebook account.
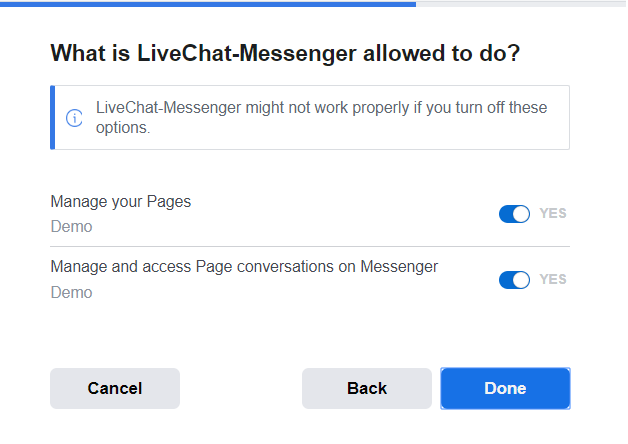
Then, hit the Done button to complete the connection.
Step 3: Adding Your Team Members
The final step is to add your team members. When it comes to communicating with customers, it’s best to respond as fast as possible. Since you’re only 1 person, adding team members to share the workload will help response times (and you’re stress levels) stay low.
You can invite your team members by adding their email address and clicking on the Send Invites button. These members can then interact with your users as representatives from your business.
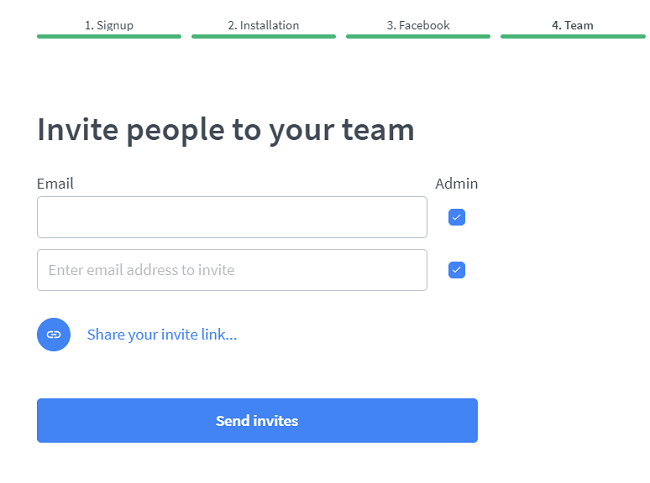
Make sure that you trust these members to take on the task, though. Since the communication will come from your Facebook business page, any negative interaction with customers will have an impact on your brand.
Luckily, there’s a way to monitor and track your chats.
Step 4: Checking Your Chats
Once you’ve configured all your settings, you’ll have access to your LiveChat dashboard. You can now check all your chats under the chat section on the top left corner of your screen:
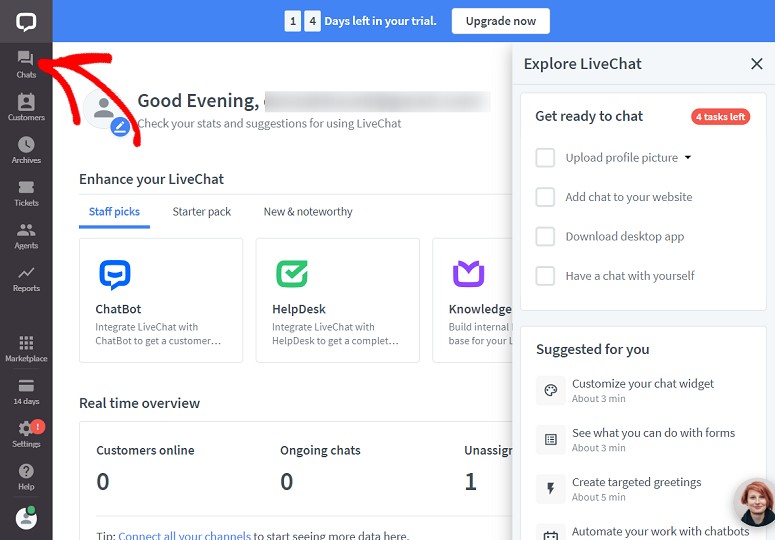
You can also start interacting with your users from this dashboard. You’ll be notified every time your page receives a new message, and you don’t even have to log into your Messenger account to respond!
Instead, everything can now be managed from the LiveChat dashboard.
We hope you found this post helpful. If you did, you may also want to learn how to drive conversions in other ways. Remember, that when you interact with customers via Messenger, they’ll still likely visit your site in the future.
You need to make sure that your website looks as professional as possible. One of the best ways of doing that is by leveraging social proof. And for that, there’s no better tool than the TrustPulse social proof app.
Got any cool tips for using Messenger to connect with your audience? Let us know in the comments section below.
Keep reading the article at IsItWP – Free WordPress Theme Detector. The article was originally written by Kaveri Bharali on 2020-05-26 02:37:34.
The article was hand-picked and curated for you by the Editorial Team of WP Archives.

