When you create a website for a client, their first taste of your work is often the WordPress login page. However, by default, every WordPress login page looks exactly the same. This isn’t exactly a strong initial impression.
Fortunately, there are lots of ways that you can customize the WordPress login screen. This includes visual changes, such as replacing the WordPress logo with your client’s branding, and functional modifications as well. With a few simple tweaks, you can create a login screen that will wow your clients right off the bat.
In this article, we’ll show you how to customize every part of the WordPress login page in five easy steps. Let’s get started!
Why you might want to customize the WordPress login screen
The WordPress login page is how administrators and other registered users access the all-important WordPress dashboard. By default, the login screen features the recognizable WordPress logo and branding, plus fields where you can input your username and password:
This standard setup may be perfectly acceptable when you’re the only person accessing the WordPress back end. However, if you’re creating a site for a client, you may want to consider customizing the default login screen.
WordPress is a hugely popular Content Management System (CMS). However, this means that it’s also highly recognizable. If your client’s first impression of their website is the stock WordPress login screen, they may question whether your agency is delivering real value.
For these reasons, you may want to rebrand the WordPress login screen. A custom-branded login will make a far better first impression compared to the generic, WordPress-branded alternative. It can also present your agency as professional, meticulous, and always willing to go the extra mile to keep your clients happy.
You might even add your own branding to the client’s custom WordPress login page. This can help keep your agency at the forefront of clients’ minds and create a strong mental connection between your company and their website. This encourages the client to view your agency as intrinsic to their site’s success, which may prove invaluable when it’s time for them to renew their contract with you.
A custom WordPress login page isn’t just about good looks. You can also add enhanced functionality. These features might help client-proof the website, or help clients independently resolve issues they encounter. Alternatively, these extra features can improve security. With WordPress accounting for 94 percent of hacked CMSs in 2019, it’s crucial that you protect your clients’ dashboards from malicious third parties.
How to Impress your clients with a custom WordPress login page (In 5 Steps)
You can create a custom WordPress login screen using a range of plugins and tools. In this tutorial, we’ll be using the Custom Login Page Customizer plugin by LoginPress.
You can use this plugin to customize the look and feel of the WordPress login page and add extra functionality. Once you’ve installed and activated it, you can dive into our five-step plan to creating a custom login experience for your clients.
Step 1: Access the LoginPress customizer
You can visually redesign your login page and add extra functionality using LoginPress’ Customizer. To access this tool, navigate to LoginPress > Customizer in the WordPress dashboard.
If you’re accessing LoginPress for the first time, you’ll be prompted to opt in to data collection. You can choose to allow or deny this request as desired, but make sure to inform your client of your decision:
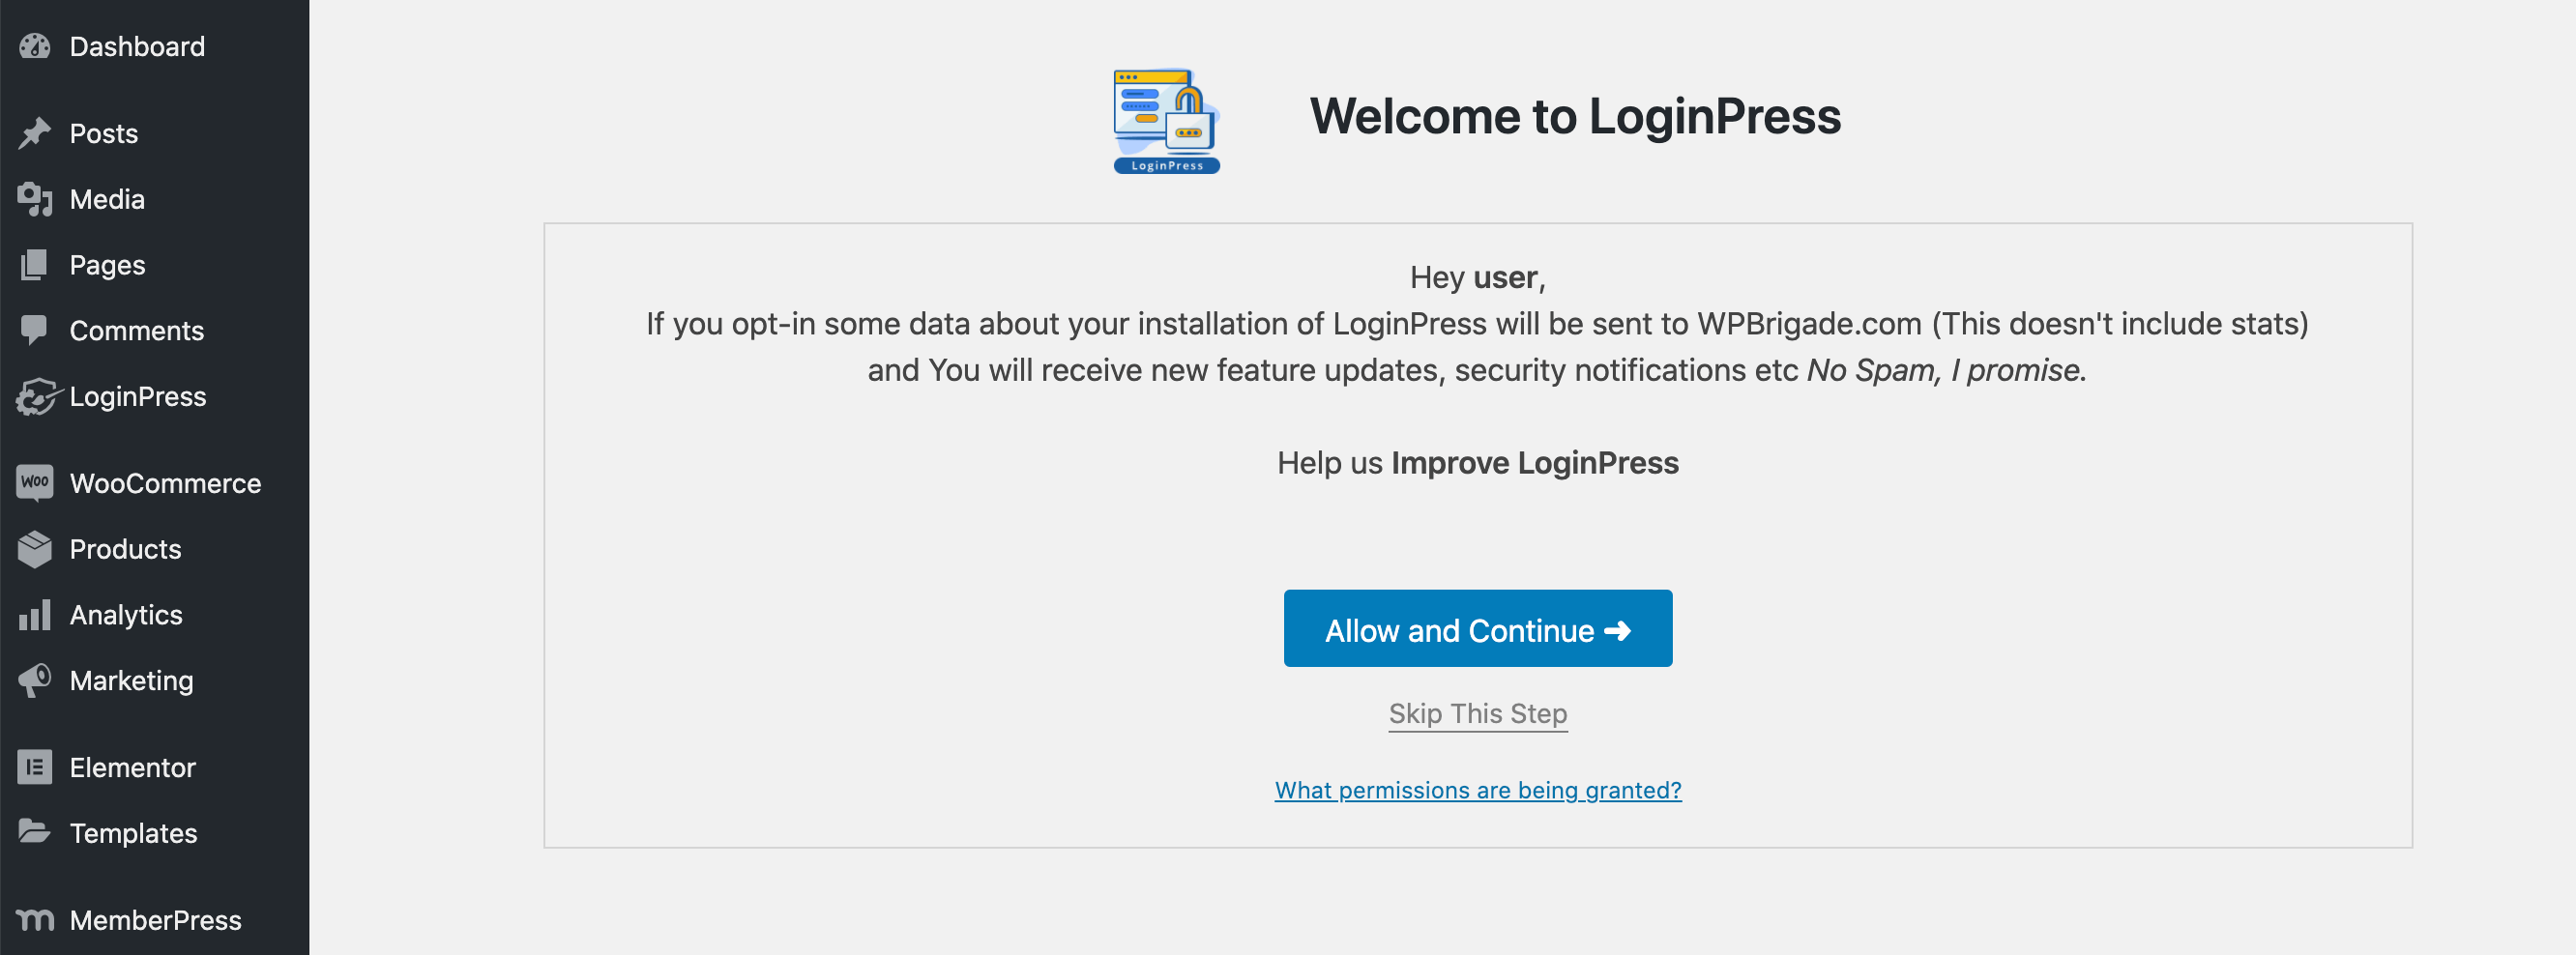
Next, you’ll be redirected to the LoginPress Customizer. If you or your client change your mind, you can opt in or opt out of LoginPress’ usage tracking at any point. Just navigate to Plugins > Installed Plugins. Find LoginPress in the list, and select its accompanying Opt In / Opt Out link.
Step 2: Rebrand the WordPress login screen
You can use LoginPress to white label the WordPress login screen with custom branding. This can help you provide an experience that’s tailor-made for your client.
Regardless of whether you plan to use your client’s branding or your own, you’ll typically want to remove the WordPress logo. In the sidebar menu, select Logo. You can then click on Logo Image > Select Image, and choose the file that you want to use:
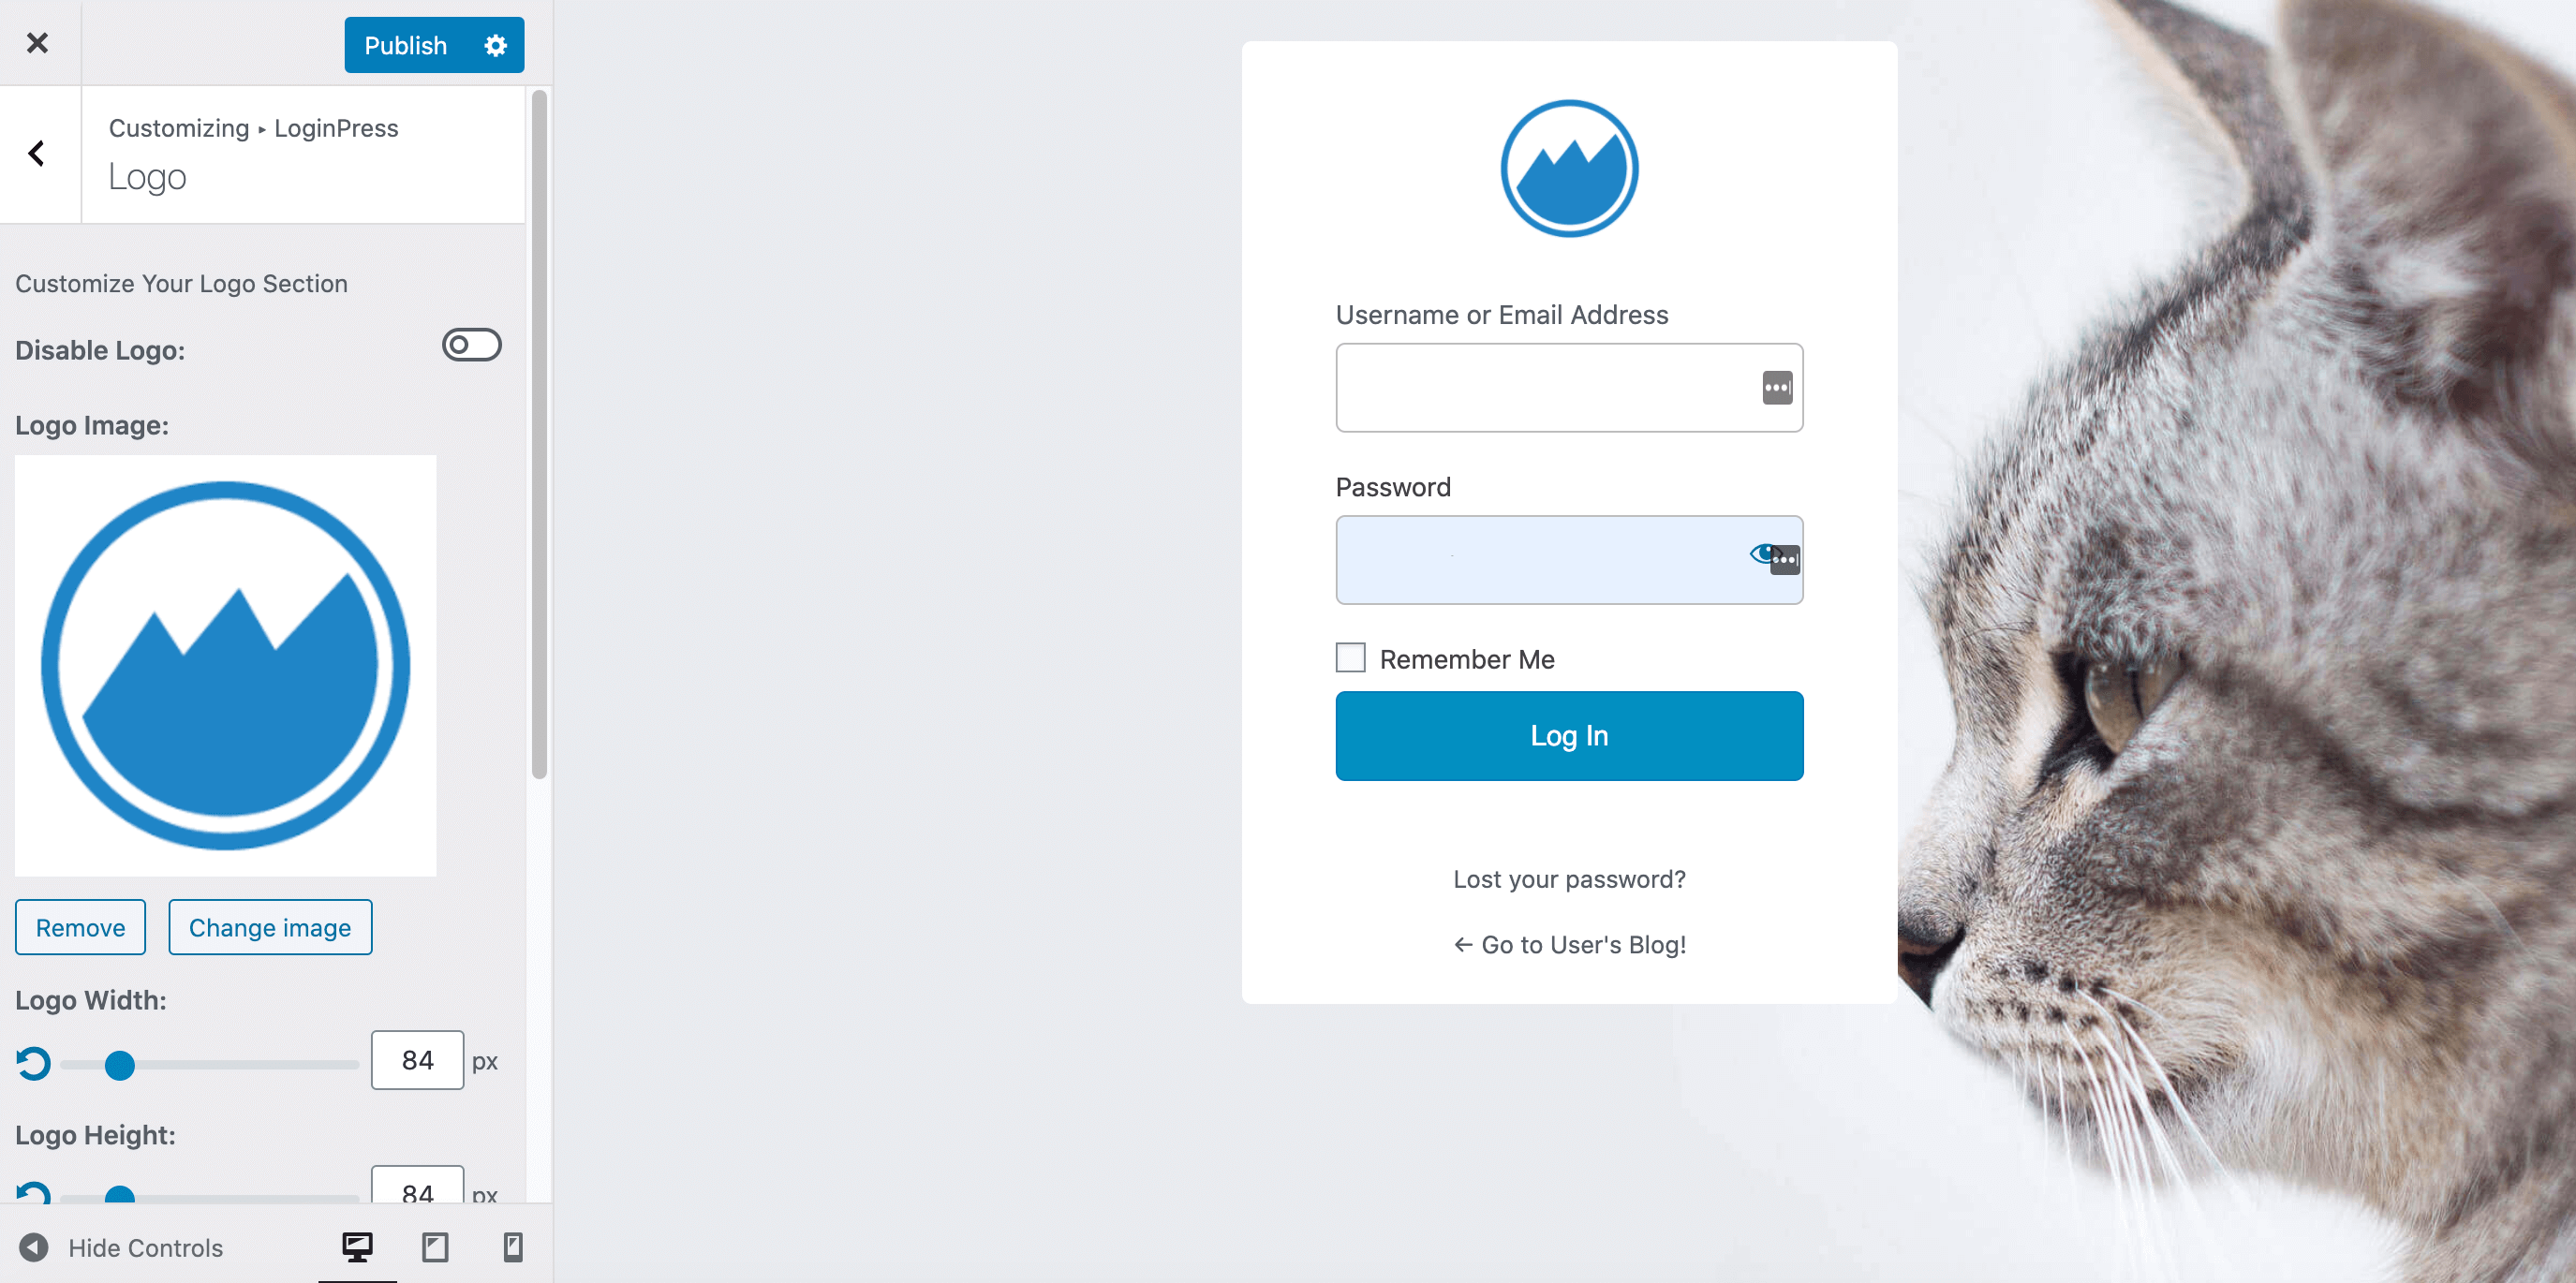
You may also want to embed a URL in your chosen logo to send users who click on it to the site’s home page. For example, if you’re displaying your agency’s logo, you could link to your agency website. You can add this address in the Logo URL field.
While you’re on this screen, you may also want to provide a Login Page Title. This is the text that appears in the browser tab:
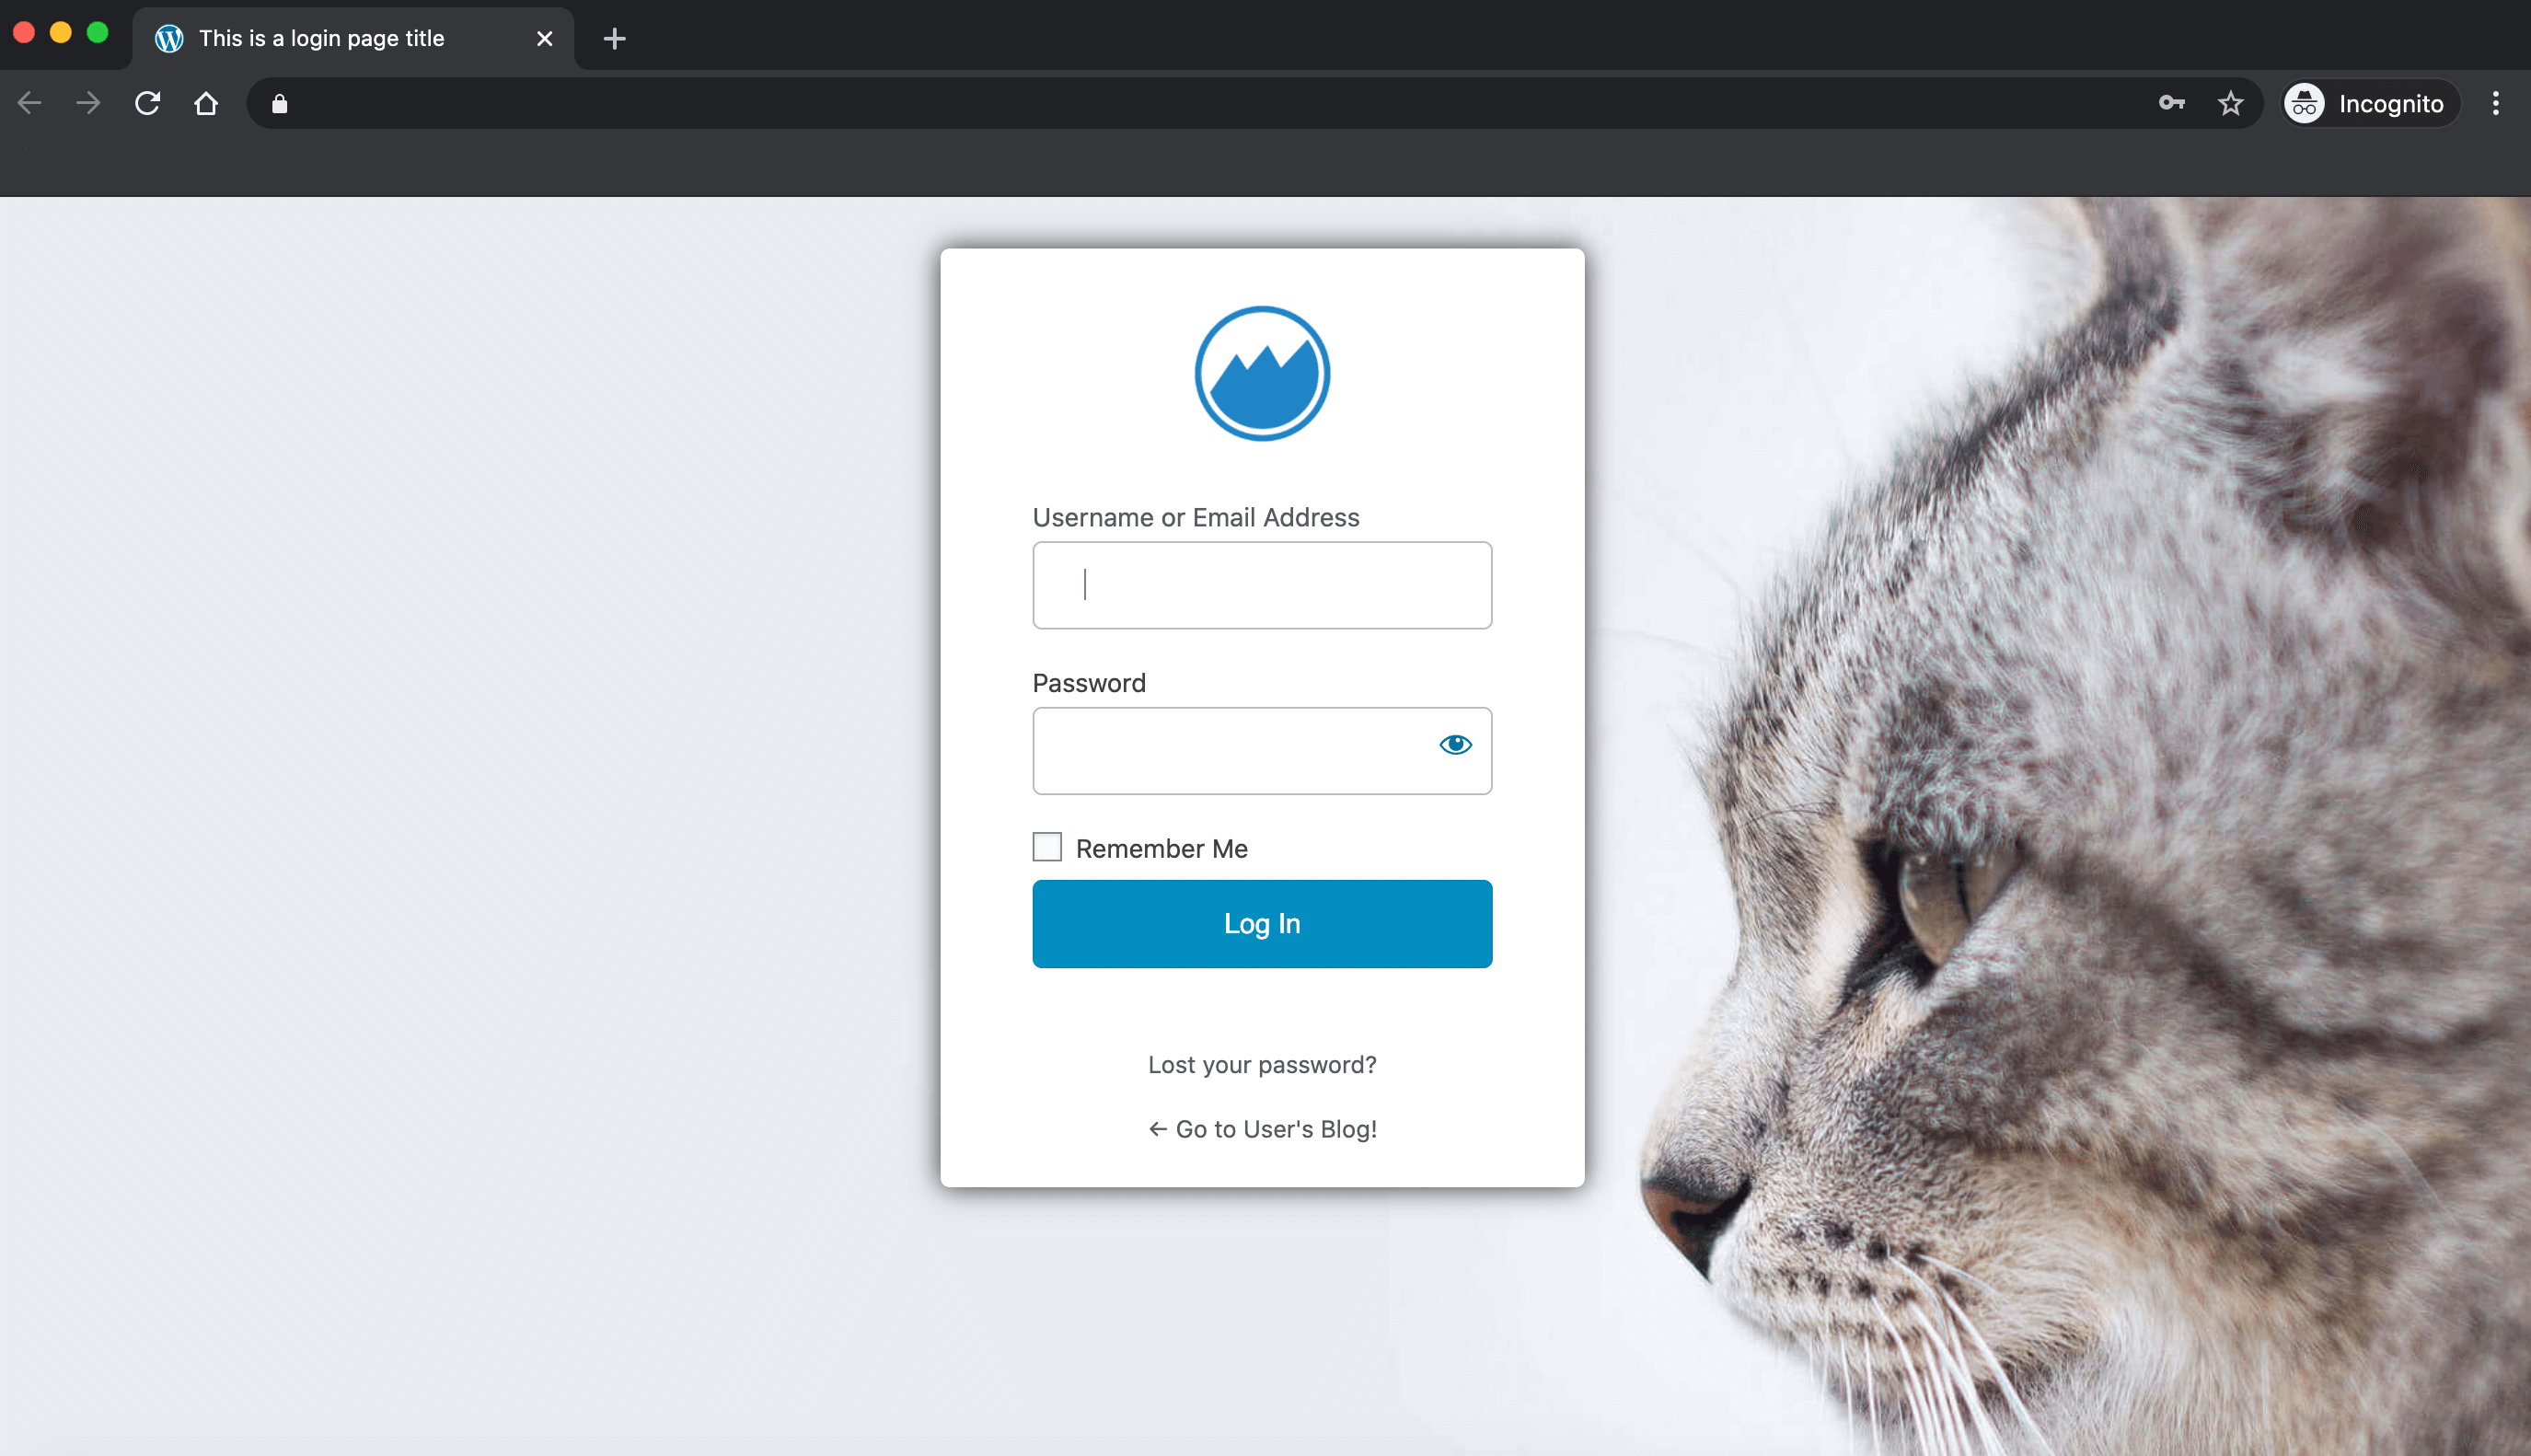
Alternatively, you can remove the logo from your custom WordPress login page entirely using the Disable Logo option. This can be useful if you’re providing a blank website that the client plans to redesign themselves.
Step 3: Change the background image
One of the most striking changes you can make to your custom WordPress login page is changing its background. To replace the plain gray WordPress background, select Background Image > Select Image. You can then choose the file that you want to use:
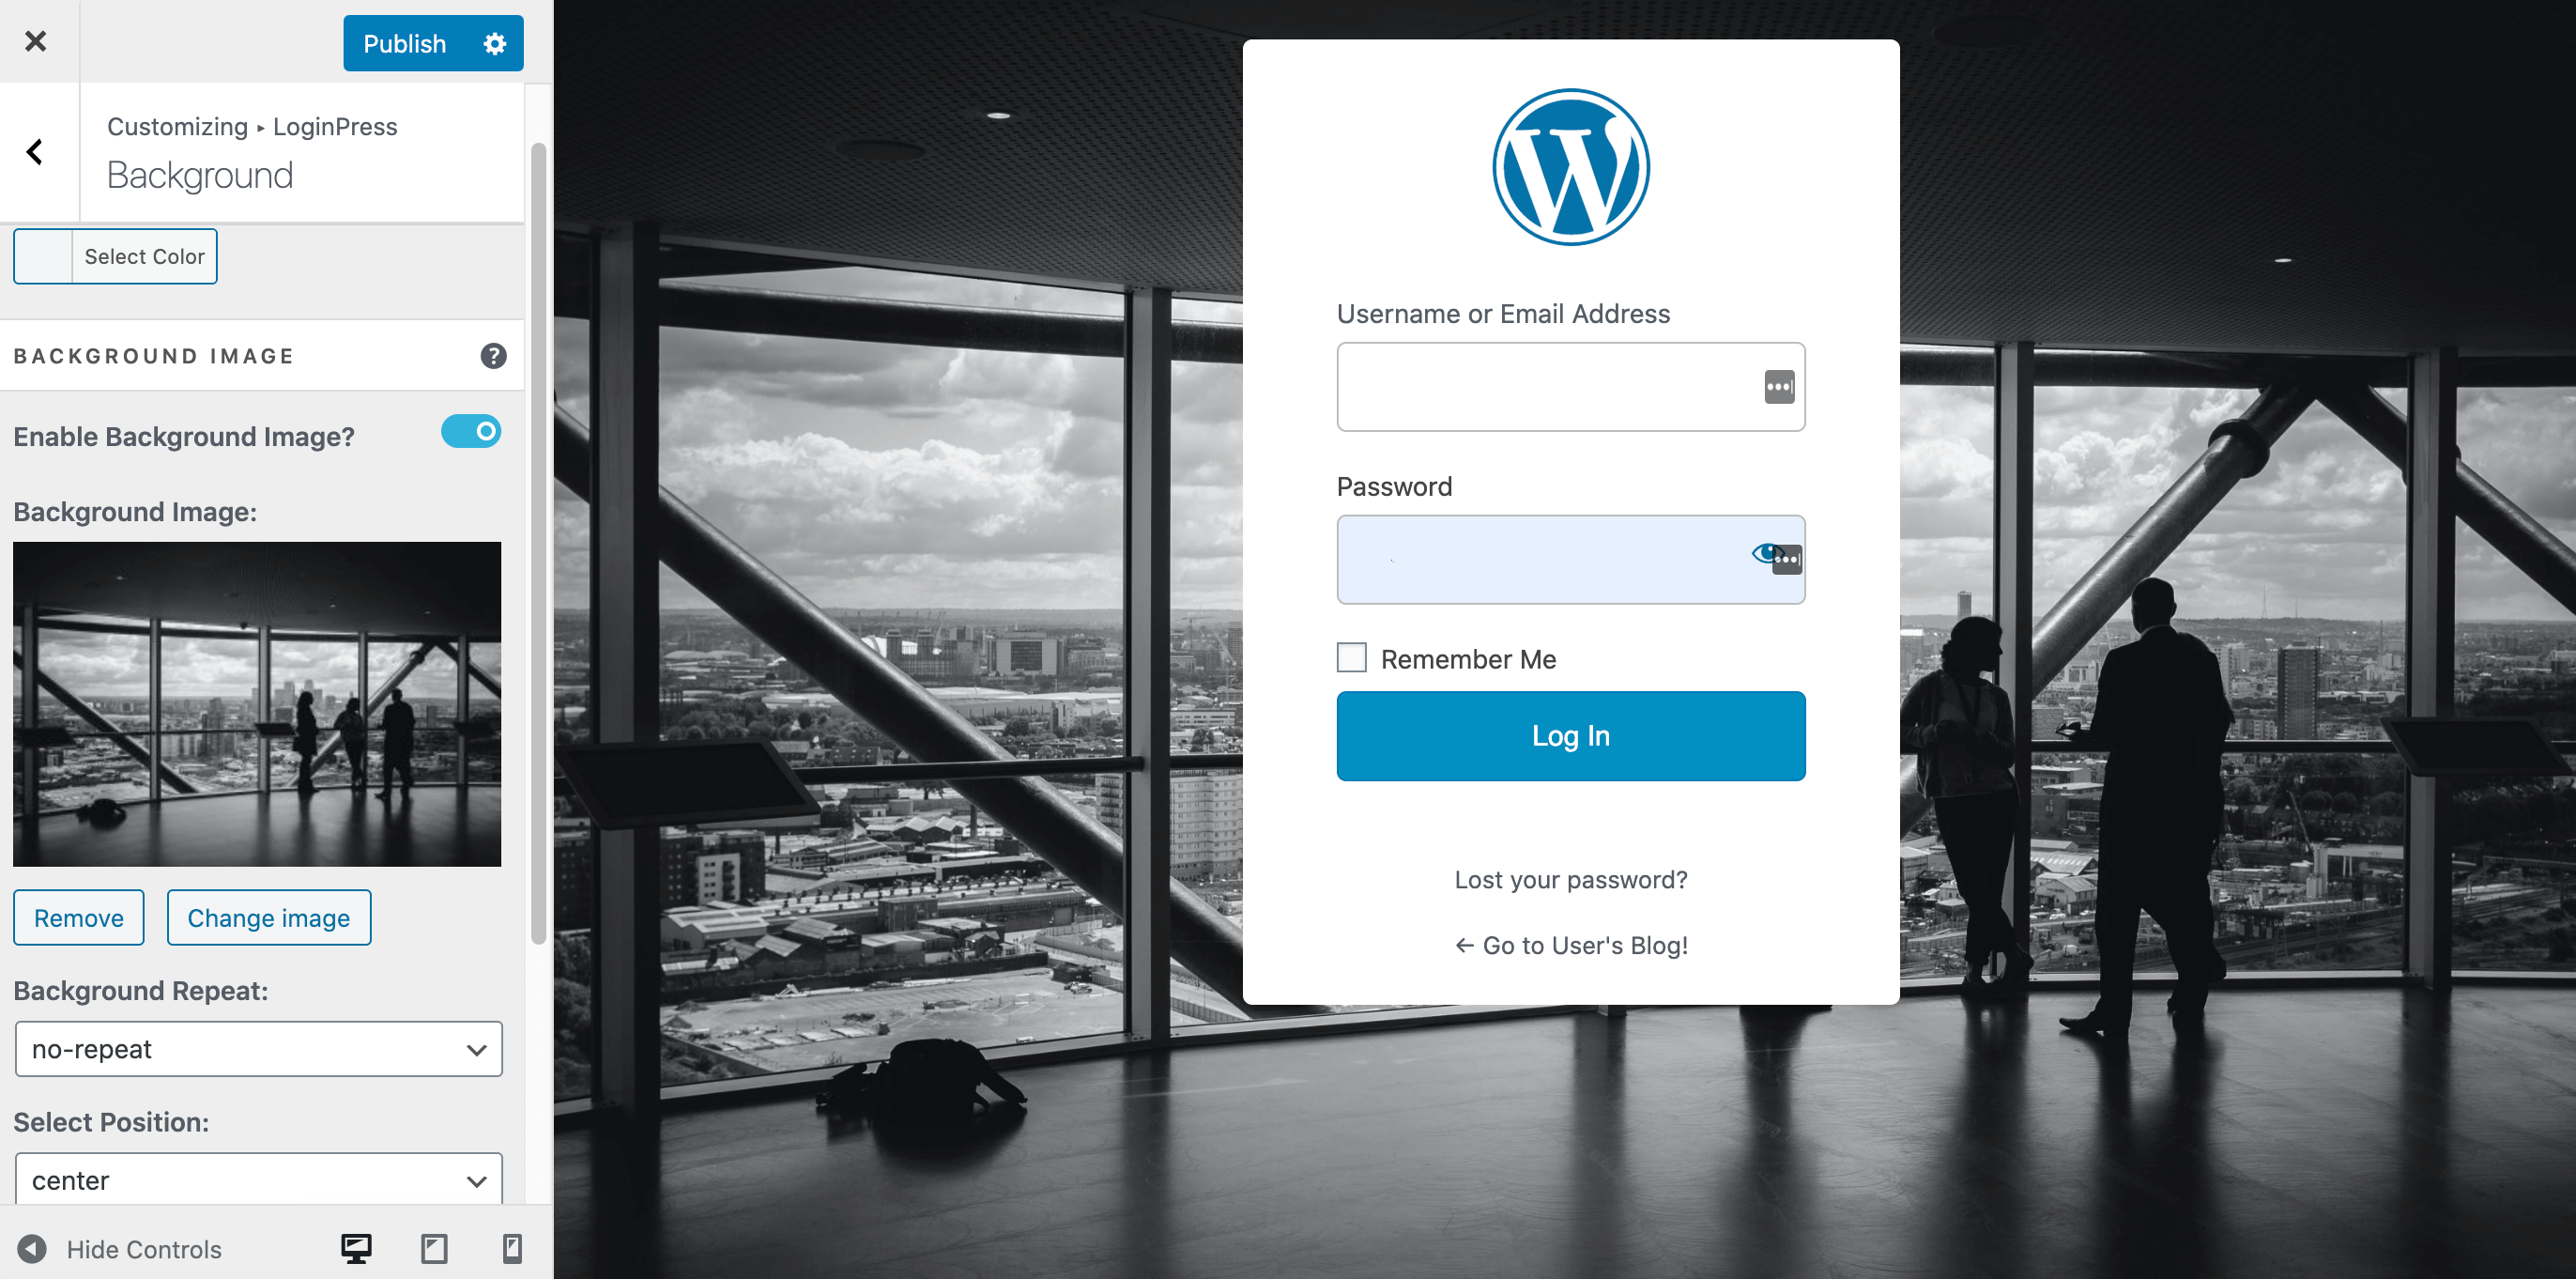
Alternatively, you can use a video for your background. This can create an eye-catching effect, although it can also be distracting. Videos may also affect page load times when the login screen is accessed over a slower internet connection. If you do decide to create an animated background, select Enable Background Video:
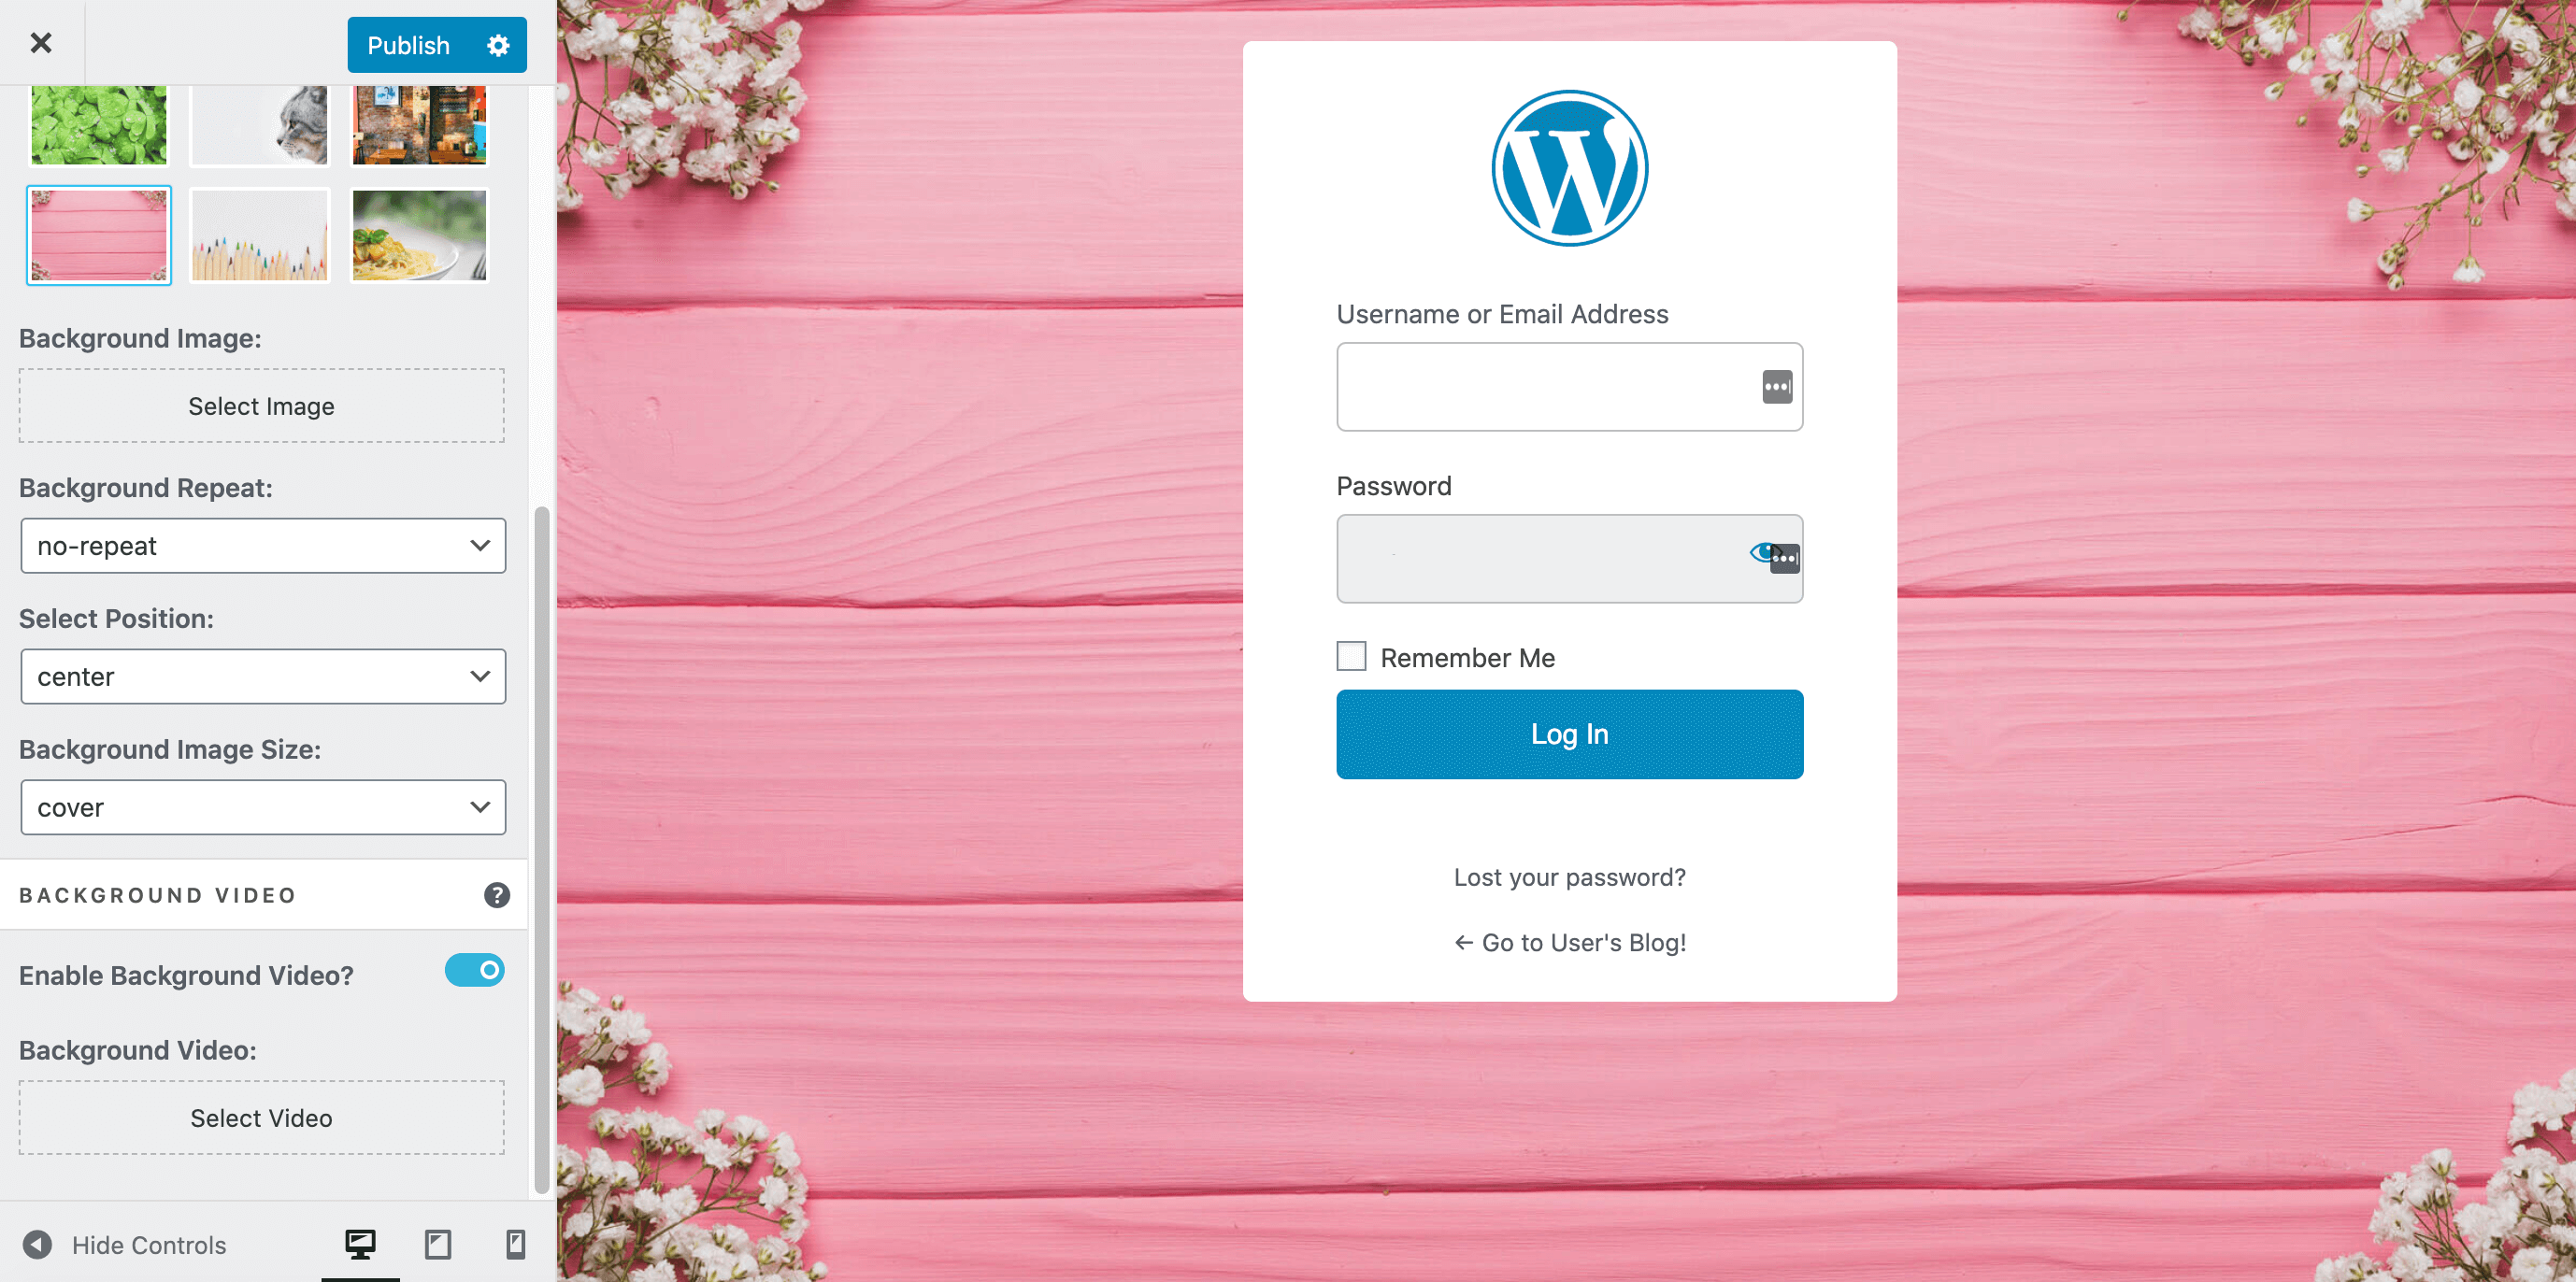
This will reveal the settings you need to upload your video. You can then configure how your new background appears on the login screen. This includes muting the video, if required.
Step 4: Customize the login form
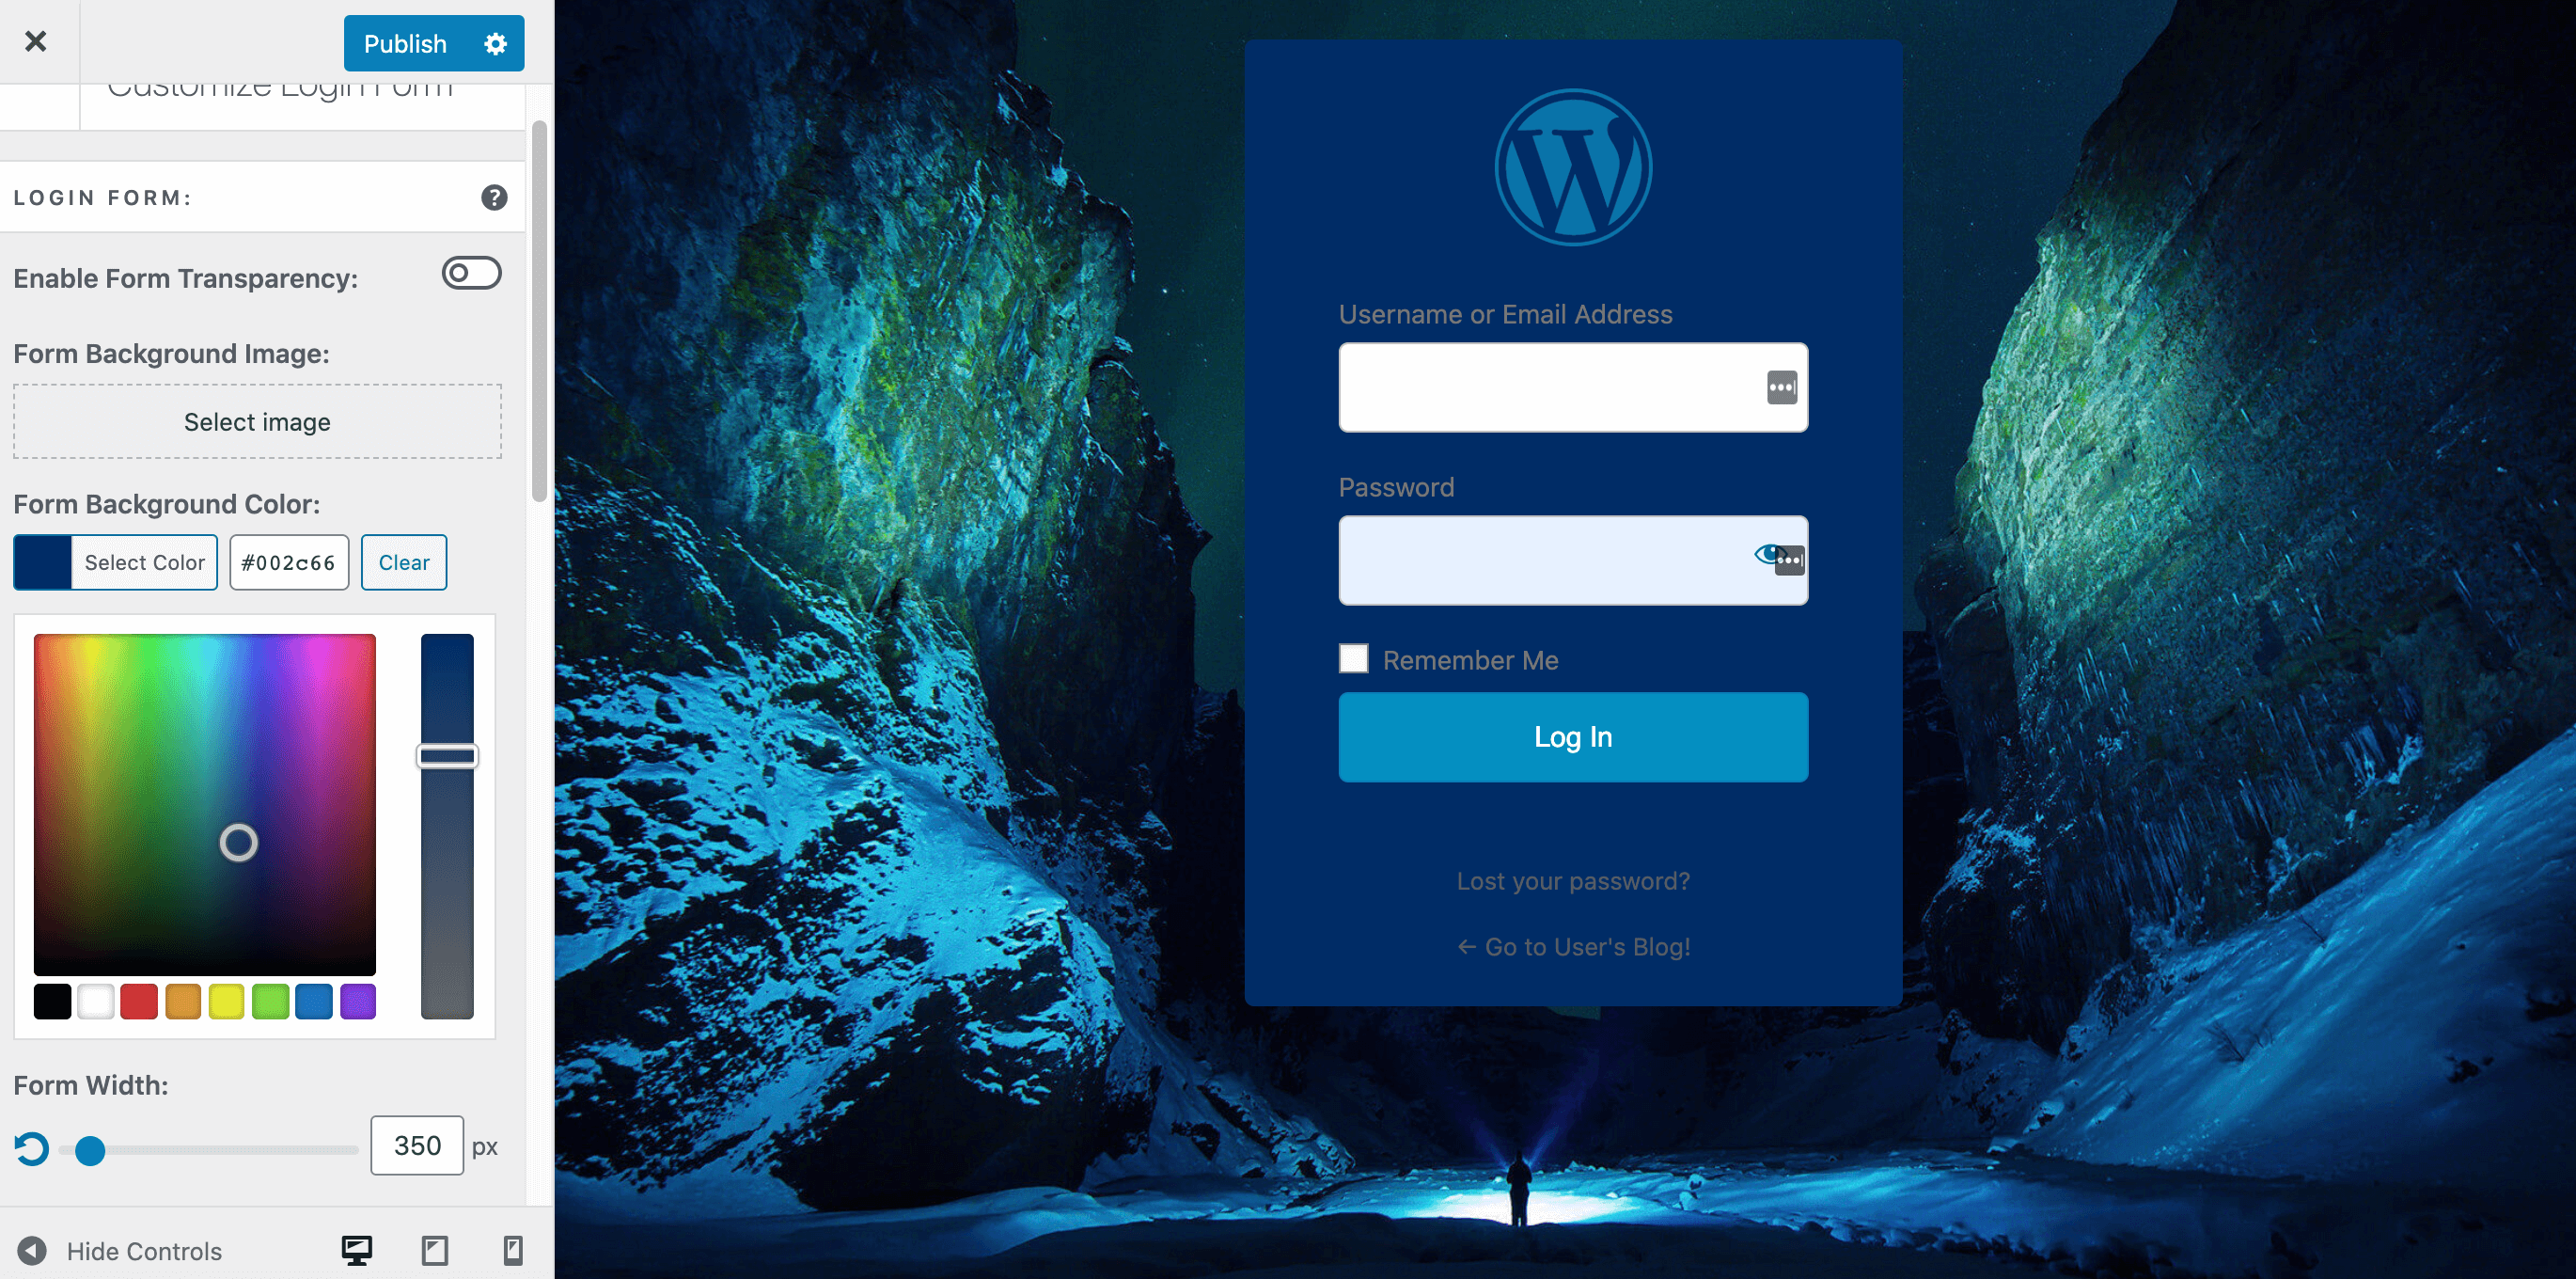
You can also change the login form itself. This includes changing the background image or color, and the color of the various labels that appear inside the form, such as the Remember Me checkbox.
To change the form’s background, select Form Background Color. You can then use the color picker to choose your new look:
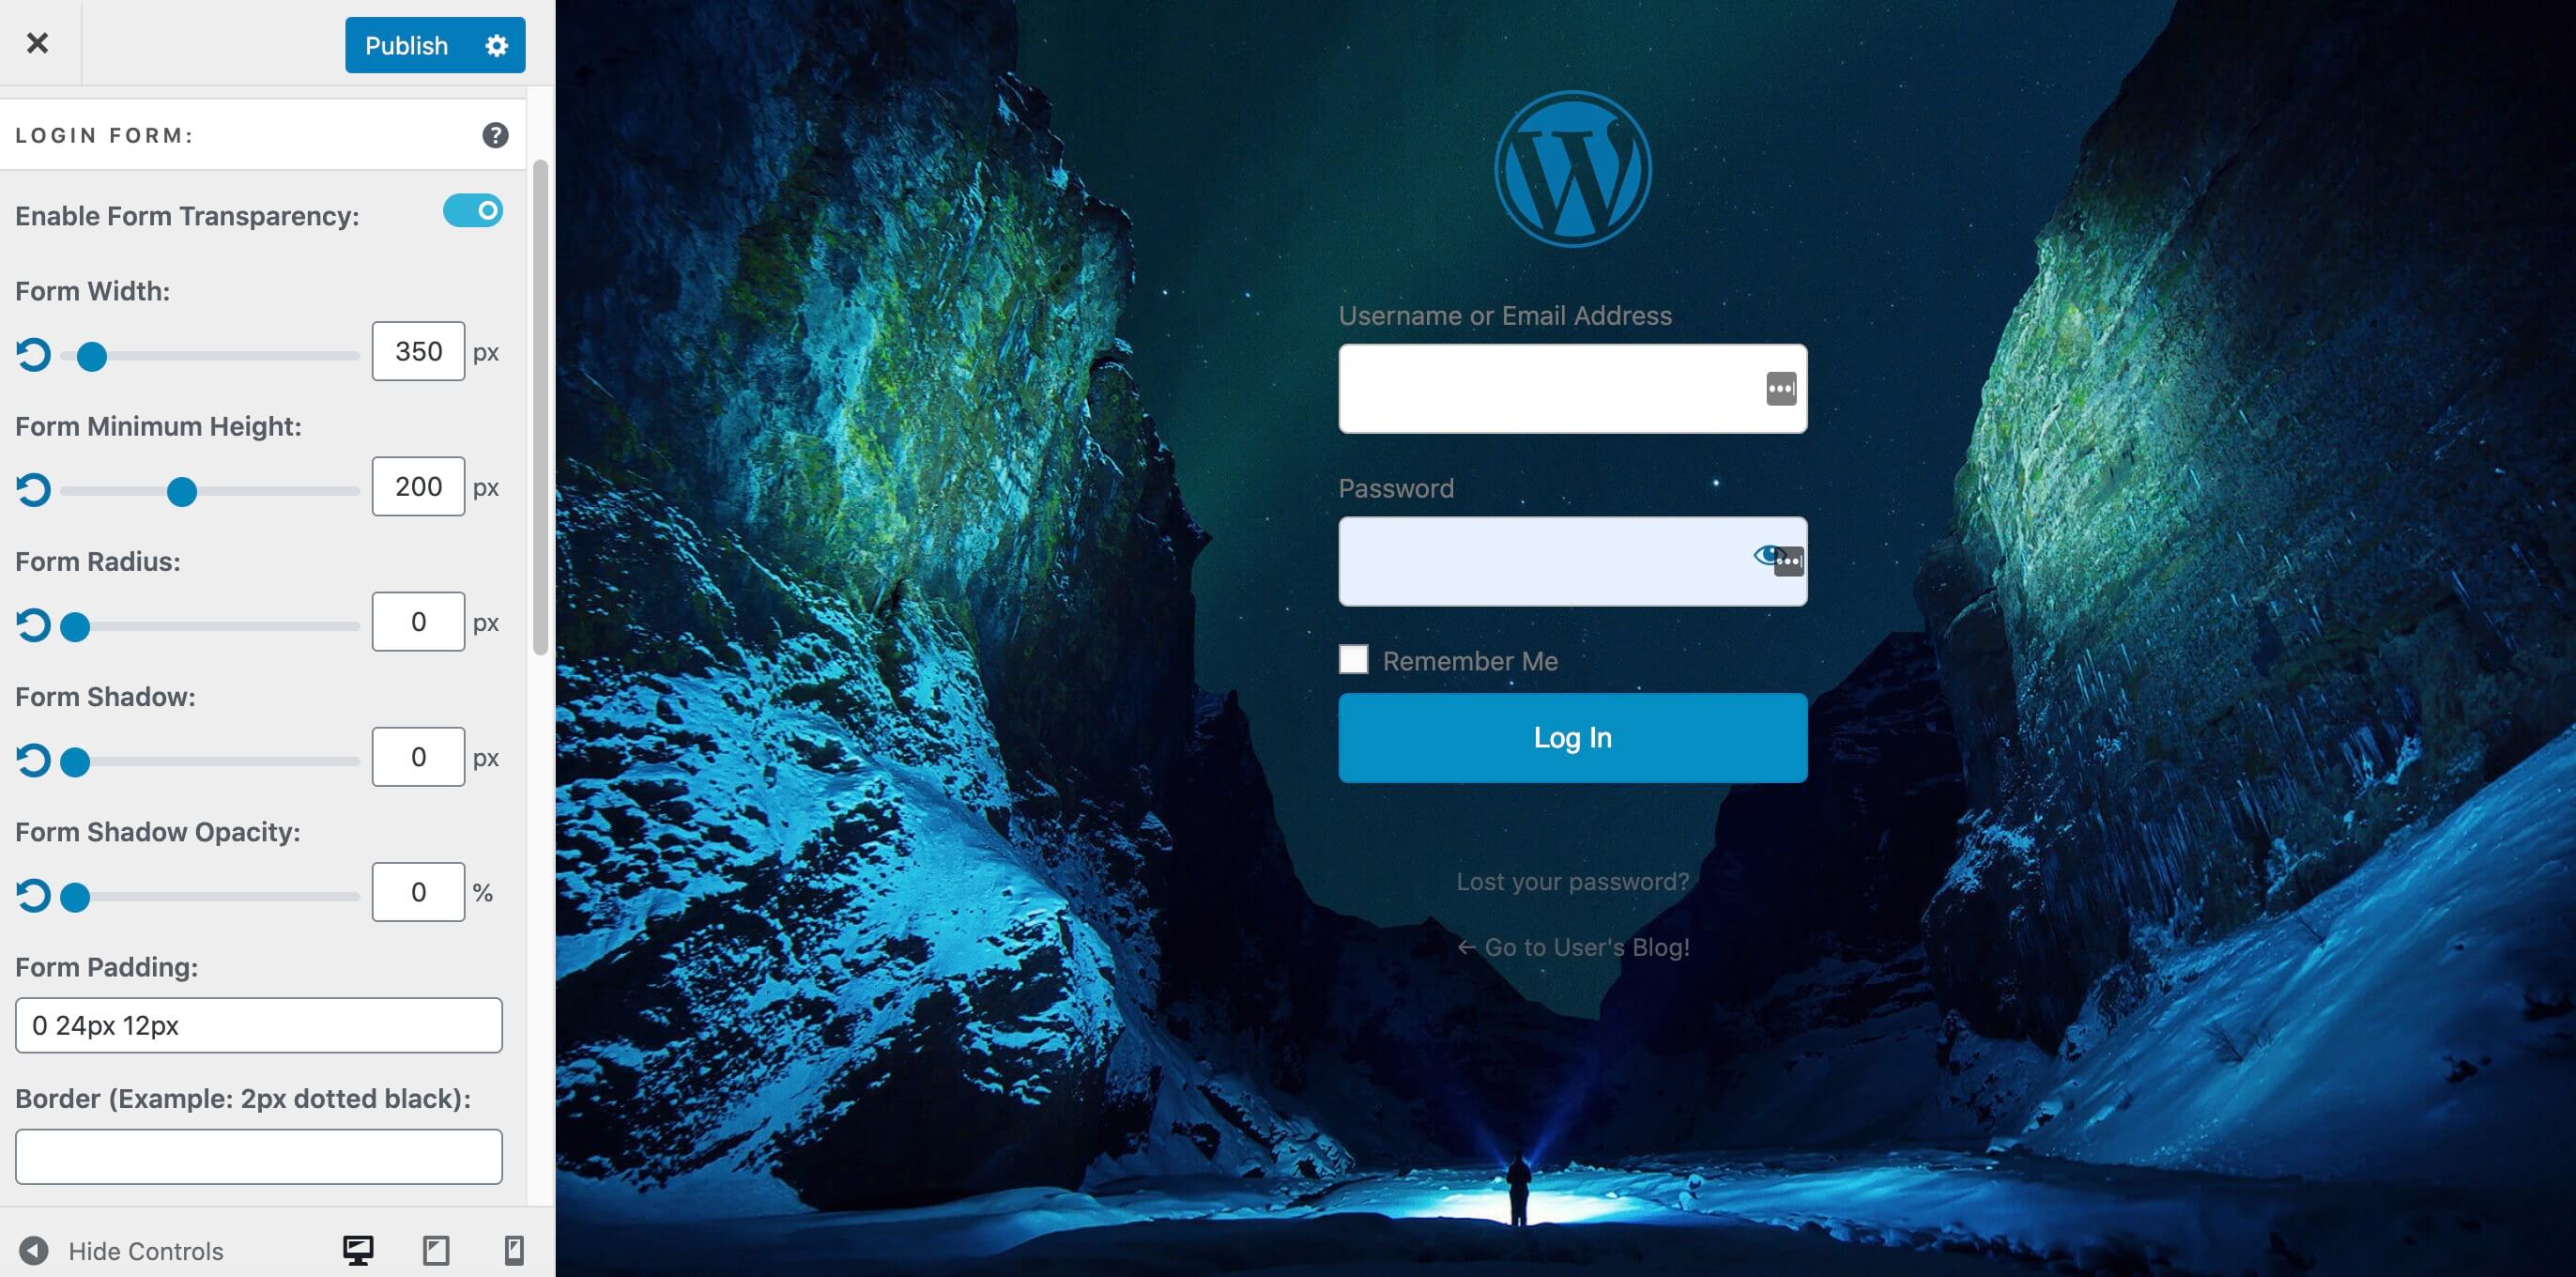
Alternatively, you can remove the login form’s background entirely, using the Enable Form Transparency slider. This can be useful if you’re designing a streamlined, simplified custom WordPress login page. It can also create an interesting effect if you’re using a busy or particularly striking background image and don’t want to distract from it or cover it:
You can also change the color of the text labels that appear within the login form. For example, you might make these labels easier to read by contrasting them with the background image.
At the bottom of this screen, you’ll find the Input Field Label Color settings. This controls the color of the Username or Email Address and Password field labels:
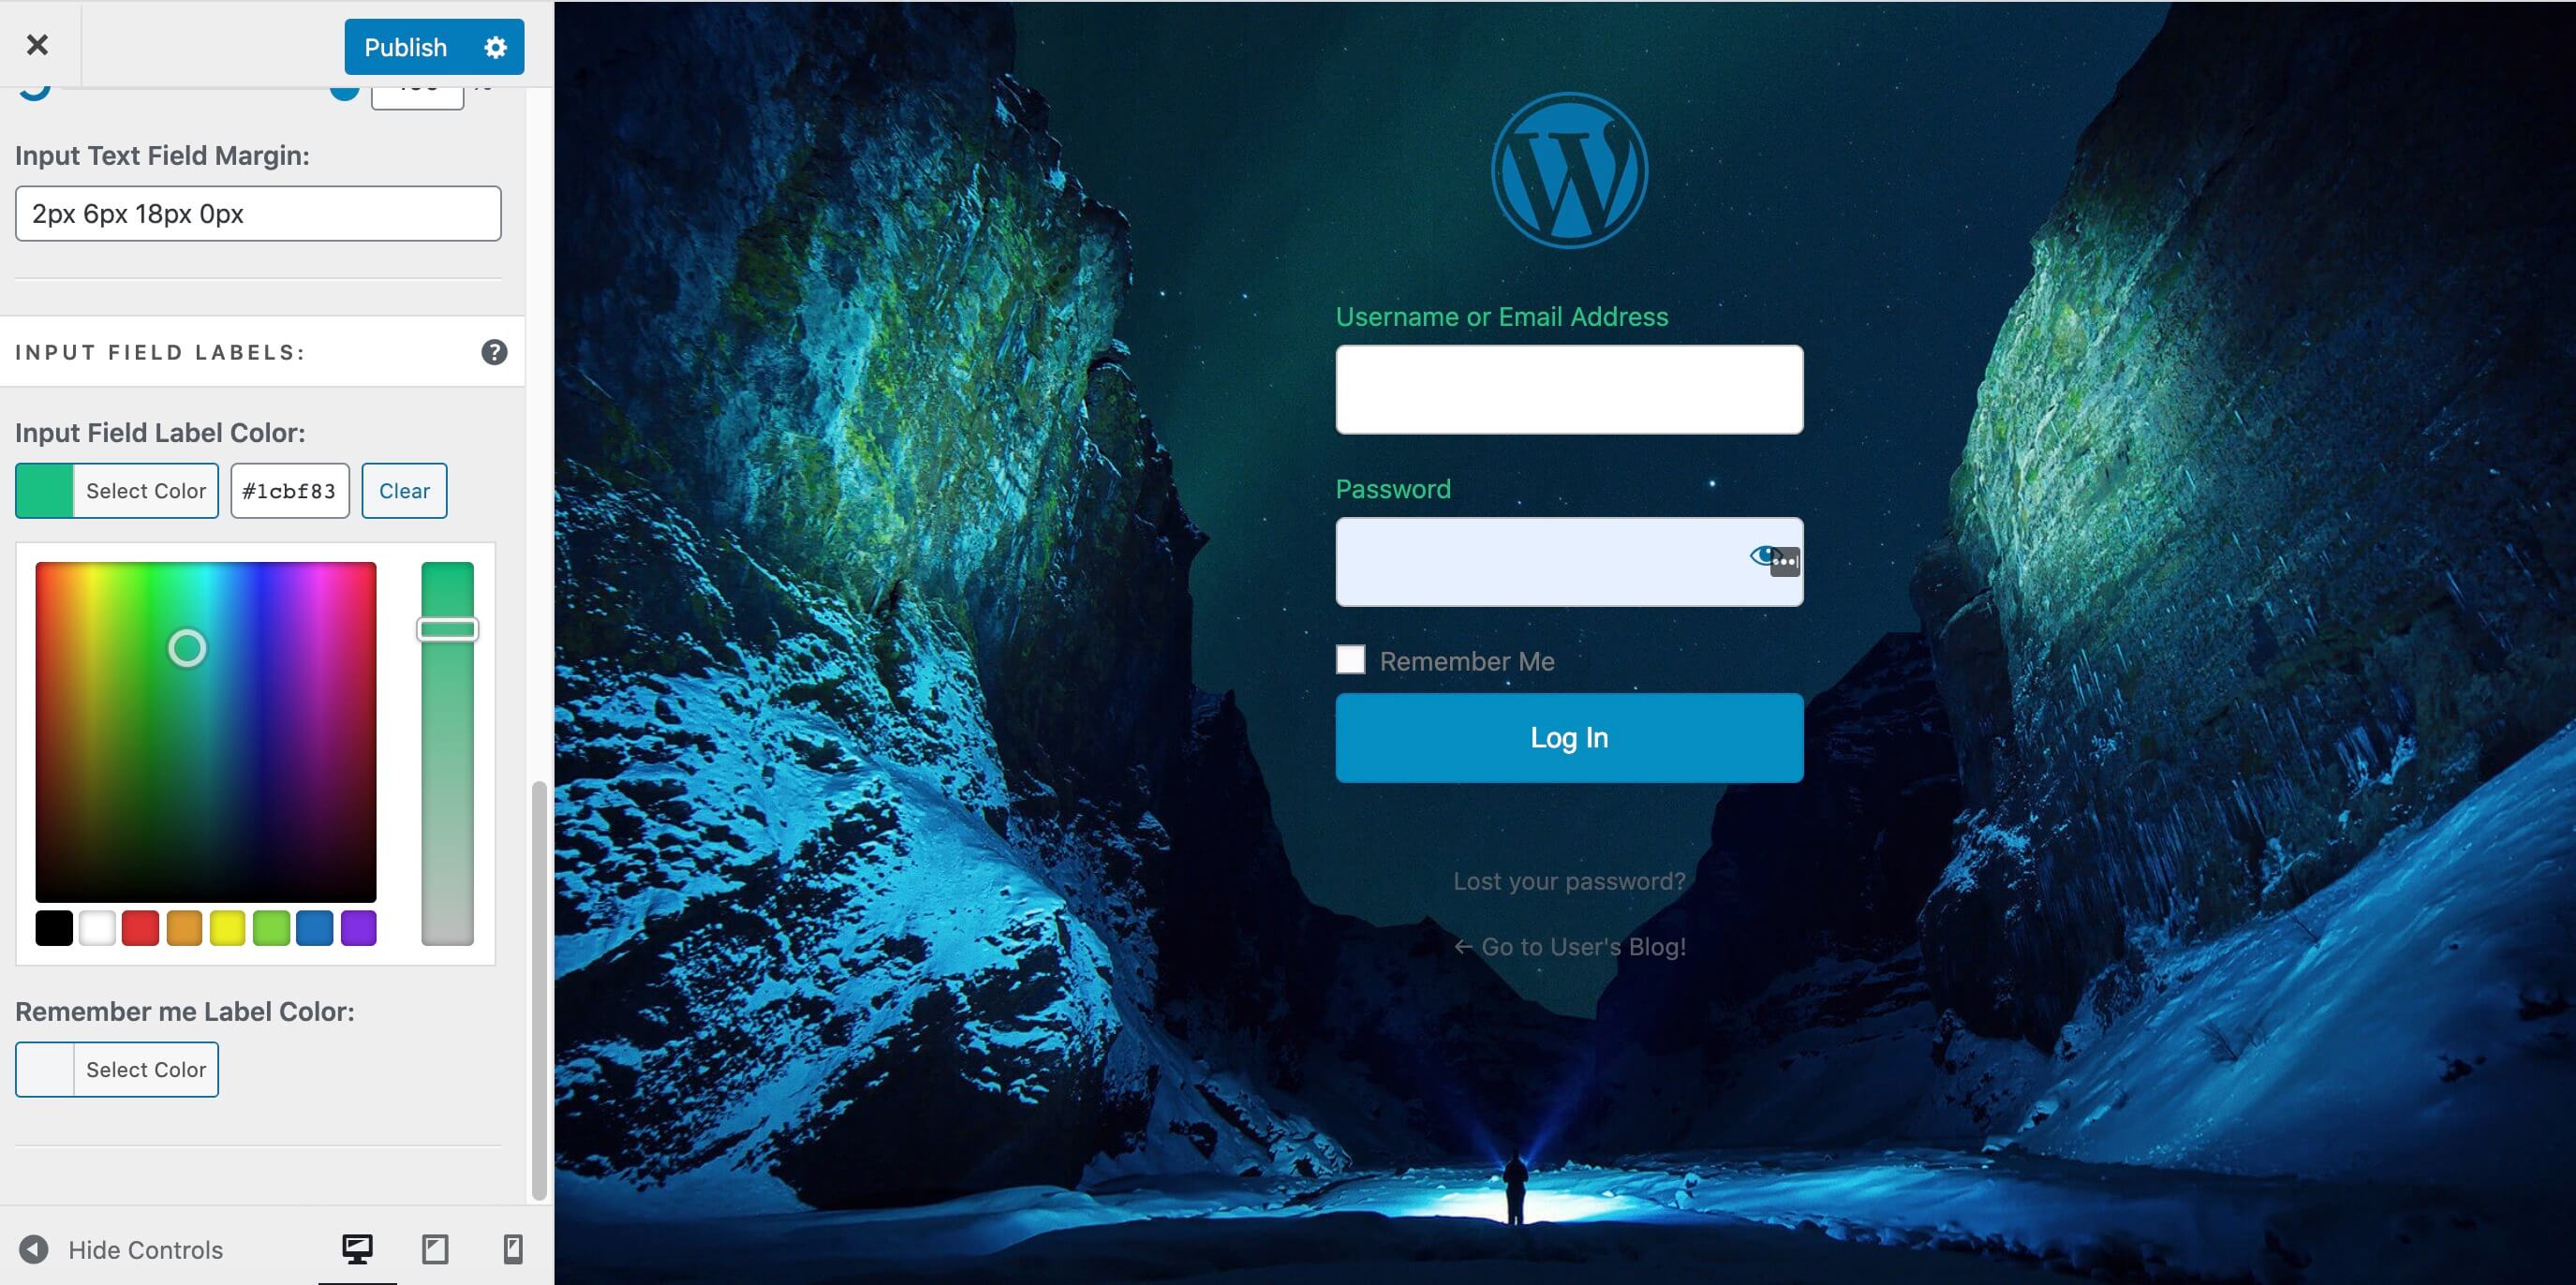
You can also change the color of the Remember Me label. To customize this text, click on the Remember me Color Label slider and use the controls found here.
Step 5: Replace the default error messages
WordPress has a series of default error messages that it displays if someone enters their username or password incorrectly. These error messages clearly identify the problem. For example, they say Invalid Username, or The email address isn’t correct to indicate which credential is preventing the user from gaining access.
You can use LoginPress to customize these error messages. For example, you might edit these default messages to provide more information about what the error is, and how to resolve it. This can be useful if your client isn’t particularly experienced with WordPress. You may also want to provide this extra information if the client hasn’t arranged for you to provide ongoing technical support.
While informative messages can help legitimate users access their WordPress accounts, they can also provide useful information for hackers. Malicious third parties may sometimes attempt to access websites using combinations of common passwords and usernames. The default error messages can help hackers identify when they’ve entered a correct username or password.
To help protect the client’s WordPress admin dashboard, you might want to make these error messages more generic. To edit them, select Error Messages from the Customizer menu:
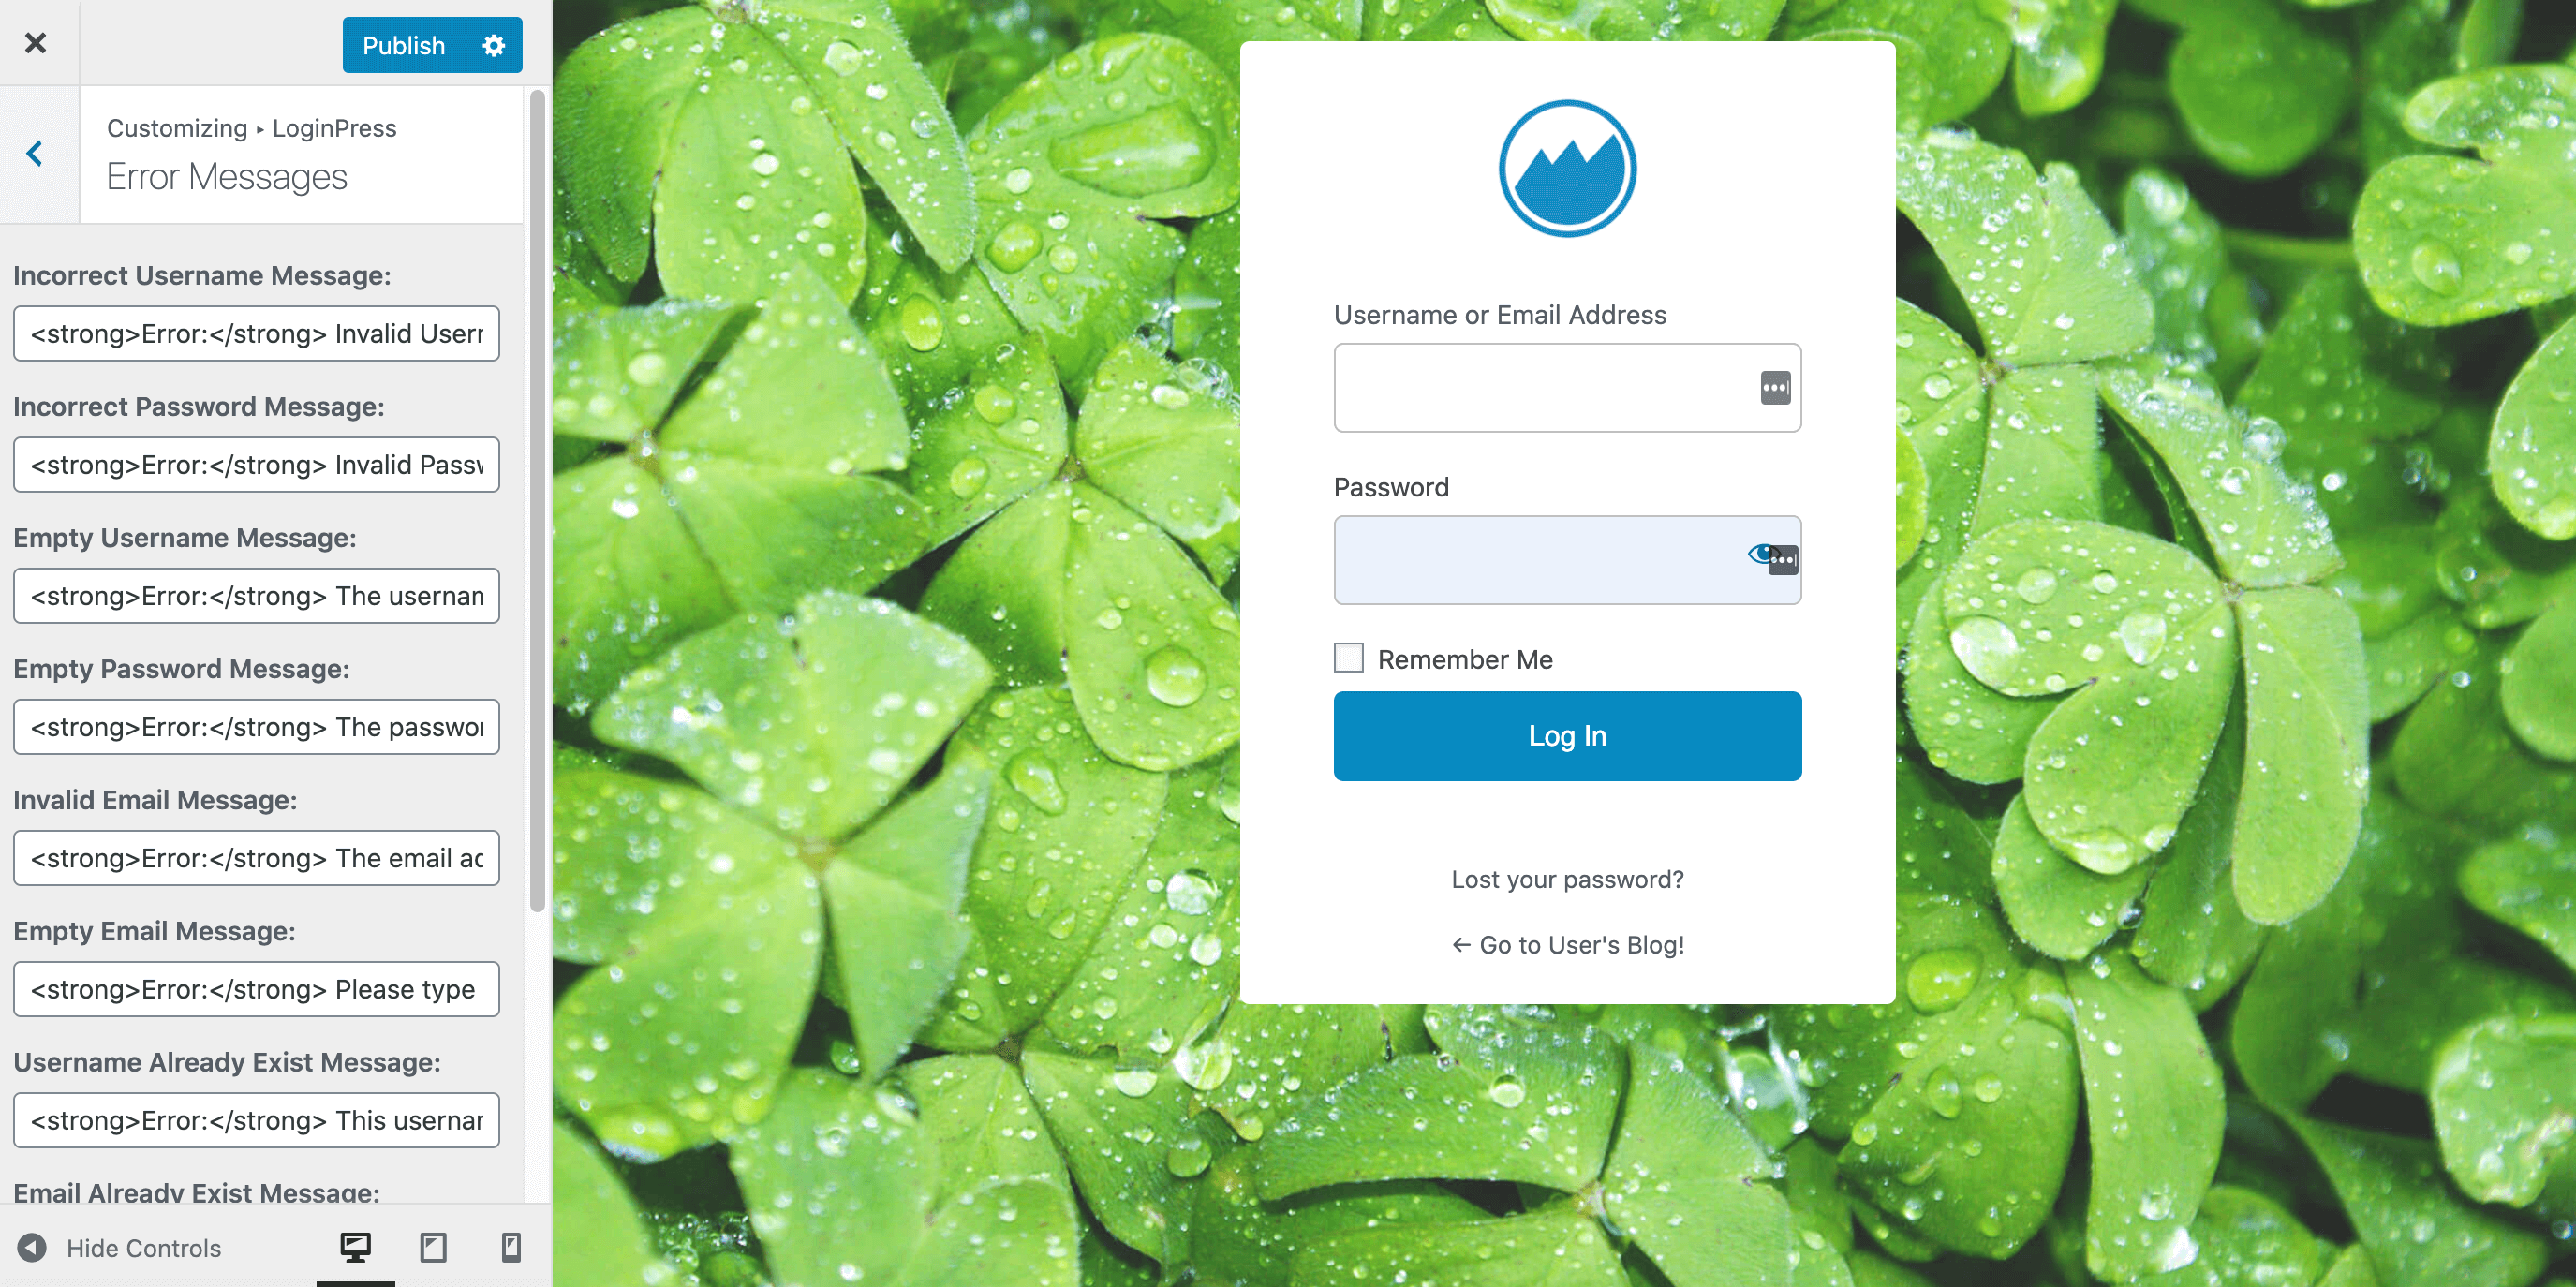
You can now make your desired changes to all the login error messages. These fields are compatible with HTML formatting. This enables you to add some stylistic elements, such as bolding and italicizing important text.
Conclusion
The default WordPress login page gets the job done, but it isn’t exactly inspiring to look at. If you’re going to wow your clients, we recommend giving the login page a makeover and perhaps tweaking its functionality.
Using a plugin such as Custom Login Page Customizer, you can create a unique login screen in five easy steps:
- Access the LoginPress customizer.
- Rebrand the WordPress login screen.
- Change the background image.
- Customize the login form.
- Replace the default error messages.
Do you have any questions about creating a custom WordPress login page? Ask away in the comments section below!
Image credits: Featured Image, example background image.
Keep reading the article at ManageWP. The article was originally written by Will Morris on 2021-02-09 11:00:52.
The article was hand-picked and curated for you by the Editorial Team of WP Archives.

