
Want to create a full-screen optin form in WordPress?
Love it or hate it… using a welcome mat is one of the easiest ways to capture your users’ attention. Even big brands like Forbes use a welcome mat to promote their campaigns.
In this article, we’ll show you how to properly create a welcome mat in WordPress.
What Is Welcome Mat & Why Do You Need It?
A welcome mat is an effective way to engage users with your campaign as soon as they visit your website. You can display flash sales, deals, newsletter signup forms, and other call-to-actions to welcome your users.
You may know that a large number of first-time visitors leave your website quickly without taking any action.
With a welcome mat, you can showcase a personalized offer or an optin campaign to your visitors just so you can connect with them later.
The easiest way to create a full-screen welcome mat is by using OptinMonster. The best part is that it lets you personalize the offer automatically based on the page your visitors are in, referral source, and more.
Step 1: Install OptinMonster and Create a New Campaign
The first thing you’ll need to do is to install and activate the OptinMonster plugin. For more details, check out our article on how to install a WordPress plugin.
This plugin works as a tool that connects your website with your OptinMonster account. If you don’t have an account yet, go ahead and sign up for one of the OptinMonster plans.
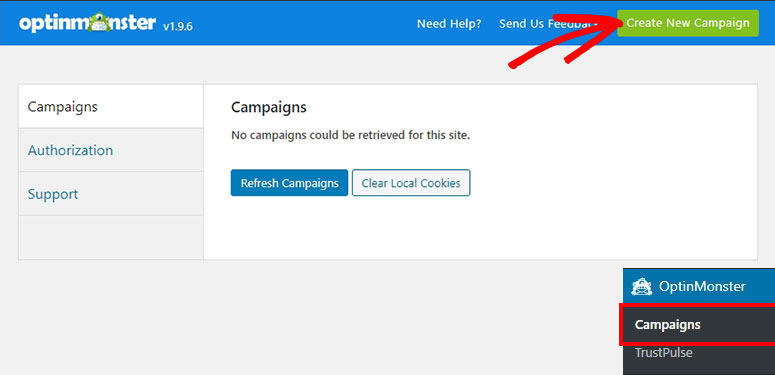
After activating the plugin, go to OptinMonster » Campaigns in your WordPress admin. From there, click on the Create New Campaign button.
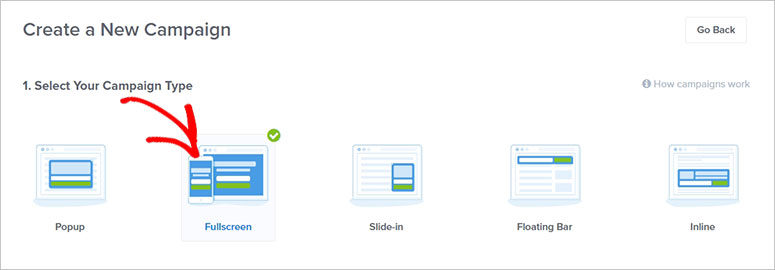
Next, you’ll see the OptinMonster account page. Start by selecting the Fullscreen campaign type.
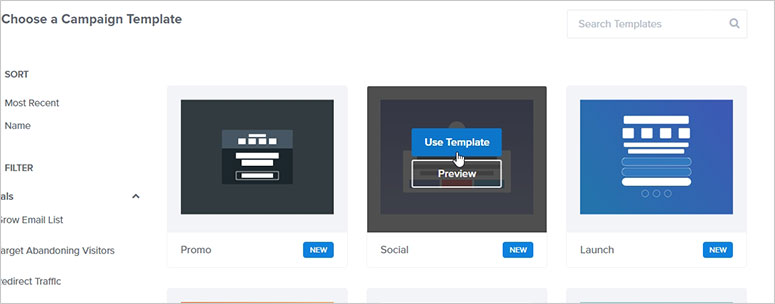
After that, scroll down a little and select a template for your welcome mat. For the sake of this article, we’ll be using the Social template.
Now, you’ll need to add a name for your campaign and your website URL, where you want to add the welcome mat.
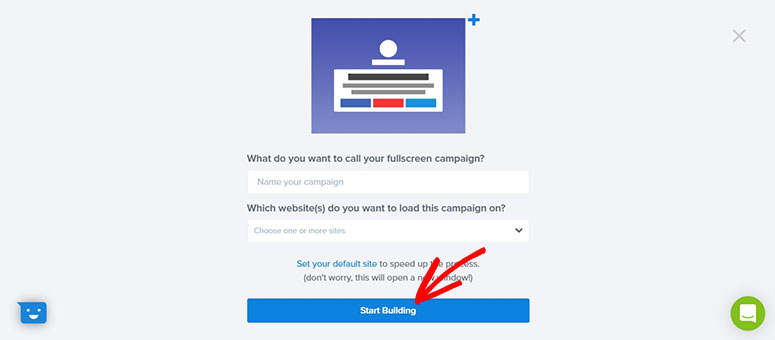
To continue, you need to click on the Start Building button.
Step 2: Customize the Welcome Mat Template in OptinMonster
You’ll see tons of editing options on your welcome mat. OptinMonster lets you customize colors, fonts, background images, and other design options easily.
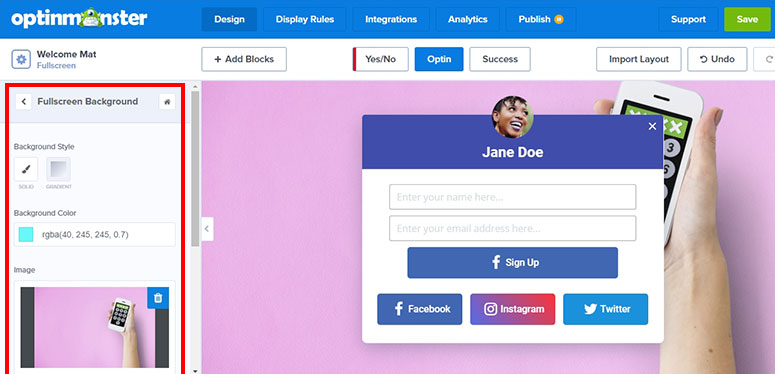
Click on any element of your welcome mat from the right side of the screen and you’ll see its settings on the left side. You can preview the changes live on your screen.
Make sure to click on the Save button to store your settings every time you make a change on your welcome mat.
Step 3: Manage Display Rules for Your Welcome Mat
You can set the display rules manually to show the welcome mat to your users whenever you want. If you don’t change these settings, then the welcome mat will appear to all your users in 5 seconds after they open your website.
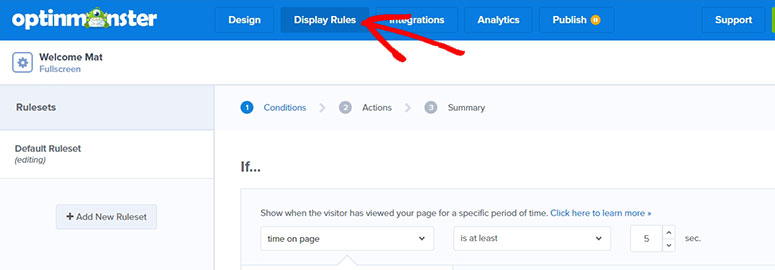
Since it’s a welcome mat, you should change the settings to ‘0’ seconds so the users can see it right away when they load your WordPress website.
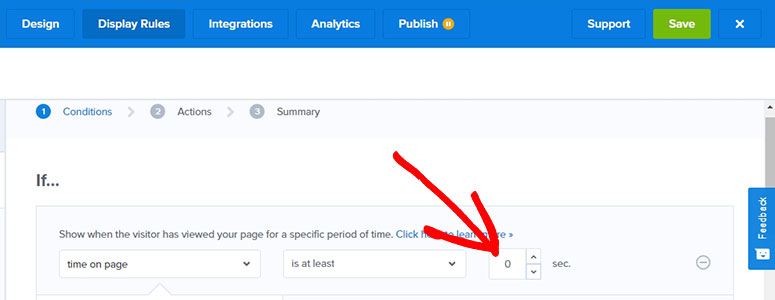
Now you need to scroll down to the bottom and click on the Next Step button.
In the Actions settings, you don’t need to change anything. However, if you want to add a sound effect with your welcome mat, then click on the + AND button.
You can add a sound to play with your welcome mat from the available options.
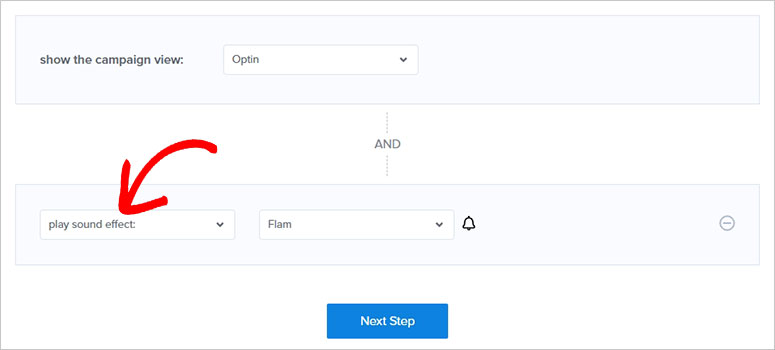
Then, click on the Next Step button to continue.
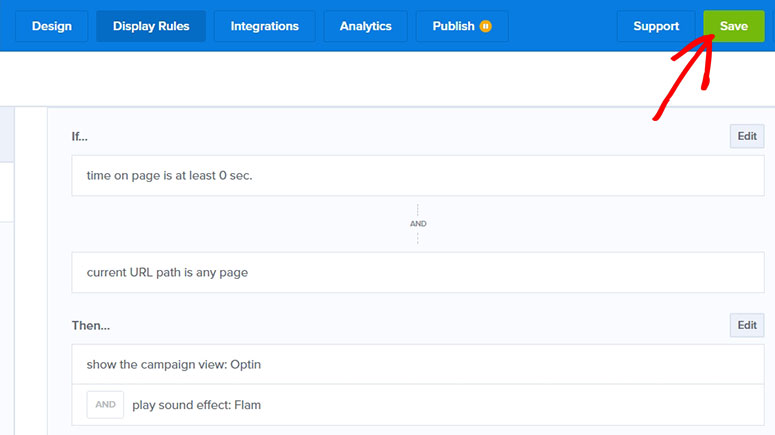
You’ll see the Summary of your display rules. Take a look at all the settings you made and click on the Save button.
Step 4: Integrate an Email Marketing Service With OptinMonster
Next, you need to click on the Integrations button from the top menu in the campaign builder. You can add an email integration to build your email list on your welcome mat.
Click on the + Add New Integration button from the left side of the screen.
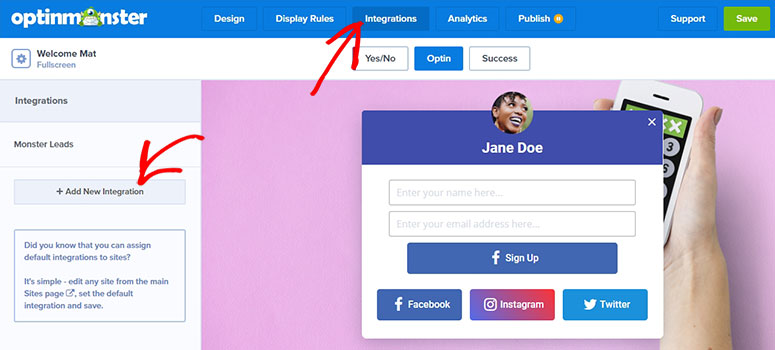
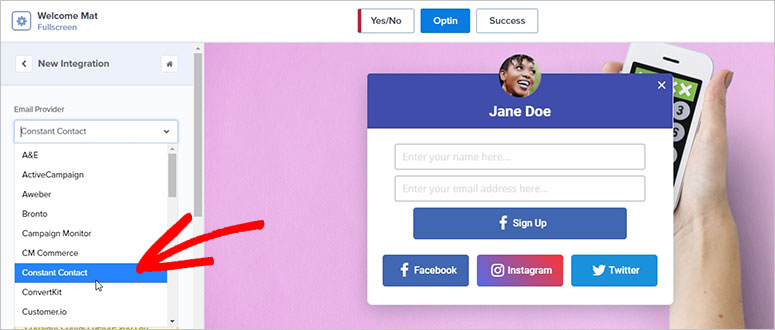
OptinMonster lets you connect with dozens of email providers and you can connect to any of the email services you like. We recommend you select Constant Contact, which is a popular email marketing service on the market.
Now you need to click on the Register with Constant Contact button to connect your OptinMonster account with Constant Contact.
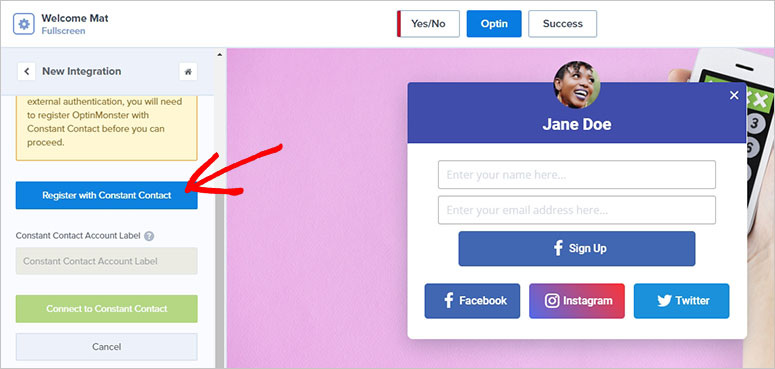
You should log in to your Constant Contact account and then click on the Connect to Constant Contact button to continue.

After that, select the Email Provider Account and Email Provider Lists to build an email list using your welcome mat in WordPress.
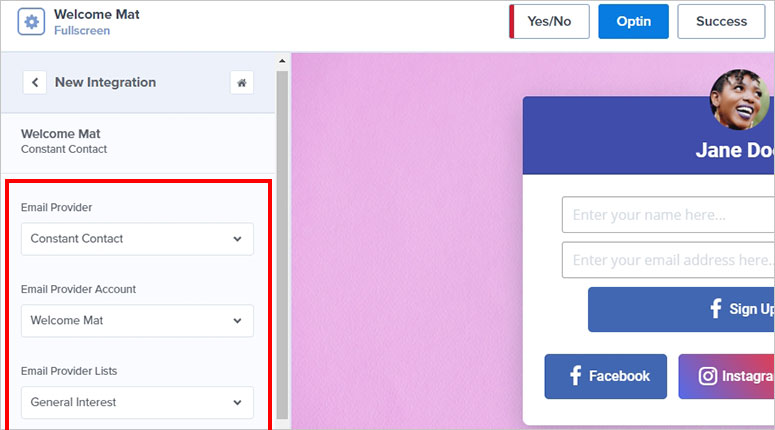
Click on the Save button from the top right corner of the screen.
Step 5: Configure Analytics in OptinMonster
Analytics will help you monitor the visitors’ activity on your welcome mat. OptinMonster offers default analytics and you can also connect Google Analytics for your ease.
Click on the Analytics button from the top menu and then add your Google Analytics Account and Website Profile.
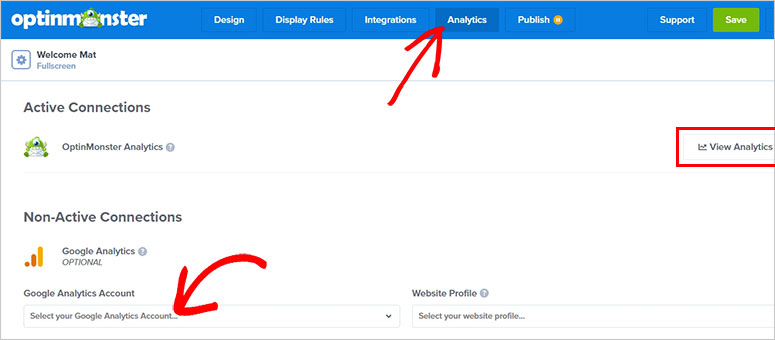
Next, you need to click on the Save button to continue.
Step 6: Publish and Display Your Welcome Mat in WordPress
Once you’re done with all the settings, click on the Publish button from the top menu. You also need to change the campaign status to Live and click on the Save button.

Now go back to your WordPress admin page and visit OptinMonster » Campaigns. Then, click on the Refresh Campaign button to see the Welcome Mat campaign that you created recently.

Next, you need to click on the Edit Output Settings below the Welcome Mat campaign name.

In this step, enable the campaign on your site and select who should see your campaign. Then, click on the Save Settings button.
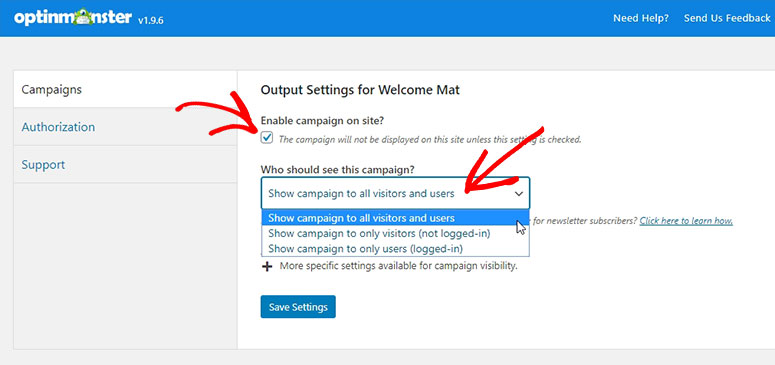
Your welcome mat is ready and it’ll appear to all your users who’ll visit your website.
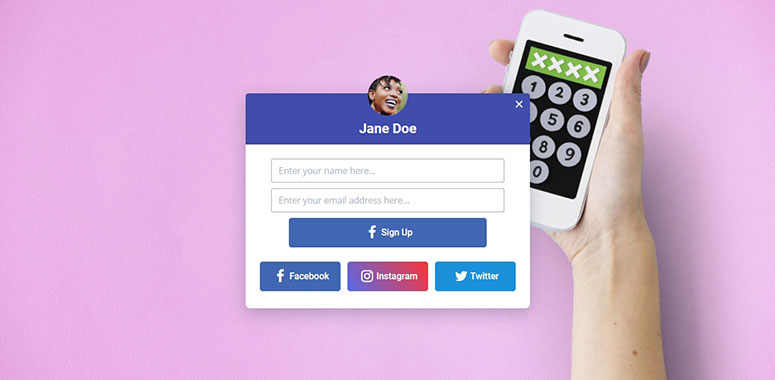
We hope this article helped you learn how to create a welcome mat in WordPress. You may also want to check out our guide on how to greet WordPress users with a custom welcome message.
Keep reading the article at IsItWP – Free WordPress Theme Detector. The article was originally written by Editorial Team on 2020-04-28 03:27:00.
The article was hand-picked and curated for you by the Editorial Team of WP Archives.

