
Do you want to host a contest on your WordPress website?
Most business websites host contests as a part of marketing campaigns to achieve different goals. Running a giveaway or contest helps engage users and grow your website traffic.
In this article, we’ll show you how to host a contest on your WordPress website and increase engagement.
Before that, though, let’s get clear on why you might want to host a contest in the first place.
Why You Should Host a Contest in WordPress
There are multiple benefits of hosting a contest or giveaway in WordPress. It provides quick results for growing your business in several ways.
This includes instant growth in website traffic, new email subscribers, a boost in your social following, more user engagement, and so on.
Running a giveaway also helps to increase your sales and conversions.
The only problem? How can you run an online contest from your WordPress site if you don’t know how to code or simply have limited “tech skills.”
This is where having the right contest plugin comes into play.
Using a contest plugin, you can easily create and host giveaways on your website. We recommend RafflePress, the best WordPress giveaway/contest plugin on the market.

RafflePress is the perfect solution for creating online giveaways on WordPress. It comes with an intuitive contest builder and useful features to set up viral contests in just a few minutes.
It also offers 1-click fraud protection and verified actions to make sure that your contest runs securely.
Now, let’s look at the step-by-step process of creating and hosting a contest or giveaway in WordPress.
How to Host a Contest in WordPress
Step 1. Install and Activate the RafflePress Plugin
The first thing you need to do is to install and activate the RafflePress plugin.
Never installed a plugin before? No worries. Just check out our complete guide on how to install a WordPress plugin.
Upon activation, go to the RafflePress » Settings » General page in the WordPress admin area. You’ll need to enter the license key here.
You can find the license key on your RafflePress account. If you haven’t already signed up yet, make sure to create an account to receive your license key.
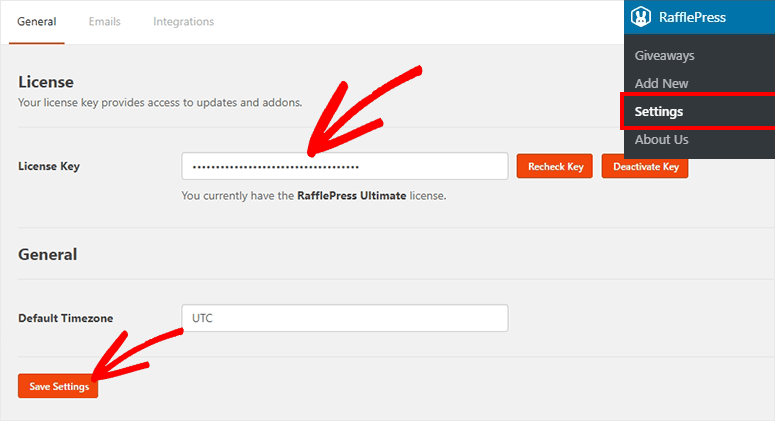
After successfully adding the license key, click on the Save Settings button to continue.
Step 2. Create a Contest/Giveaway in WordPress
To host a contest, visit RafflePress » Add New in the WordPress admin.
It’ll open the RafflePress giveaway builder.
Start by entering a name for your contest or giveaway. RafflePress offers built-in templates to speed up the process of creating a contest in WordPress.
For the sake of this guide, we’ll be using the Classic Giveaway template. This lets you build and host a contest with custom settings.
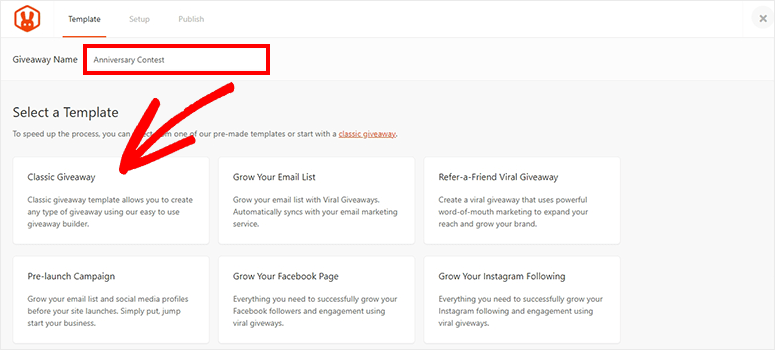
It also offers other goal-specific templates to host a contest or giveaway, including growing your email list, increasing your social media followers (Facebook, Instagram, and Twitter), and more.
These templates are useful when you have a specific goal to achieve.
Step 3. Enter the Contest Information
On the next page, you need to add prize details for your new contest. This includes the title of your prize, start and end times, and an image of the prize.
Click on the pencil icon to edit the description of the prize. It’ll open the editor on the right side of your screen.
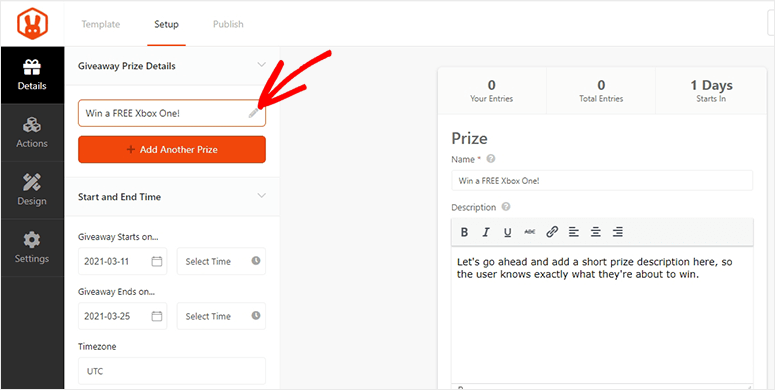
You can also add more prizes by clicking on the Add Another Prize button from the left column.
Step 4. Set Up Actions For the Contest
Now you need to add actions and entry options for users to become a part of your contest. RafflePress is highly customizable and offers several actions to achieve your goals.
Click on the Actions tab from the absolute left navigation on your screen.
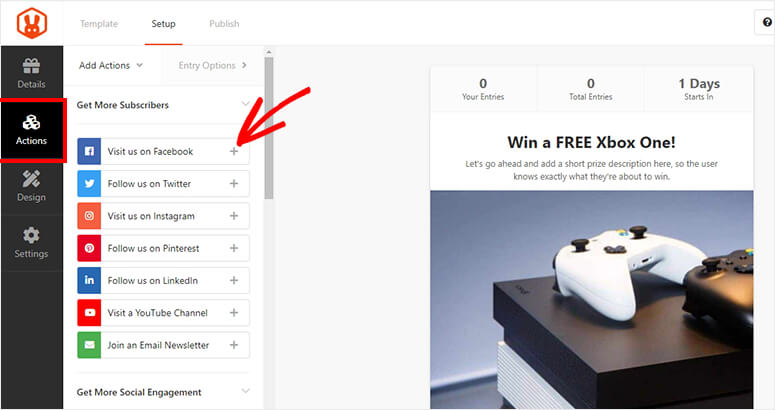
This will display all the actions that you can add to your contest. These actions are divided into 3 categories: get more subscribers, get more social engagement, and get more traffic.
You need to click on the ‘+’ icon in front of any action to add it to your contest.
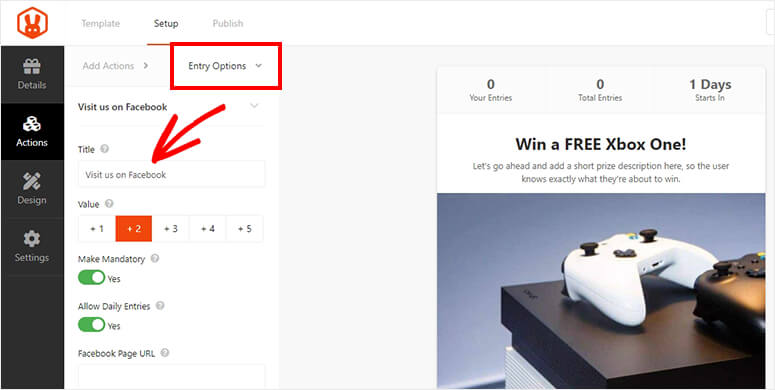
Once you add an action, it’ll display entry options. You can change the title, entry points, mandatory option, allow daily entries, and link social accounts using URLs.
Entry options can be different for other actions. You can add as many actions as you need and provide entry details one by one.
Step 5. Edit Design Settings For Your Contest
Next, switch to the Design tab from the left navigation menu. It’ll display layout and design options.
You can change the layout, font, button color, page background color, background image, and so on.
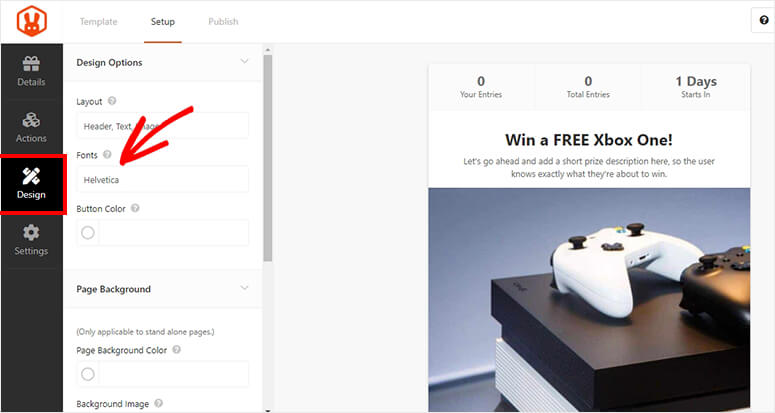
With the live preview on the right side, you’ll know exactly how your contest will appear in WordPress. Once you’re satisfied with the contest design, you can move to the next step.
Step 6. Update Your Contest Settings
Now you need to click on the Settings tab from the left navigation menu. In the contest settings, start with the Giveaway Rules option.
Here, click on the Generate Rules button.
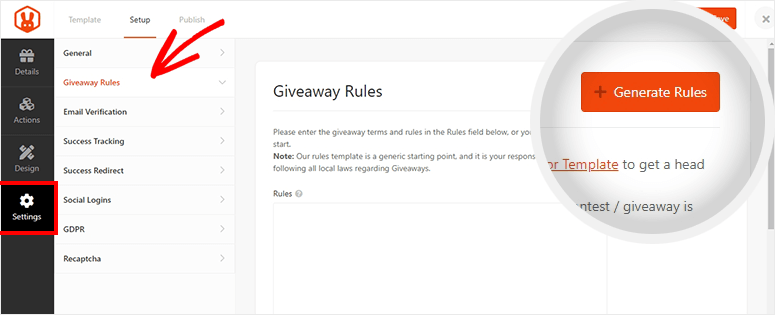
It’ll open a popup where you need to enter the information about the contest sponsor. After adding all details, click on the Generate Rules button.
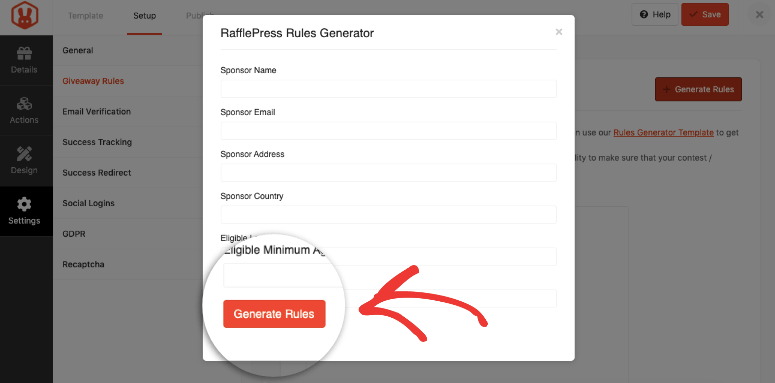
Now you’ll notice that RafflePress has generated rules for the contest that your users can read before submitting their entries.
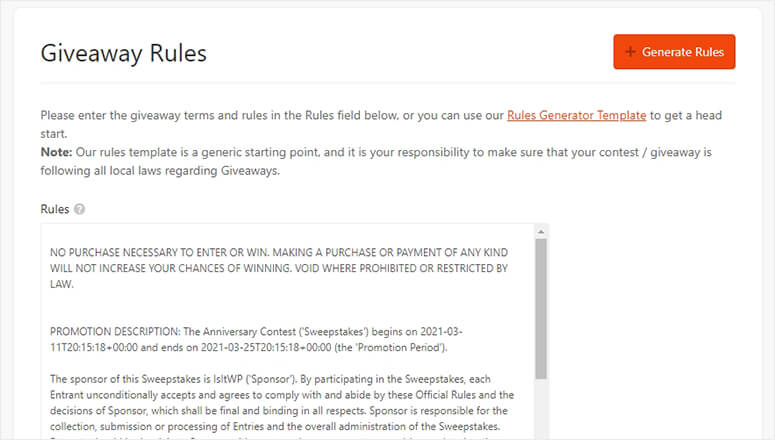
Other contest settings include email verification, success tracking, redirect, social logins, GDPR, and Recaptcha options. You can configure these settings as you like and continue to save your contest settings.
Step 7. Save and Publish Your Contest in WordPress
After successfully setting up the contest, you need to click on the Save button from the top right corner of your screen.
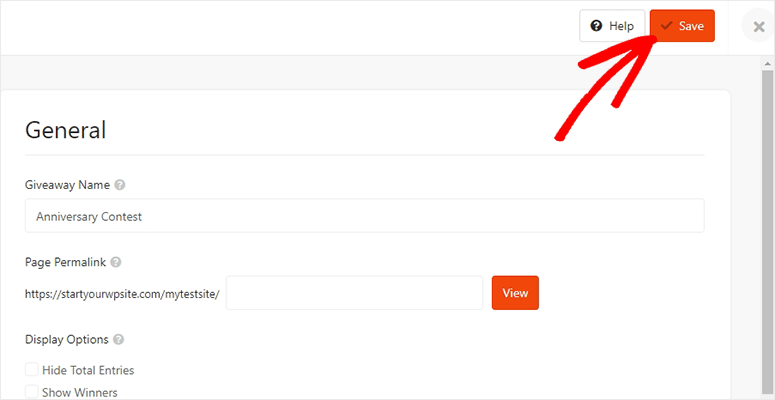
It’ll take a few seconds, and you’ll see a success message that your giveaway or contest is saved.
To publish this on your WordPress website, go to Posts » Add New in the WordPress admin. Add a title for your new post and click on the ‘+’ icon.
You need to search for the RafflePress block.
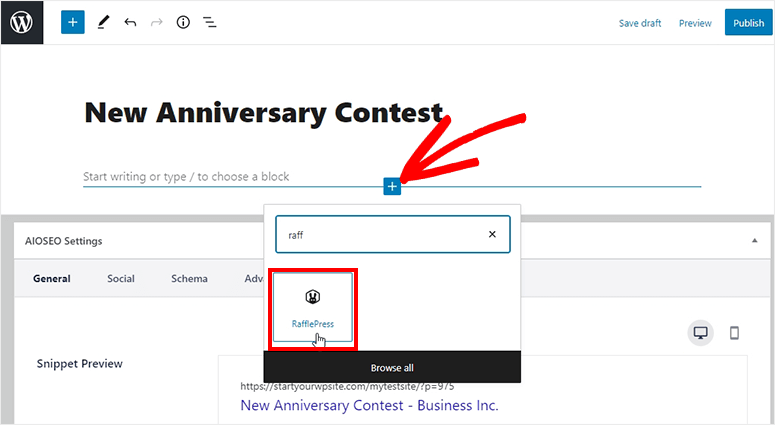
Add the RafflePress block in your post editor and open the dropdown to select your contest from the list.
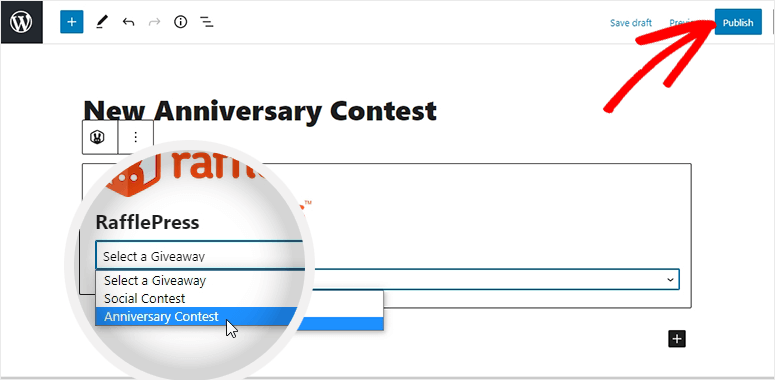
Once everything looks good, go ahead and hit the Publish button from the top right corner of your screen.
And you did it! The contest is now live, and you can visit your website to see it in action.

RafflePress also lets you create a standalone landing page to host the contest. Other than that, you can use shortcodes to add the contest anywhere on your WordPress site.
Step 8. Share Your Contest and Announce a Winner
Feel free to share the contest on your social profiles, emails, and other marketing channels. You can pin a post about the contest on your Facebook page, edit your Instagram bio and add the link of the contest’s post, share it in the stories, and so on.
When the contest is ended, you need to select a winner or multiple winners.
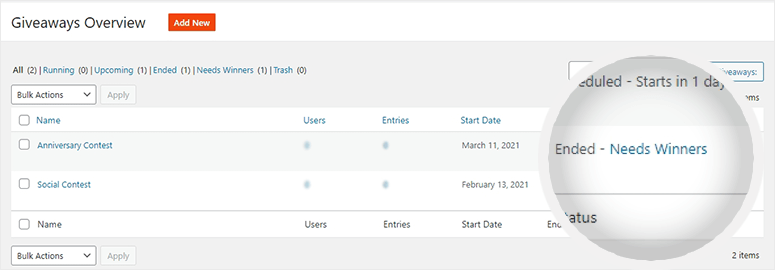
RafflePress made it easy for you with the Need Winners option that you can find in the WordPress admin next to your contest or giveaway name. This option appears after the contest ends.
Set the total number of prizes and click on the Choose Winners Now button.
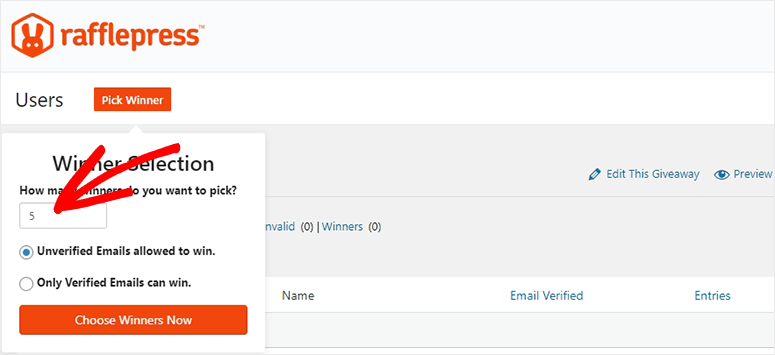
RafflePress will randomly select the winners and display them below. Then, you can inform the winners through email to claim their prizes.
Easy, isn’t it? We hope this article has helped you learn how to host a contest on your WordPress website.
You may also want to check out our guide on the best ways to use social media to increase email subscribers.
This will help you build an email list faster using your social media accounts.
Keep reading the article at IsItWP – Free WordPress Theme Detector. The article was originally written by Editorial Team on 2021-03-17 05:28:11.
The article was hand-picked and curated for you by the Editorial Team of WP Archives.

