You’ve put a lot of time and effort into creating your WordPress website and you’re finally ready to move it from localhost to a live site. However, this can be a lengthy process that potentially results in errors. It can be extremely frustrating to complete this final step after all the hard work you’ve already put in.
Fortunately, there are a few ways to migrate your website from localhost to a live server depending on your needs. If you’re tech-savvy and want more control over the process, you can carry it out manually. Alternatively, there are tools available to make the job simpler and less labor-intensive.
In this guide, we’ll cover some scenarios where you might need to migrate your site from localhost to a live server. Then we’ll show you two methods you can use to accomplish this task. Let’s get started!
Why you might need to move a site from localhost to a live site
First of all, when you use localhost to develop a website, it merely means you’ve built the site on your computer so that it’s not accessible to the public. Once you’ve finished developing it, you’ll need to migrate it to a live server so that you can start attracting visitors.
While it might seem like you’re creating more work for yourself, there are advantages to developing in a local environment. To start with, you won’t have to worry about breaking the website while making changes to it. You’ll have plenty of freedom to experiment and can take your time with the process.
Local development is usually accomplished with help from a platform such as Local by Flywheel, MAMP, or XAMPP. In other cases, you may be using a local staging site to test new plugins, a theme change, or updates before implementing them on your live site. This can help prevent errors.
How to move WordPress from localhost to a live site (2 methods)
While localhost is a useful tool, migrating your site to a live server when it’s ready can be confusing if you’re not familiar with the process. There are a few different ways you can go about it, two of which we’ve outlined below.
1. Migrate your website manually
Of the two methods we’ll show you in this guide, migrating your site manually is more difficult and does require some technical knowledge. However, it also gives you complete control over the process every step of the way.
First, you’ll need to migrate your WordPress files from your local installation to your live server. You can do this using a File Transfer Protocol (FTP) client such as FileZilla.
First, access your FTP credentials via your hosting account and enter them in your FTP client to connect to your server:
In FileZilla, the righthand panel shows your live site’s filesystem. Select the public_html folder, as this is where you’ll need to upload the WordPress files from your local site.
In the lefthand panel, navigate to where your local site’s files are stored. Select them, right-click on them, and choose Upload:

Next, you’ll need to move your database from your local site to your live server. You can do this using phpMyAdmin. Navigate to http://localhost/phpmyadmin and enter the username “root” and the password you use for your local site:

Once you’re logged in, click on the Export tab at the top of the screen. You’ll be able to choose either Quick or Custom if you would prefer to tweak some of the options. Once you’ve made your selection, click on Go to download your database:

The next step is to create a new database for your live site and upload the data from your local site to it.
If your host uses cPanel, you can accomplish this by navigating to the Databases section and selecting MySQL Databases. Under Create New Database, give your new database a name. Then click on the Create Database button:

Next, you’ll create a new user. Scroll down to the Add New User section of the MySQL Databases page. Fill in the fields and click on the Create User button:
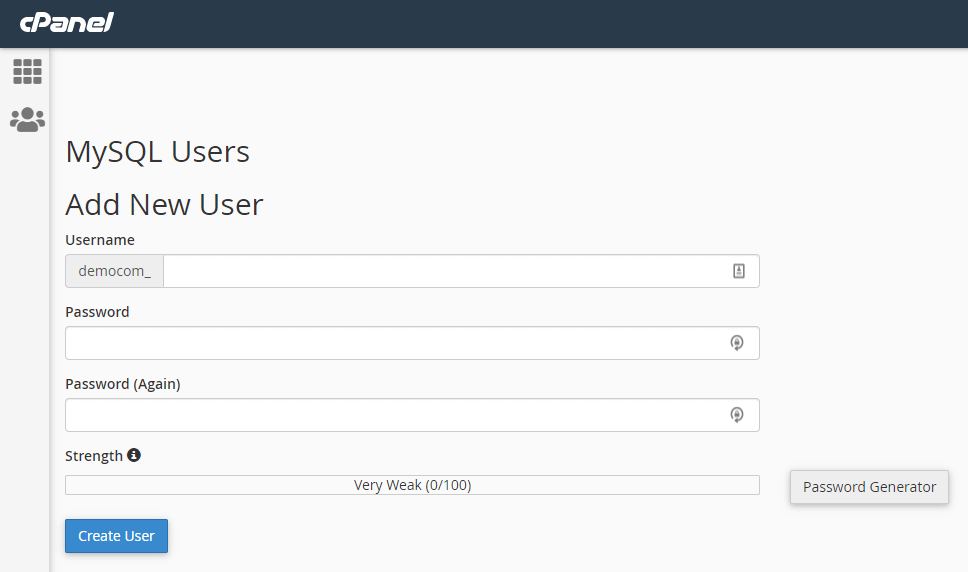
You’ll be asked to set privileges for this new user. You can either grant all privileges or select from the available options.
Now you can import the database you downloaded to your local site. From the cPanel dashboard, click on phpMyAdmin, then select the Import tab. Under the Files to import section, click on the Choose File button and select the database you downloaded earlier:
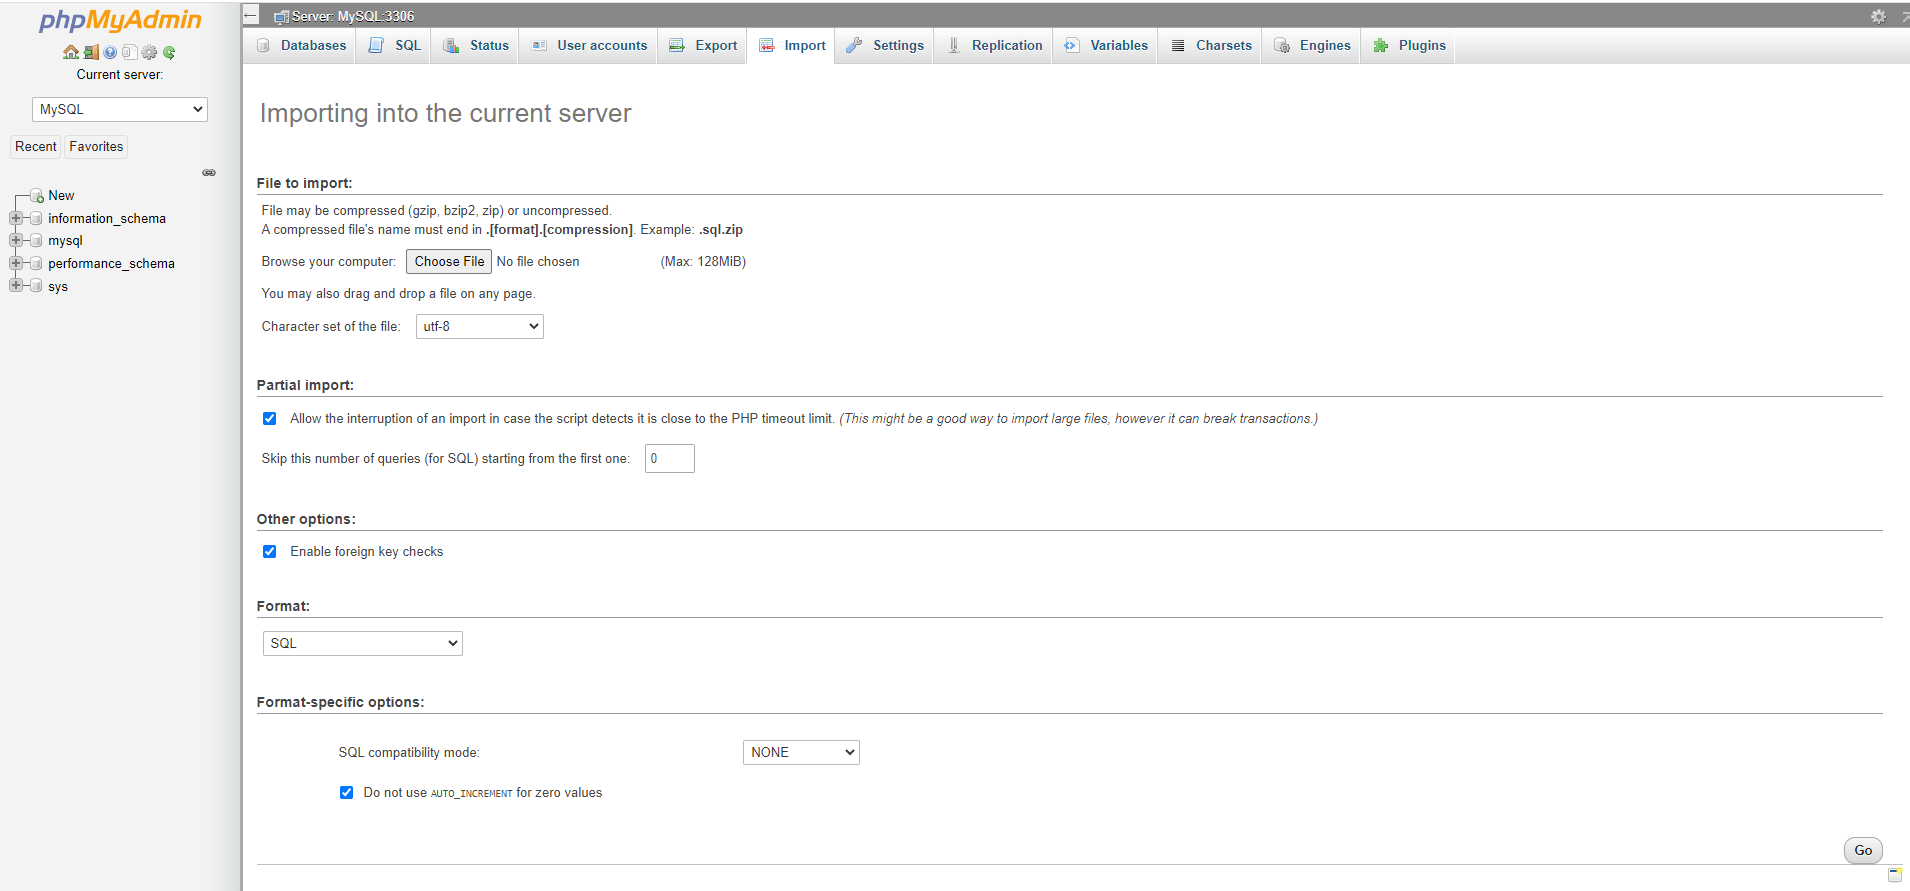
Click on the Go button at the bottom of the screen to import your database to your live site.
Now you’ll have to change your site’s URL. In phpMyAdmin, locate the database you just imported and find the wp_options table. Locate siteurl under option_name. Click on Edit:

Replace your local URL in the option_value box with the one for your live site. Save this change by clicking on the Go button:
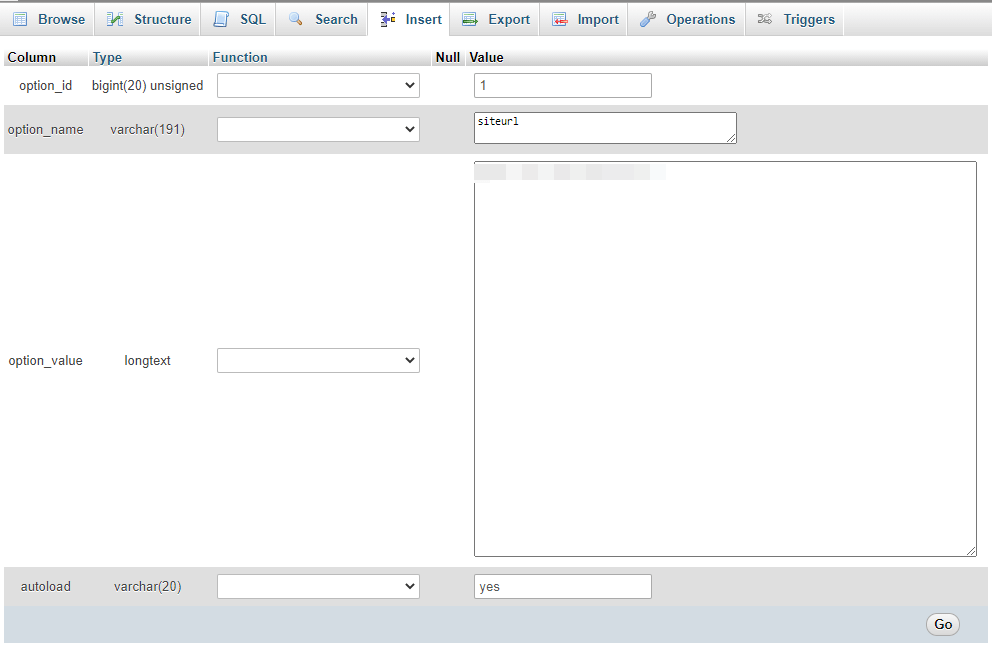
You’ll need to update the home URL as well by repeating these steps for that row.
The next step is to edit your site’s wp-config file to ensure your site uses the correct database. Using your FTP client, download the wp-config.php file from your live site and open it in a text editor. You’ll need to add the database name, username, and password you created earlier to the appropriate lines:
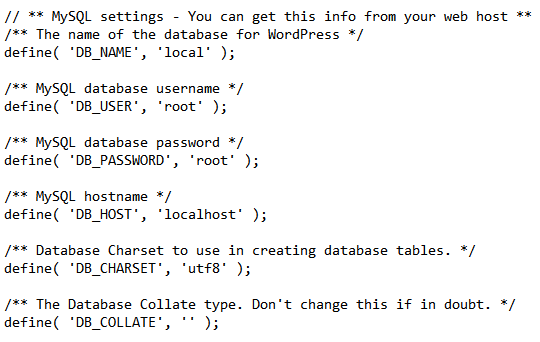
Once you’ve made those changes, save the file. Reupload it via FTP, making sure to overwrite the existing wp-config file.
At this point, you should be able to log into your live site’s WordPress admin dashboard. Navigate to Settings > General. Check that the WordPress Address and Site Address fields show the correct domain name:
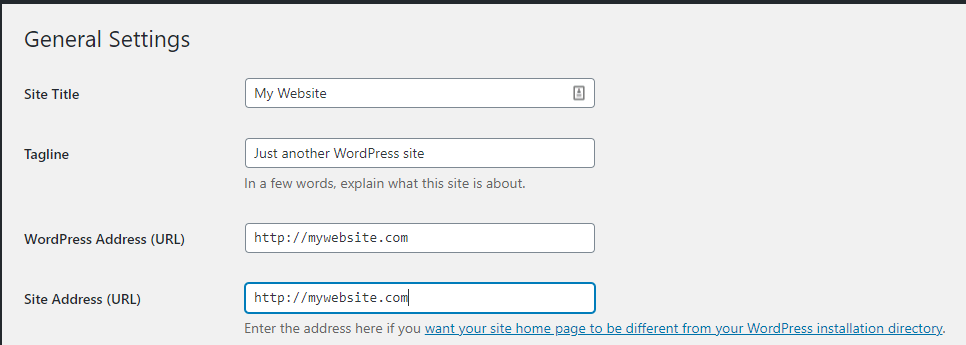
Finally, you’ll likely need to fix broken images and links. You can do this using a SQL query. From phpMyAdmin, click on your database and then select the SQL tab:

Enter the following in the text box, using your own site URLs:
UPDATE wp_posts SET post_content = REPLACE(post_content, 'localhost/my-website/', 'www.mywebsite.com/');
Click on the Go button to run the query. This should fix any broken links and images and your site should be ready for visitors.
2. Move your website using Local Sync
Local Sync from ManageWP is a much faster, easier way to migrate your WordPress site from localhost to a live server. If you haven’t already, add your live site to your ManageWP dashboard using the Worker plugin.
From your ManageWP dashboard, select your live site and then click on Local Sync. You’ll need to enter the URL of your local site:
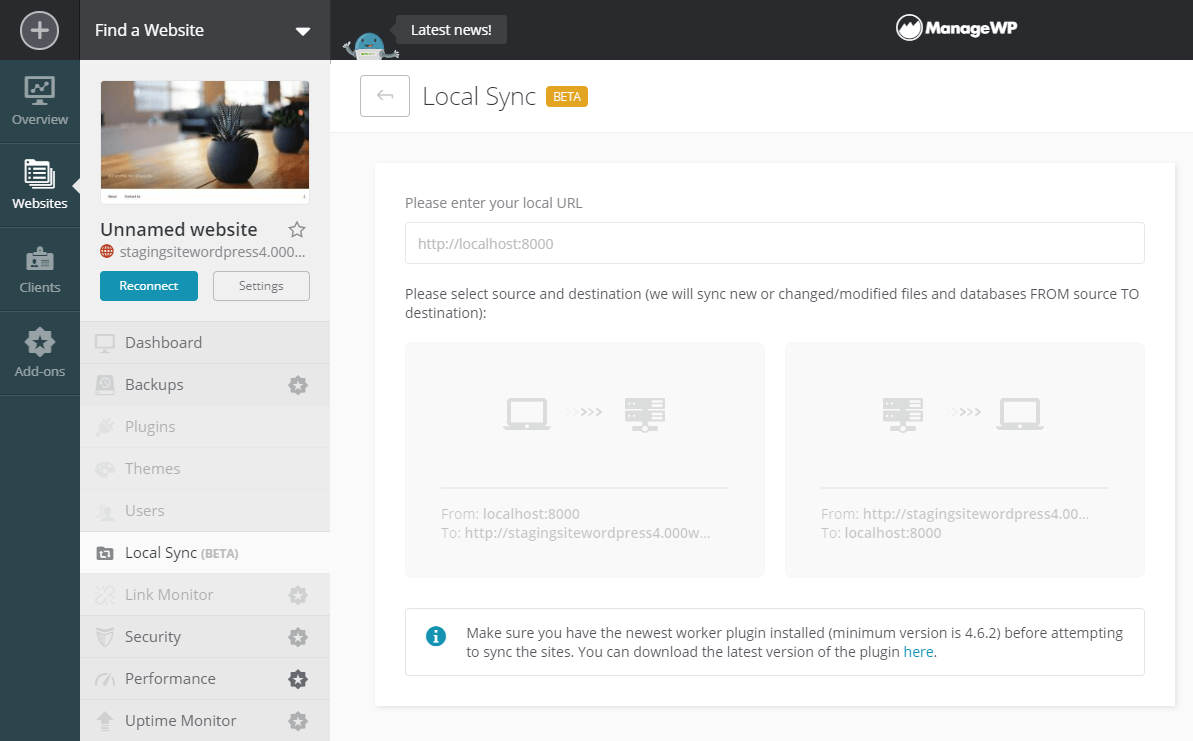
The localhost site will open in a new browser tab and must remain open throughout the synchronization. During this process, Local Sync will hot-swap the database, which means it overwrites the existing database with a new one:
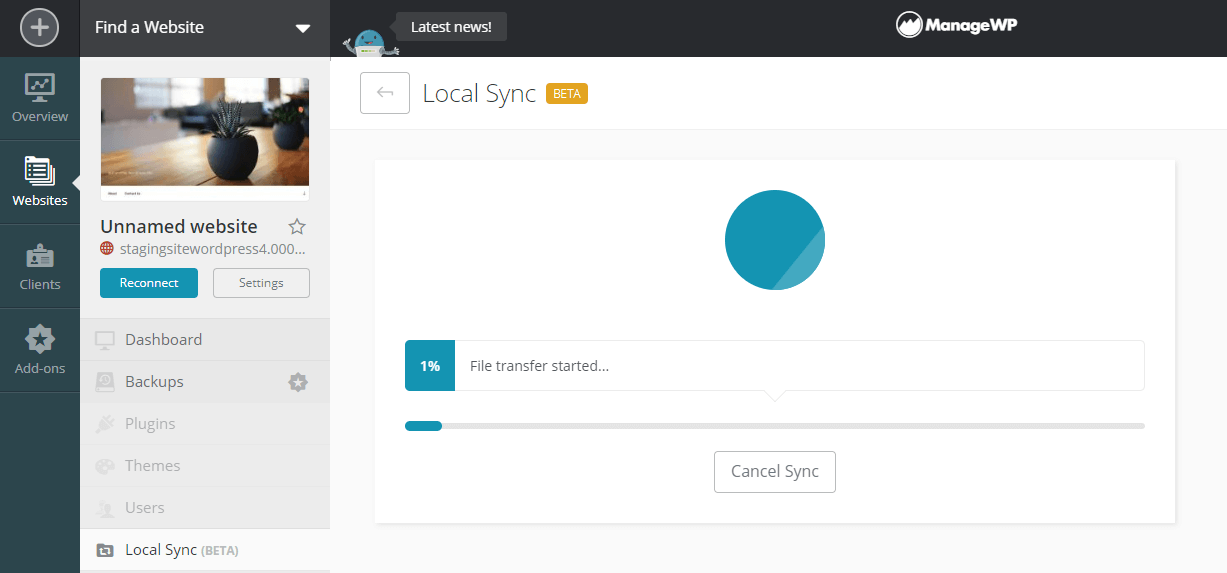
You can also use Local Sync to push a live site to a local environment. This can be especially useful if you’d like to make changes to your site without worrying about breaking it in the process.
When you’re ready to move those changes to your live site, you can use Local Sync again. Only modified files will be pushed in this scenario, which can save you a lot of time.
Conclusion
Moving WordPress from localhost to a live site can be a nerve-wracking experience. With so much to keep track of, it can be easy to make a mistake that causes your website to malfunction.
In this article, we showed you two ways to migrate your website. Carrying out this project manually can be difficult, but you’ll have a bit more control over the process. However, using Local Sync can save you a lot of time and trouble.
Do you still have questions about migrating your local WordPress site? Let us know in the comments section below!
Image credit: Clément H.
Keep reading the article at ManageWP. The article was originally written by Will Morris on 2020-12-08 11:00:54.
The article was hand-picked and curated for you by the Editorial Team of WP Archives.

