Want to start an online tutoring business with WordPress? Online tutoring is slowly becoming the norm in the education industry.
With the right WordPress plugin, like Learndash, you can easily start an online tutoring business even if you’re an absolute beginner.
In this tutorial, we’ll show you how to start an online tutoring business (step by step).
Why Start Online Tutoring
Let’s take a look at a few benefits of online tutoring.
- No geographical constraints: Teach and learn from anywhere in the world.
- Saves money and time since both the tutor and student don’t have to commute to attend the class.
- It’s extremely helpful in times of emergency like the Covid-19 crisis time when people across the globe are forcefully locked down in their homes to protect themselves from the deadly virus.
Step 1: Creating an Online Tutoring Website
First off, create an online tutoring website with WordPress. To create a website, you’ll need a domain name and web hosting.
A domain name is the URL address that users will type in their browsers to access your website (For example, google.com or isitwp.com).
Web hosting is where people store the content and files of their websites.
When a visitor tries to access your website by typing in your web address (domain name), then they’ll be directed to the website files stored on your web hosting server.
When you want to create a new website from scratch, the combined cost of domain and hosting can seem like quite a lot.
That’s why we’ve worked out a deal with Bluehost to offer our users a free domain name, free SSL, and over 60% off on WordPress hosting.
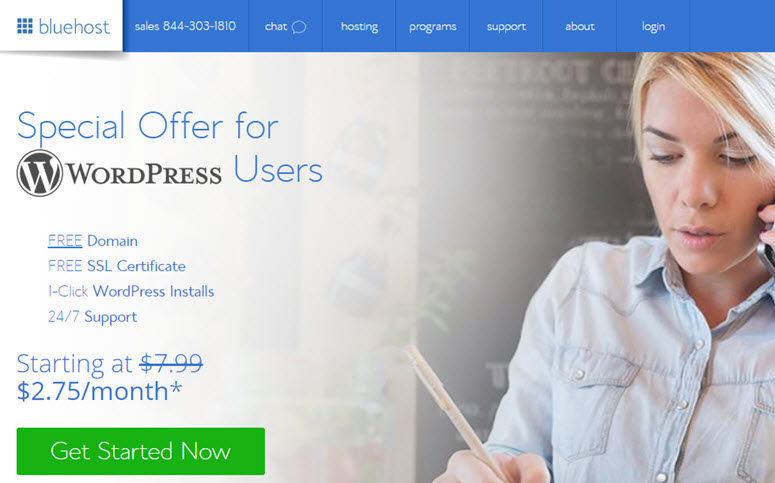
For more details, check out how to build a website from scratch.
Step 2: Installing and Setting up the LearnDash LMS Plugin
The next step is to install the LearnDash plugin. LearnDash is a popular learning management system (LMS) plugin that makes creating online courses easy with all its powerful features. You can use it to create courses, quizzes, lesson plans and a lot more.
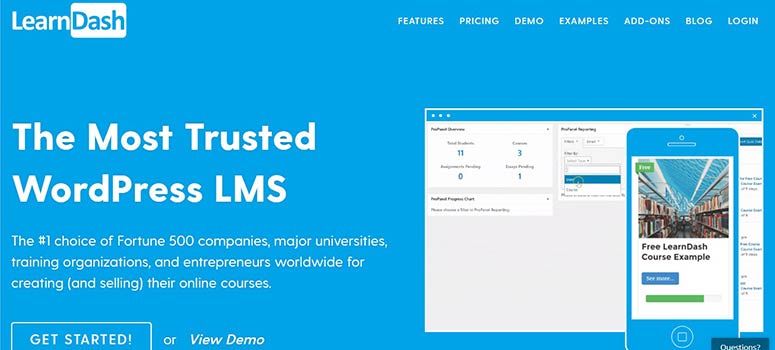
Here’s how you can install a plugin on your WordPress site. If you want to know more, check out our LearnDash review.
Once the plugin is installed and activated, go to LearnDash LMS » Settings » LMS License. Here you can enter your email address and license key.
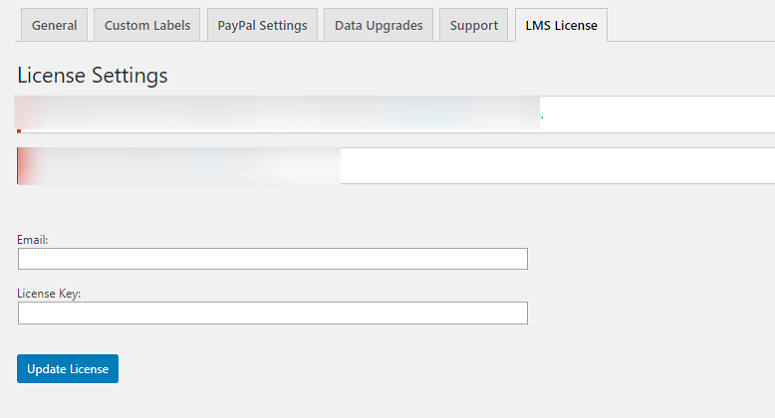
Now click on the Update License button. Next, go to the PayPal Settings tab. In this tab, you will have various options. Just fill them out and click on the Save button on the right of your screen. These settings will help you receive online payments from your users.
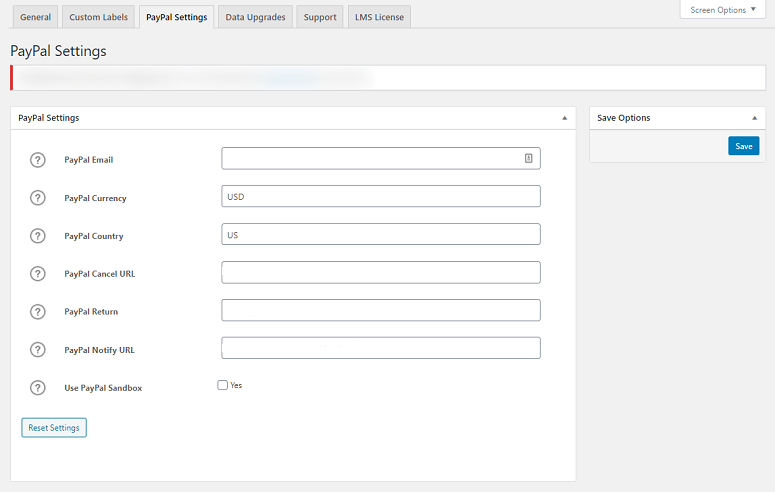
Your basic settings are configured correctly. Now you can start creating your online course. Let’s see how to do it.
Step 3: Using LearnDash to Create Your Courses
To create a course with LearnDash, go to LearnDash » Courses » Add New

You’ll now be on a new screen where you can start creating your course. You can start by adding a title to your course. Once the title is added, go ahead and add a description for the course.
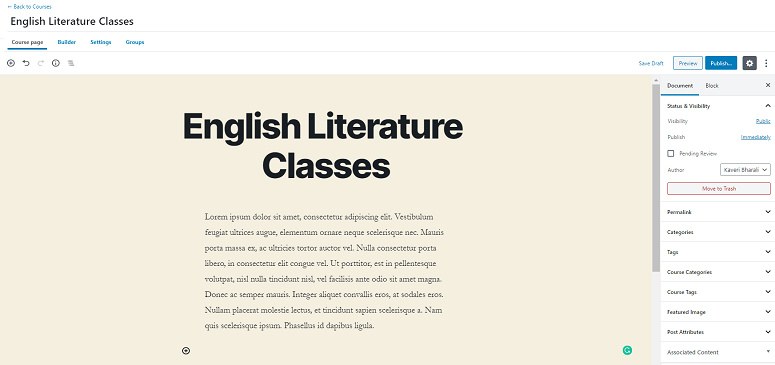
You can also add a featured image that will appear as a course thumbnail. You even have options to add categories, tags, etc. to your course.
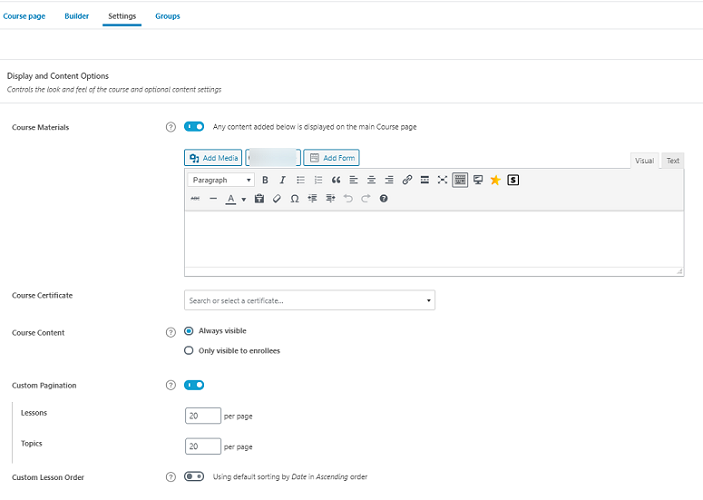
Once done, switch to the Settings tab. You’ll see several options here.
- Ability to add course materials that are visible on the main course page
- Add a course certificate
- Choose the course visibility options
- Set up Custom pagination and Custom lesson order
By scrolling further down, you’ll see options to select how you want your users to access your course material.
You can either provide access to everyone, require users to register to get access or make it available only to premium users.
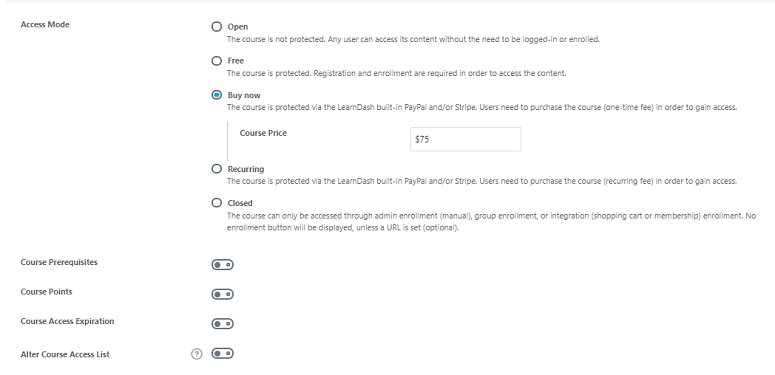
You can also select the course pre-requisites, points, access expiration, and alter the access-list options.
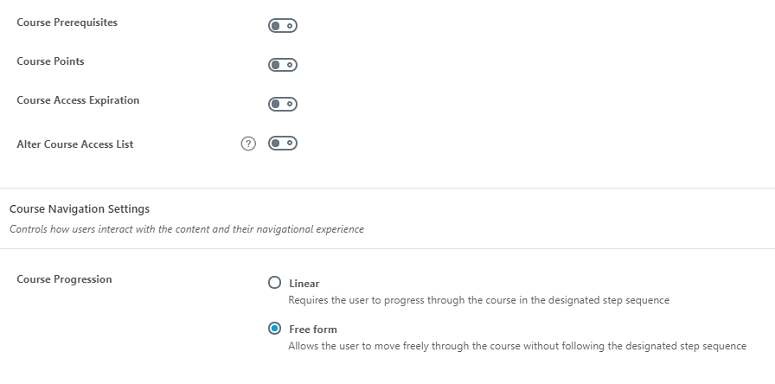
Once you’re done with your settings, click on the Publish button for your course to be available for users.
Step 4: Adding Lessons to Your course
The next step is to create lessons for your course. For that, go to the Builder tab. Here you can create new lessons and quizzes for your course. Click on New Lessons to add a lesson. For quizzes click on New Quiz.
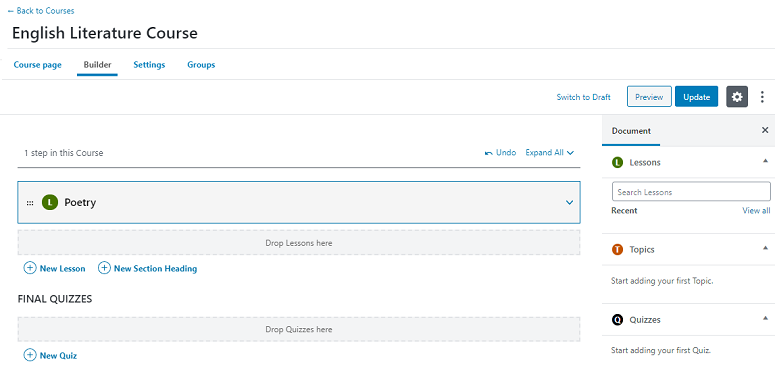
You can also add new lessons by going to LearnDash LMS » Lessons » Add New.
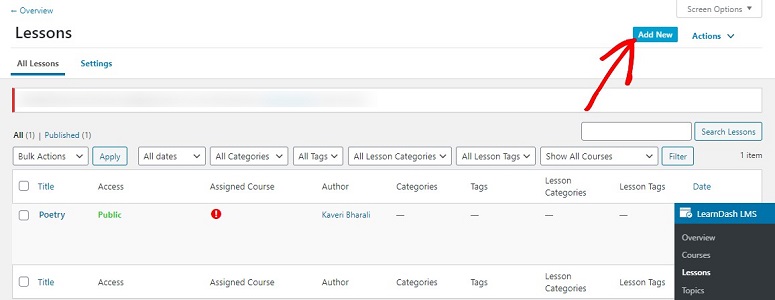
This will take you to the lesson editor where you can start creating your lesson. You can start by adding a title and then create your lesson just like you would create a normal post. Feel free to insert links and upload multimedia files.
Once the lesson is created, go to Settings tab. Here you can configure the appearance of your lessons and manage user access.
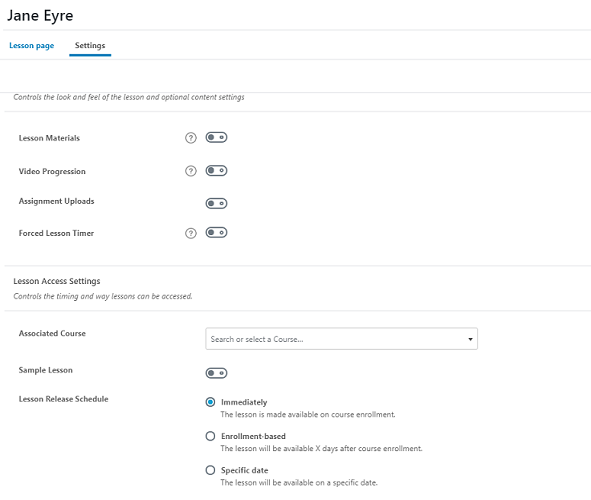
Here you can also schedule your lessons.
Once done, save your settings by using the Save Draft option. You can also add more topics to each of your courses and lessons by going to Topics » Add New.
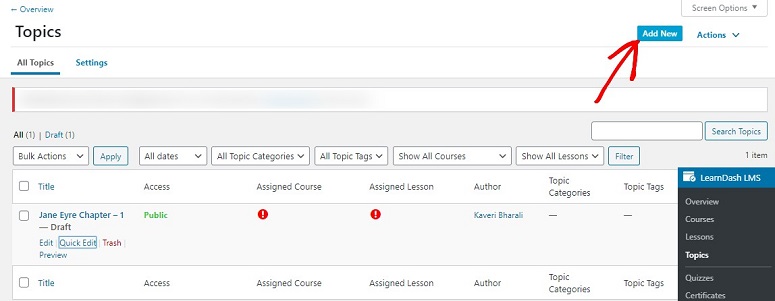
Once you create your lessons, you can assign it to a course you’ve already created. You can do that by going to the Settings tab on the top of your page.
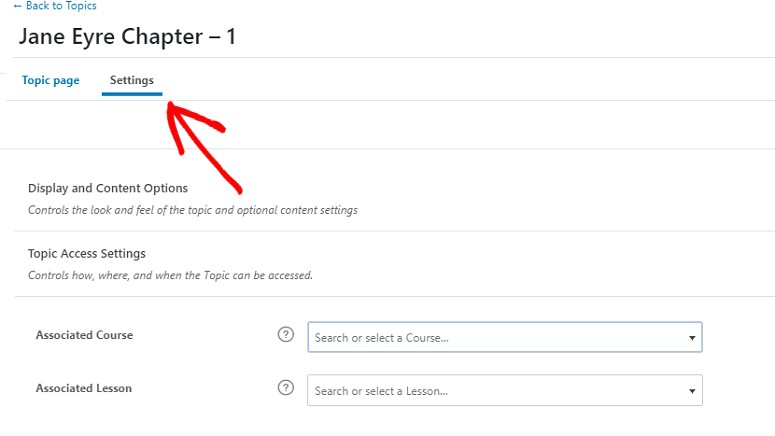
Now under Topic Access Settings, you’ll see two options. For course, you can click on the drop-down arrow under the Associated Course option and then select the course in which you want to add your topic. You can do the same for lessons too.
Step 5: Enabling Assignments with LearnDash
LearnDash also lets you add assignments to your courses. This option is available under the Lessons » Settings . Here you can enable Assignment Uploads. This will expand a lot of options using which you can set your upload file size, limit the number of file uploads, etc.
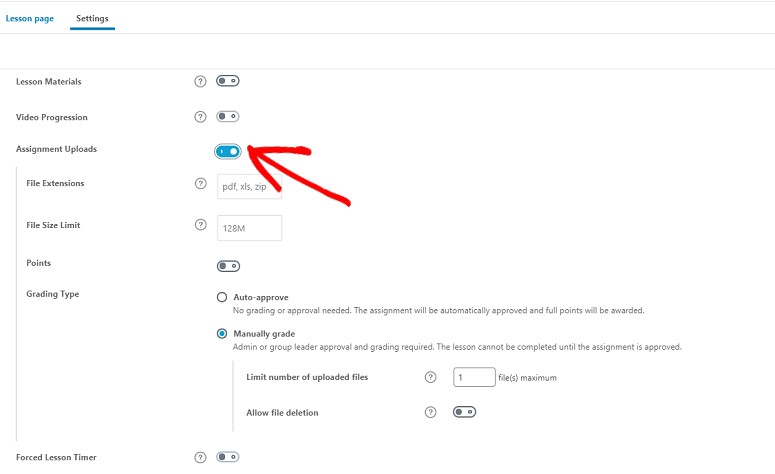
Once your assignment is created, you can view them in LearnDash » Assignments.
Step 6: Creating Certificates for Your Users
The next step is to create certificates for your users that can be awarded at the end of a course. To create a certificate, go to LearnDash » Certificates
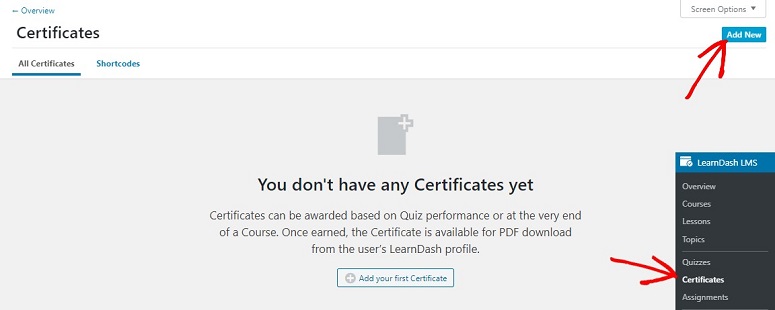
Now click on Add New. Here you can create your certificates and customize them to make it more appealing. Once done, you can associate it with any course you want.
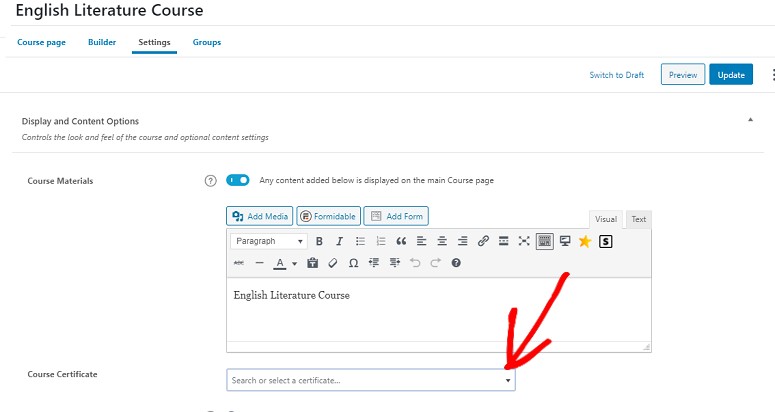
For example, to add a certificate to a specific course, go to LearnDash » Course . Now click on Edit » Settings. Here you’ll have options to add your certificates by clicking on the drop-down arrow and selecting the required one.
Step 7: Creating Membership Courses
Now that the course is ready, you might also want to create a membership program for your courses. By creating a membership site, you can make your courses available to registered users only. You can hide your premium content and let users unlock them with a key. This key can be accessed only when they purchase a membership on your site.
This is a great way of making recurring money from your online tutoring business site.
You can easily add memberships to your site by using the MemberPress plugin. With this plugin, you can transform your regular site into a membership site. Here’s how you can install the MemberPress plugin.
Once the plugin is installed and activated, you can start using it to convert your regular site to a membership site. Here’s how you can add memberships with MemberPress.
This plugin offers also comes with payment features and subscription control options as well.
That’s it! Your online tutoring class is now ready. Wasn’t that easy? If you want to sell more products or services on your website, you can check out how to add an eCommerce storefront to your site.
Keep reading the article at IsItWP – Free WordPress Theme Detector. The article was originally written by Editorial Team on 2020-04-01 03:44:26.
The article was hand-picked and curated for you by the Editorial Team of WP Archives.

