As a web professional, you’re probably well-versed in the WordPress back end. However, inexperienced users – such as your clients – might not be so familiar. They could find the number of options in the dashboard intimidating, or the WordPress branding and default aesthetics might put them off.
Fortunately, you can white label your WordPress client websites to improve their User Experience (UX). By customizing the dashboard, you can create a back end environment that reflects both your client’s branding and their comfort level with the platform.
In this article, we’ll discuss the benefits of white labeling WordPress client sites. We’ll also take you step-by-step through three easy ways to do it. Let’s get started!
The benefits of white labeling your WordPress client websites
As you may already know, white labeling is the process of removing the branding of a product or service (such as WordPress) and replacing it with a different brand identity (such as that of the client the site belongs to). This can take the form of aesthetic alterations such as changing out logos as well as replacing text or removing certain features entirely.
For example, if you’re worried about someone accidentally uninstalling a vital plugin, you can hide the entire WordPress Plugins screen before giving them access. Likewise, some page builders enable you to white label them so you don’t have to field uncomfortable questions about site design.
This personalization process can make a huge impression on users. It can also help you create a consistent brand identity across both the front and back ends of a site – especially if user registration is enabled. For instance, users at the login screen will see your client’s logo instead of WordPress’.
You can implement these changes with the addition of some simple code. Or, there are plugins that can do the job for you. No matter what your preference is, you can impress clients with your WordPress skills and build your professional reputation.
3 ways to white label your WordPress client websites
White labeling provides a subtle touch of powerful personalization. Below, we’ve explored three ways to implement it on your WordPress client sites.
However, before you jump in, make sure you’re prepared. Since you may be editing key files during this process, you’ll want to:
Without further ado, here are some tips for how to white label WordPress.
1. Change the login screen to reflect your branding
The WordPress login screen is probably one of the first things you and your clients see. Customizing it is an easy way to achieve a professional, polished look.
If you haven’t already, you should consider changing the default login URL before you start. It’s an easy way to personalize the site while also increasing security.
Next, substitute the default WordPress logo above the login form with your client’s branding:
This will minimize confusion among users who come to this page to log into your client’s site. The WordPress logo may throw them off, but having consistent branding across the front and back ends will reassure them they’re in the right place.
The quick and easy solution for this is to use a plugin such as Custom Login Page Customizer by LoginPress:

In addition to providing an intuitive editor for uploading your client’s logo and changing its link, this plugin also enables you to change the background, button appearance, error messages, and more.
Change the login logo with code
If you would rather go the manual route, first locate the image file of your client’s logo. It should be no larger than 80 x 80 pixels.
Next, use your FTP client to navigate to your child theme files. Create a directory inside named Images:

Save the logo image file inside. Then, open the child theme’s functions.php file with your preferred editor. It should look something like this:
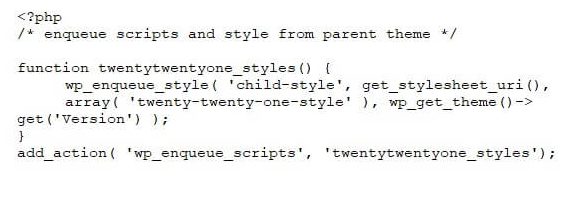 Copy and paste this code from the WordPress Codex at the bottom of the file:
function my_login_logo() { ?>
  <style type="text/css">
    #login h1 a, .login h1 a {
      background-image: url(<?php echo get_stylesheet_directory_uri(); ?>/images/site-login-logo.png);
        height:65px;
        width:320px;
        background-size: 320px 65px;
        background-repeat: no-repeat;
        padding-bottom: 30px;
    }
</style>
<?php }
add_action( 'login_enqueue_scripts', 'my_login_logo' );
Be sure to replace site-login-logo.png with the file name of your client’s logo. You can change the padding-bottom value to adjust the space between the logo and the login fields. The height, width, and background-size values can likewise be adjusted to your preferences.
If you want to change the logo’s link as well, copy and paste the code below under the first snippet:
function my_login_logo_url() {
return home_url();
}
add_filter( 'login_headerurl', 'my_login_logo_url' );

function my_login_logo_url_title() {
return 'Your Site Name and Info';
}
add_filter( 'login_headertitle', 'my_login_logo_url_title' );
After all of that, your child theme’s functions.php file should look something like this, with the new additions highlighted:
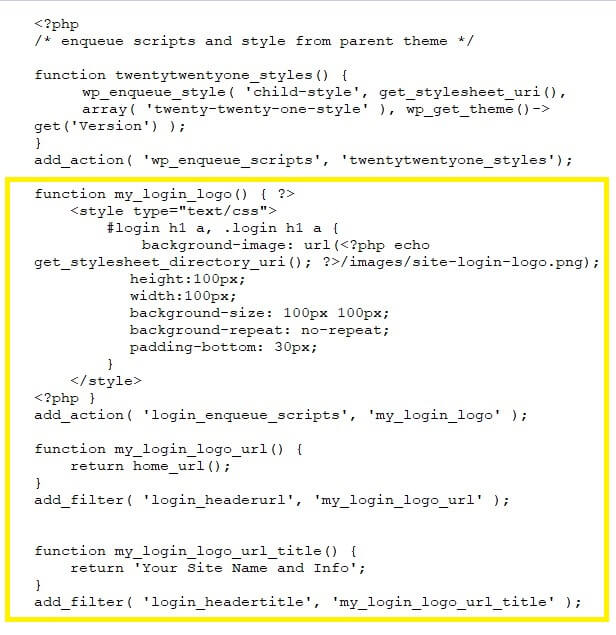
These changes will make your client’s login page look something like this:
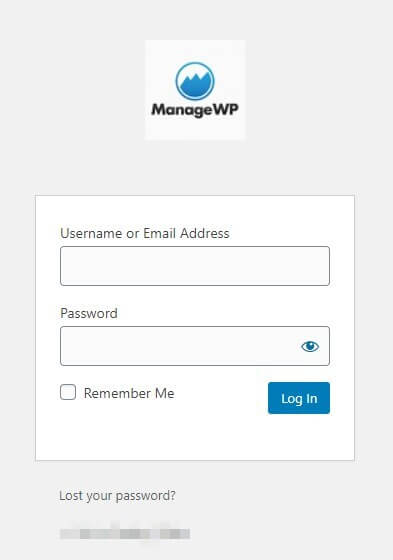
You can further style this page with CSS as outlined in the WordPress Codex.
2. Remove widgets or menu items from the dashboard
The dashboard is a WordPress site’s command center. Optimizing it for both functionality and aesthetics is critical.
For example, let’s say that you’re creating a site for a client who isn’t terribly technically inclined. You might want to hide the Settings area from the dashboard menu so they won’t have to worry about it.
To do this, you just need to open up your child theme’s functions.php file and add the following code:
function remove_menus(){
remove_menu_page( 'options-general.php' ); //Settings
}
add_action( 'admin_menu', 'remove_menus' );
You can remove other menu items by replacing options-general.php with the relevant menu item. If you ever want to bring the hidden options back, just delete the code.
Additionally, you can edit the dashboard with the Ultimate Dashboard plugin. You can use it to customize which widgets are visible, as well as other aspects via custom CSS:

There are also plugins for if you’re looking to change the dashboard’s aesthetics. Slate is one example. You can tweak the theme to match your client’s branding with ease:

Finally, if you want to be sure clients won’t edit site files, all it takes is a single line of code. Open wp-config.php and add the following:
define( 'DISALLOW_FILE_EDIT', true );Save the file to prevent client edits.
3. Use ManageWP’s White Label feature to customize communications
Creating your own unique client communications can be an impressive finishing touch to the white labeling process.
ManageWP can help you maintain multiple sites in several ways, including installing updates, creating backups, and monitoring analytics. It also has a White Label function.
In your ManageWP dashboard, navigate to the White Label feature by mousing over your username in the top right corner. Select White Label from the menu:
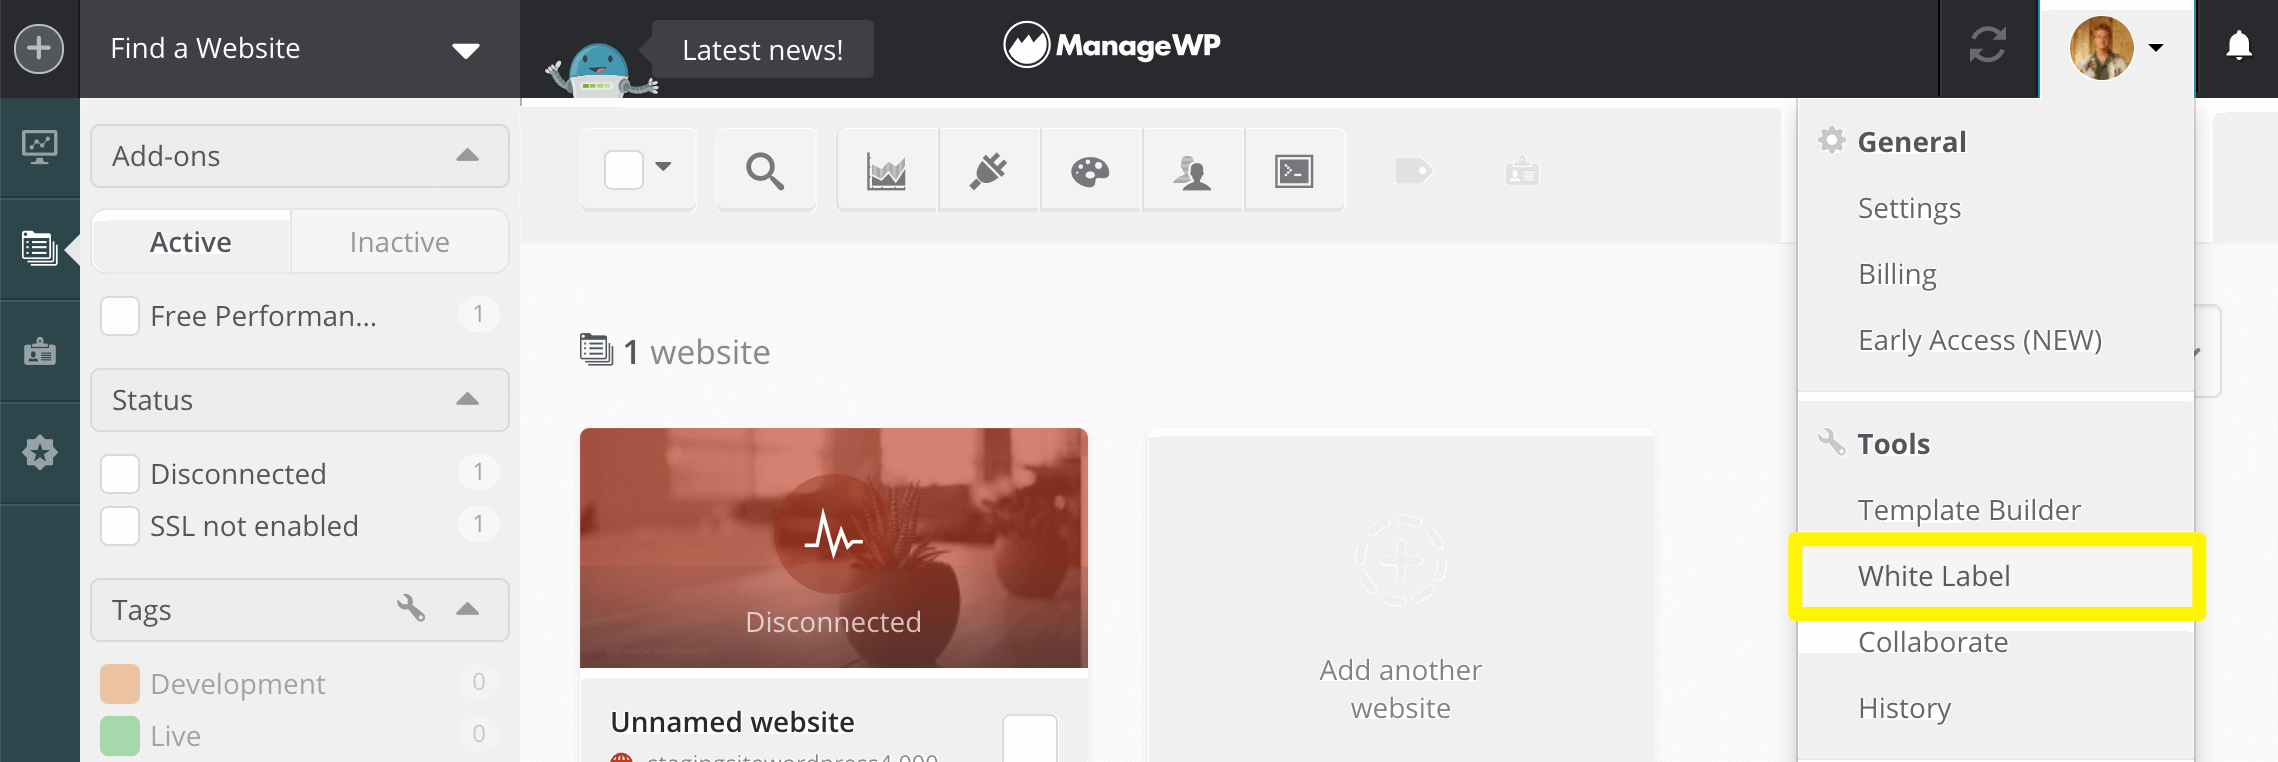
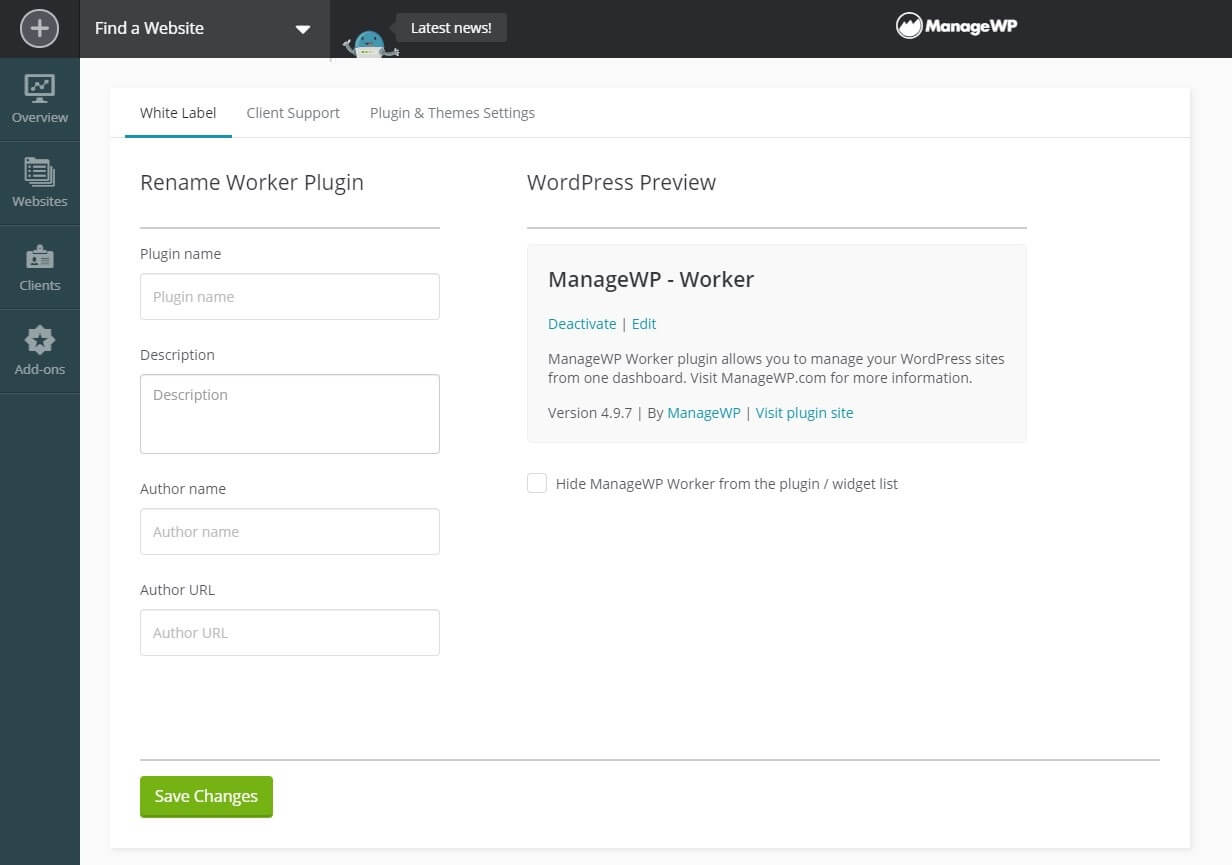
First, you’ll have the option to change the name of the ManageWP Worker plugin as it appears in the WordPress dashboard:
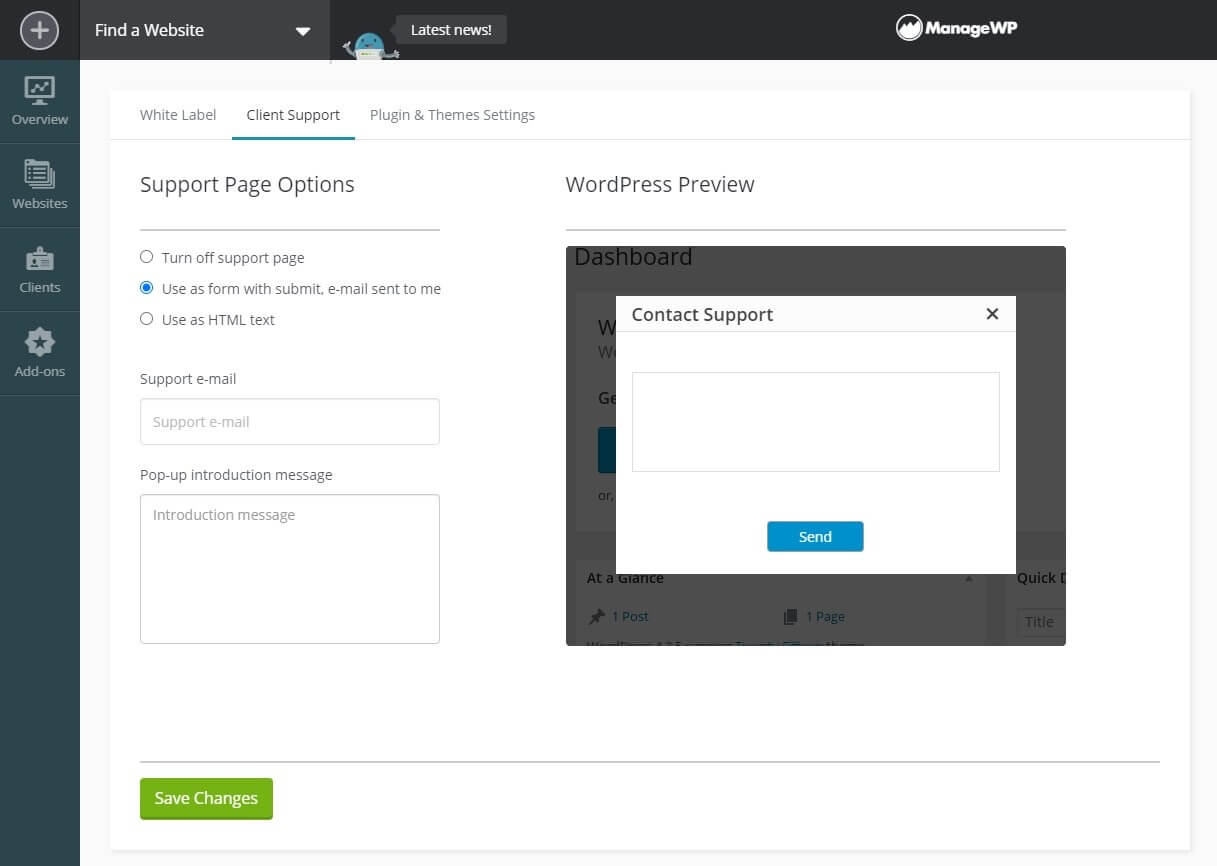
In the second tab, you can add a support page for clients to contact you directly with a custom message. If you want to give them a quick primer or assurance that you’ll get right back to them if they need help, this is the place to do so:
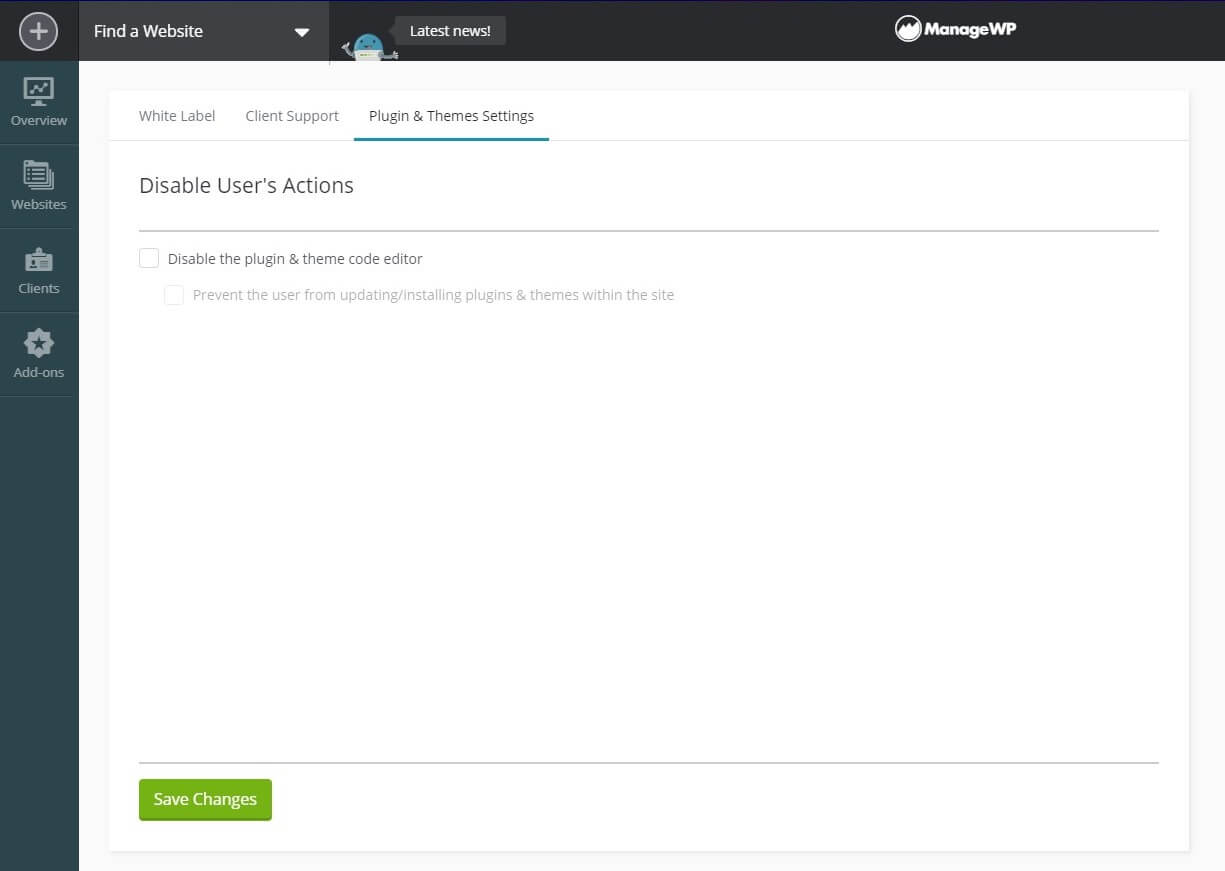
Finally, you can disable user actions so that settings can only be accessed through your ManageWP dashboard. This can help you client-proof your site:
Make sure to always click on the Save Changes button to confirm your settings.
Conclusion
Customizing the back end of WordPress client websites can add a touch of professionalism and polish. With a little bit of code or a helpful plugin, you can expertly personalize this part of any development project.
In this article, we explored three ways to white label your WordPress client websites:
- Add a few lines of code to customize the login page with your client’s branding.
- Use a plugin such as Slate or copy and paste some code to edit the WordPress dashboard.
- Take advantage of the benefits offered by ManageWP’s White Label feature.
Do you have any questions about white labeling a WordPress site? Let us know in the comments section below!
Image credits: Pixabay.
Keep reading the article at ManageWP. The article was originally written by Will Morris on 2021-02-02 11:00:54.
The article was hand-picked and curated for you by the Editorial Team of WP Archives.

