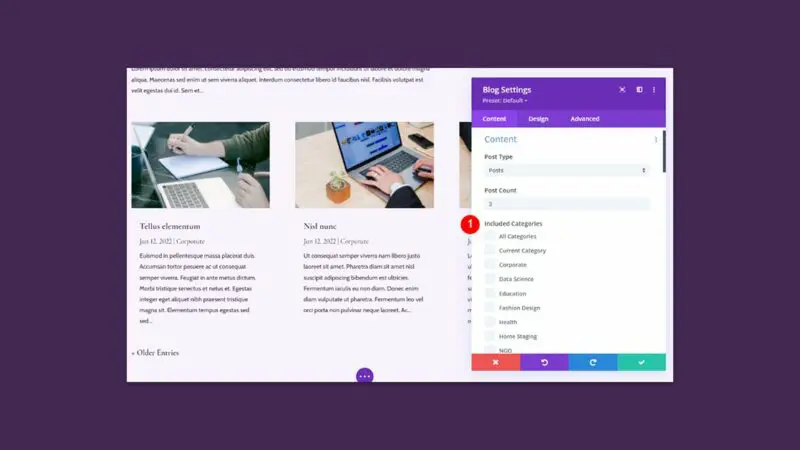
One simple and interesting feature of the Divi Blog module is the ability to show blog posts based on categories. This opens lots of design possibilities such as creating custom templates for your categories or showing a specific category on a certain page. In this article, we’ll see how to show blog posts per category using Divi’s Blog module. We’ll also create a few examples along the way.
Let’s get started.
Why Display Specific Categories?
Before we see how to show blog posts per category, let’s explore what this means, why we’d want to show them by category, and where we’d show them.
Showing posts by category filters all categories except what’s selected to display. You can select the categories manually or have Divi select them automatically based on the circumstances.
For example, if a user selects a category link on your pages, that link could display a list of blog posts of that category. This works for a blog feed for archive pages. In this case, you’d use the Divi Theme Builder to create those category pages and assign them appropriately.
You could also manually display posts from certain categories within your pages. For example, if you offered a service and you have blog posts that focus heavily on that category, you could show a blog module that displayed only those posts on that service page.
Let’s see how to create all of these options using the Divi Blog module.
Divi’s Blog Post Category Options
Divi has category options within the Blog module. It works the same on blog pages and blog templates. Within the Content settings, you have the option to choose the categories. Options include All Categories, Current Category, and each category. You can select multiple categories.
This option allows us to display specific categories on pages and within Theme Builder templates. Let’s look at several ways we can use these category options and see when to use each.
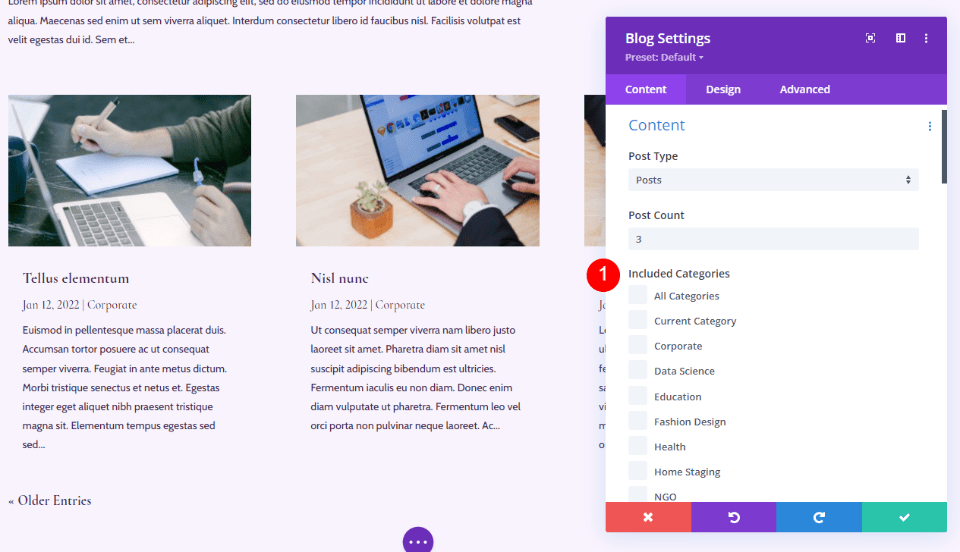
Show Blog Posts per Category in the Divi Theme Builder
The Divi Theme Builder lets us create archive page templates. When a user selects a category, we could have Divi display a template in place of the standard WordPress search results. This gives us more control over our website’s design and keeps the site more consistent. We could create one archive page for all categories or create an archive page to display the feed for the specific category.
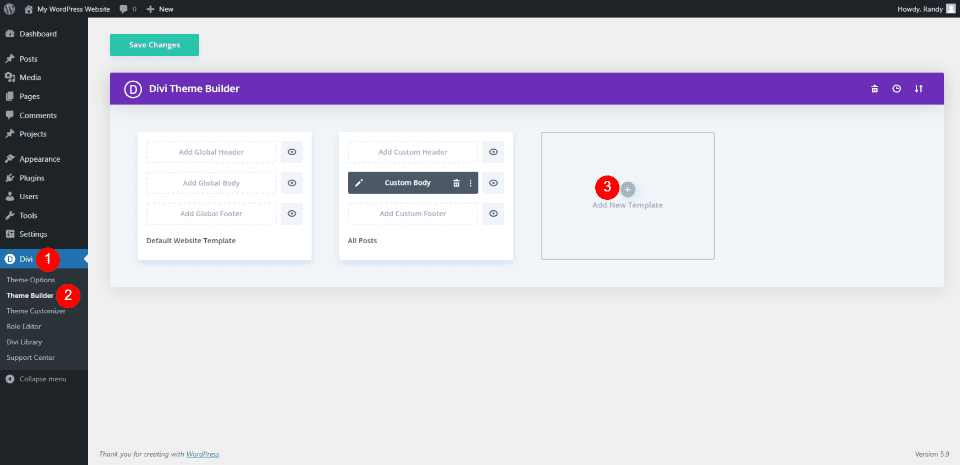
The Divi Theme Builder gives us several options to display posts based on their category. To show posts per category on your page templates, go to Divi > Theme Builder in the WordPress dashboard. If you don’t have an archive template, click Add New Template. You can build from scratch or select one of the many blog page layouts that are available from within Divi.
Show Blog Posts on All Category Pages
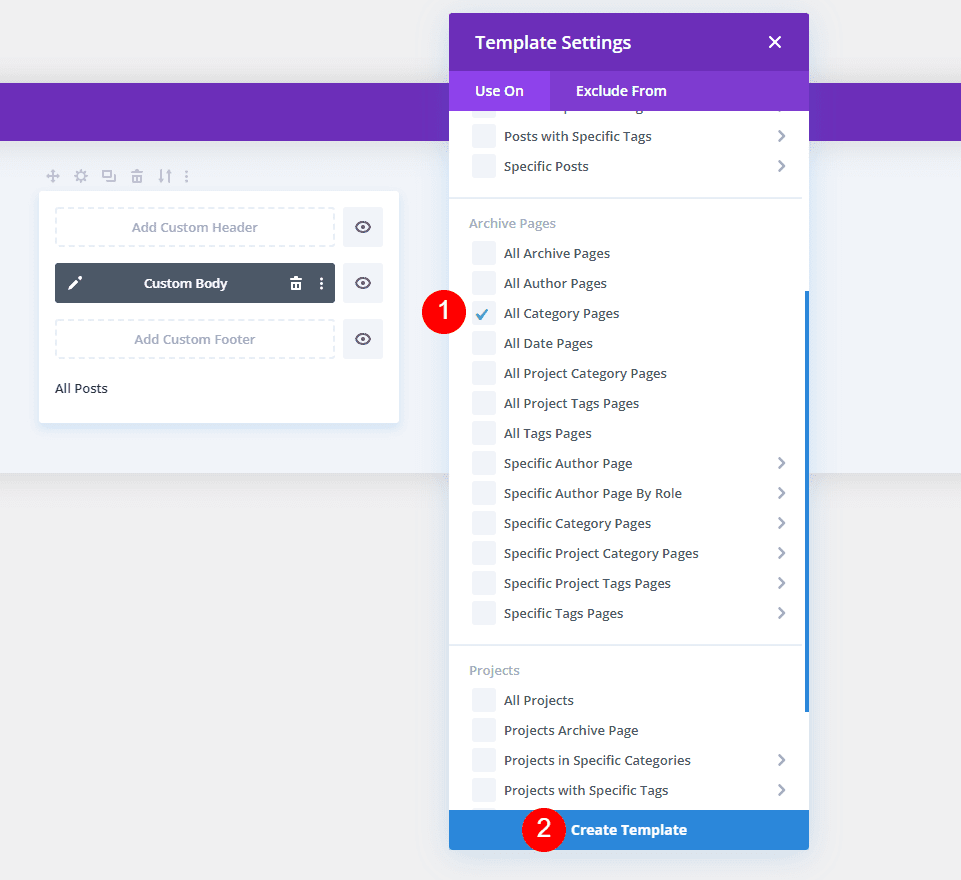
Once you’ve selected to build a template, you’ll have to assign it. Let’s assign one to all category pages and have it to display when a user selects a single category.
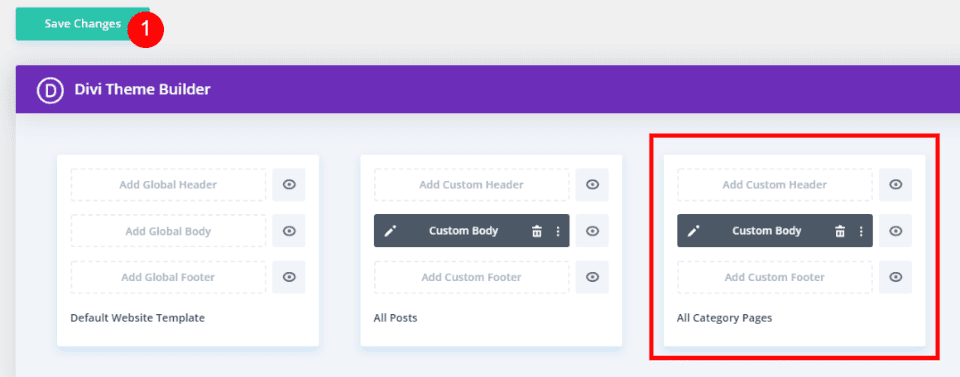
In the Template Settings, scroll down to Archive Pages and select All Category Pages. This will use the same template for every category, but we still need to tell Divi how to select the category for the Archive Page. Next, click Create Template.
Create or upload your blog page template. Open the Blog Module’s settings by clicking the gray gear icon.

In the Content settings, you’ll see Included Categories. Select Current Category. This tells Divi to display blog posts from the category the user clicked on. Close the module and save your settings.
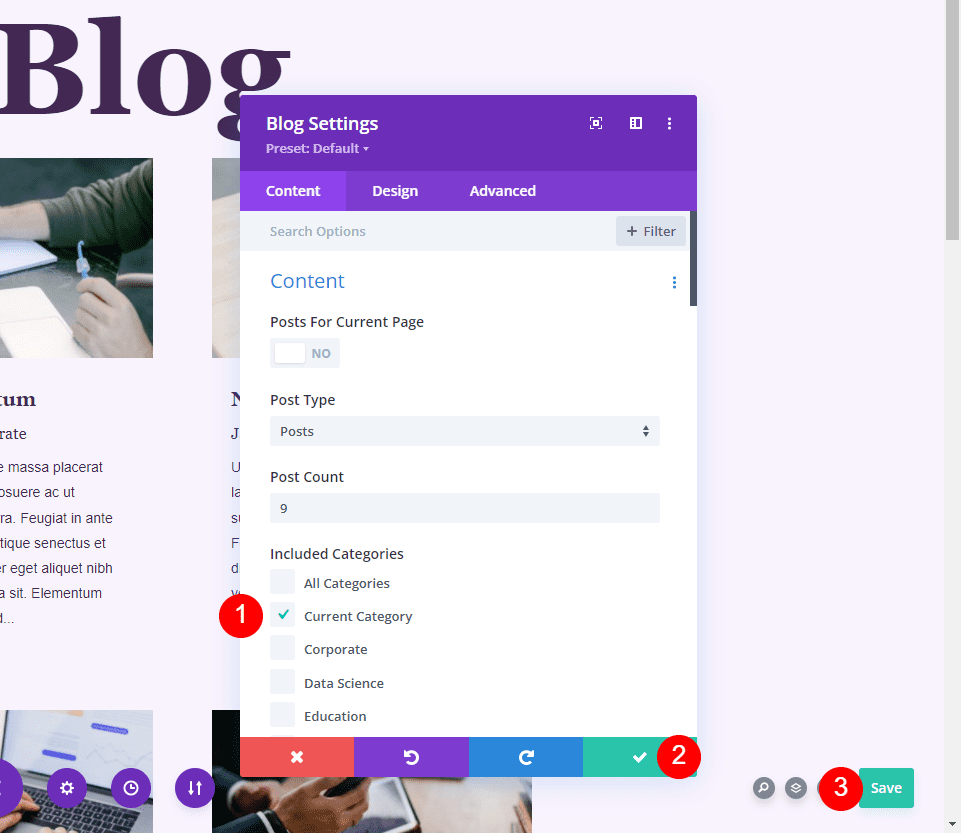
Save your settings. You now have a template that will show blog posts for the category the user selected.
Show Blog Posts on All Category Pages Results
This shows my blog page with multiple categories. The user can select any of the categories to see its archive page.
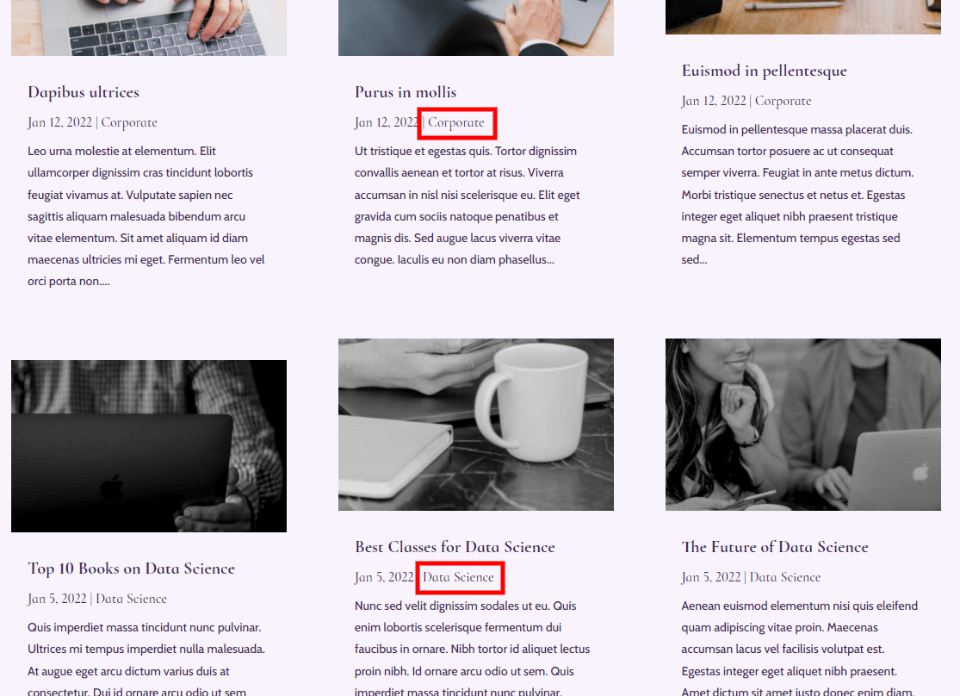
I’ve now selected Data Science. Now, only posts from that category are displayed. I’ve left the page title as it is, but you could expand this by making the title dynamic and selecting the Post Category for it to display as the title.

Show Blog Posts on Specific Category Pages
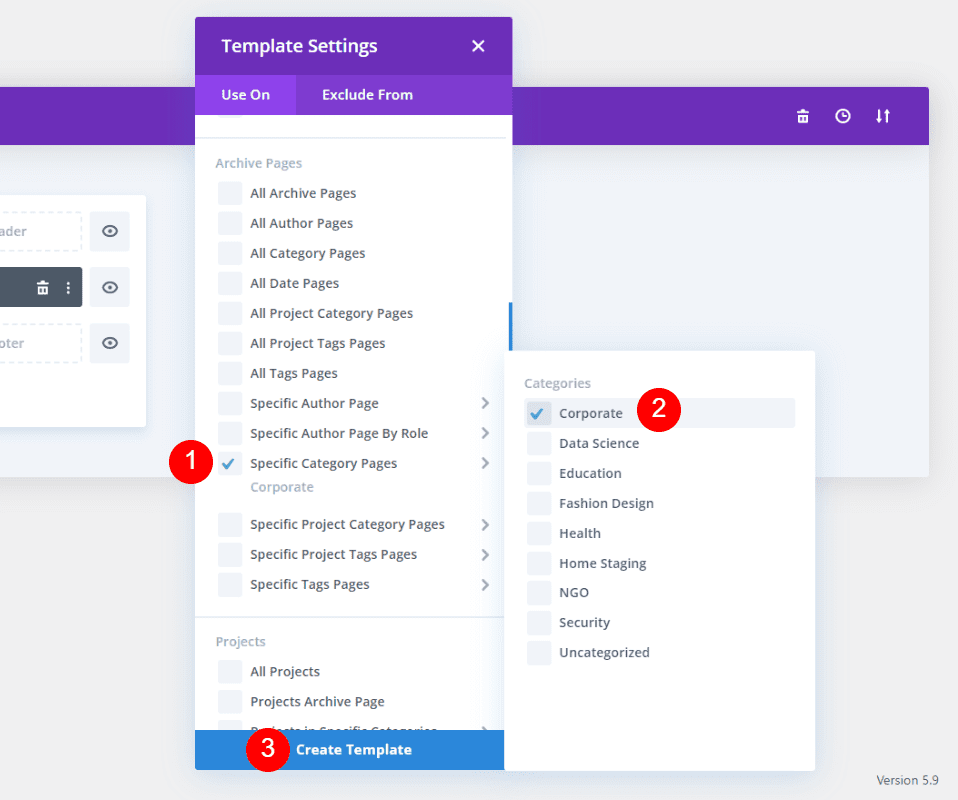
If you want to use a different design for different category pages, you can assign your templates to specific categories. To assign them, select Specific Category Pages under Archive Pages and then choose the category. Next, click Create Template.
Open the Blog Module’s settings by clicking the gray gear icon.

Choose the category you want to display in this template. This tells Divi to only display posts from this specific category. Close the module’s settings and save the template.
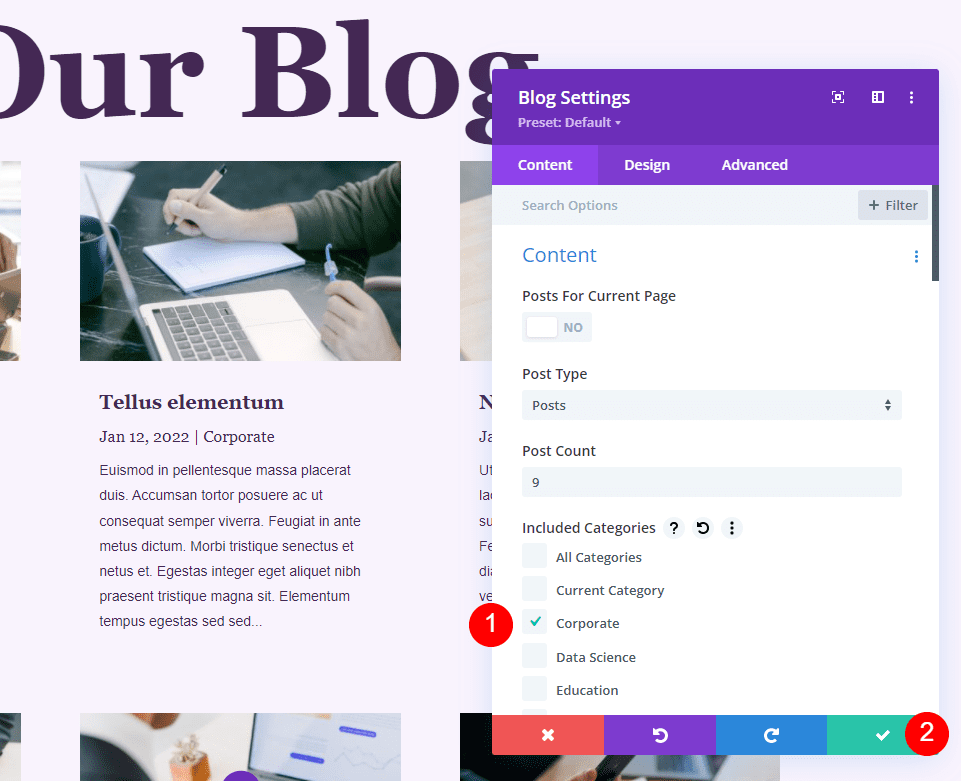
Since this template will only show posts from the Corporate category, I’ve also changed the text for the title at the top of the page. You can open the Text module or just click on the text to change it. Now, close the module and exit the editor.

Save your changes. You now have a custom template that will only display for that specific category.
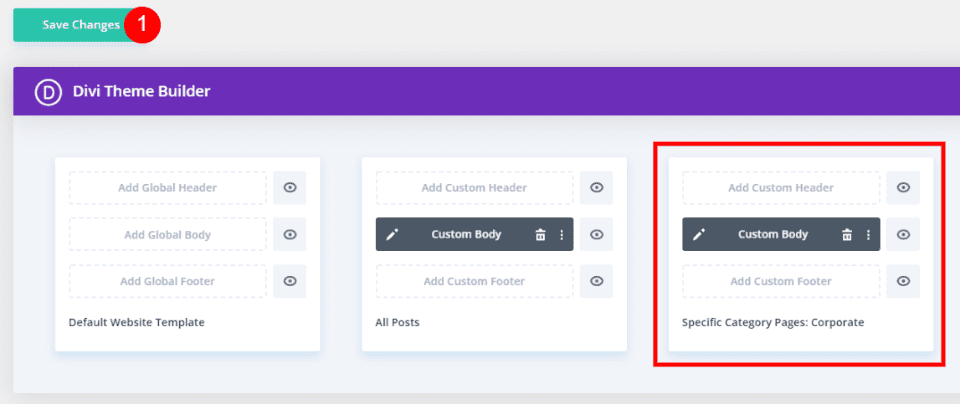
Show Blog Posts on Specific Category Pages Results
Now, if someone selects to see posts from my Corporate category, they’re taken to a blog page with posts only from that category. They’ll see the title at the top of the page. This is a custom page, and you could use different colors, fonts, etc. if you wanted.

Show Posts per Category on Pages
There are times when you want to show blog posts from specific categories within your pages. For example, if you have a page that discusses a class on a certain topic, you might want to include a blog feed that only shows posts from that topic. You could even include multiple Blog modules and show a different post category in each one to divide the topics, create a magazine layout, etc.
Display Blog Posts on a Service Page
Let’s consider an example with a Service page. This is the Service page from the Data Science Layout Pack. If you wanted to show examples of your knowledge, you could share your related blog posts on this page. I’ll add the Blog module from the Data Science Blog page. I’ll quickly step through its settings so you can add it manually, but you could copy and paste the blog section from the Blog Page layout if you prefer.
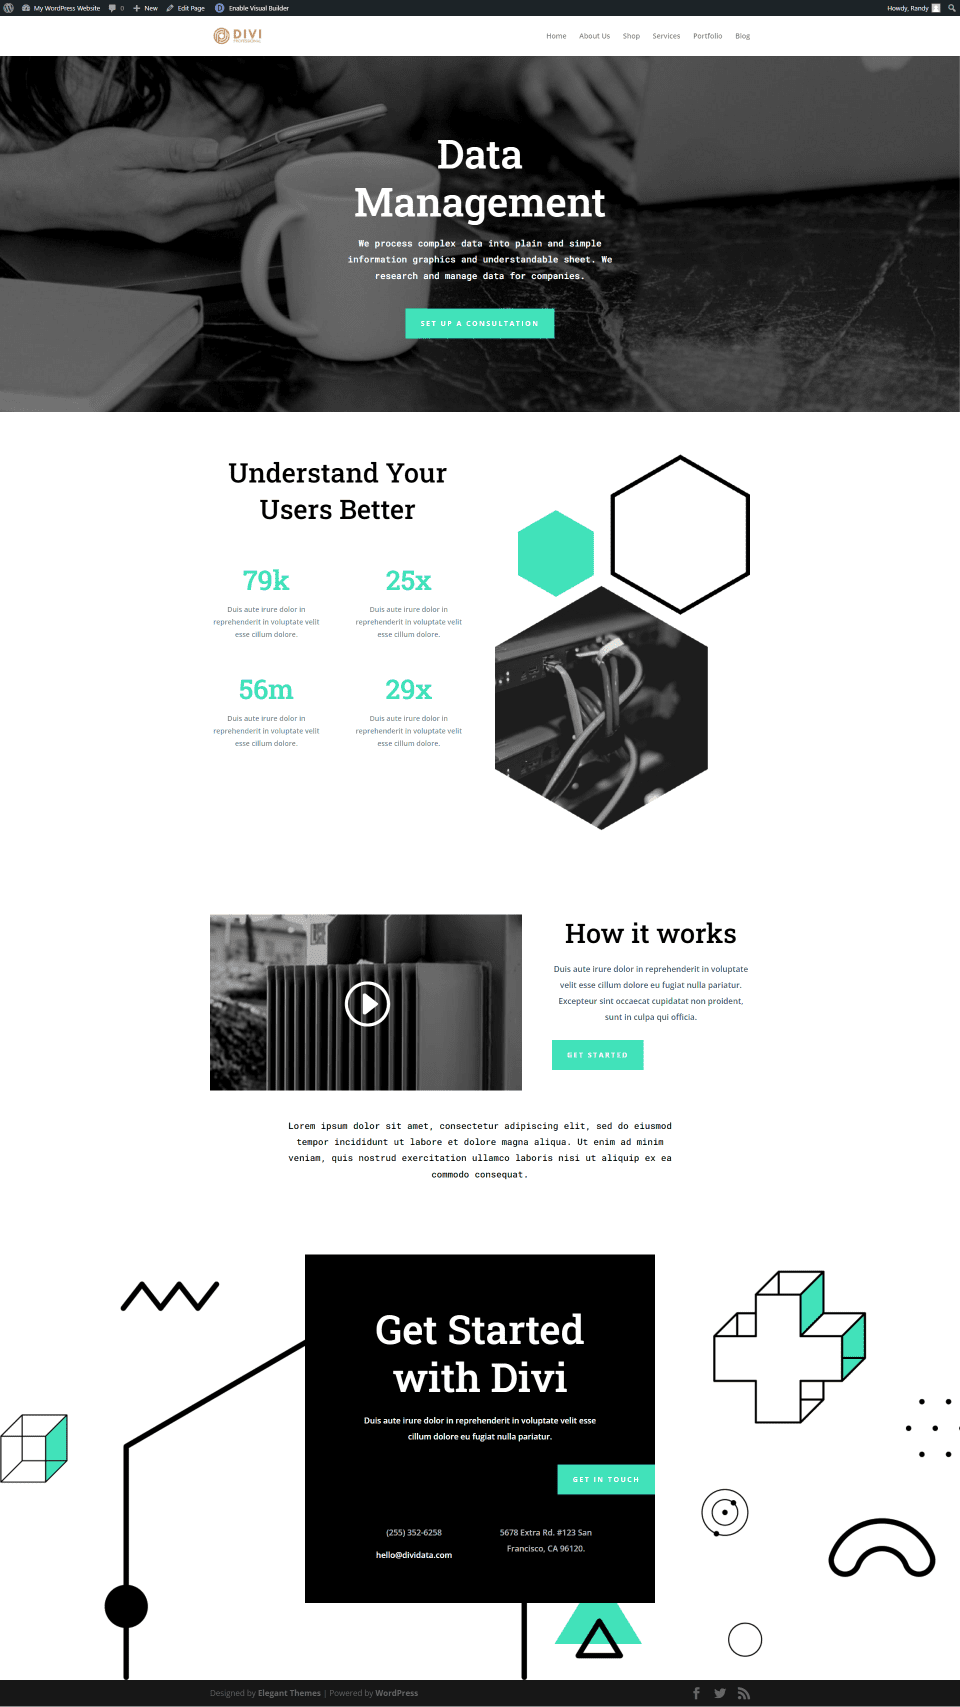
Add a New Blog Section
First, create a new page using the Divi Builder and import the Data Science Service page. On the front end, enable the Divi Builder by clicking the button at the top of the screen.

Add a new Section under the video section. Click the blue plus icon and select Regular.
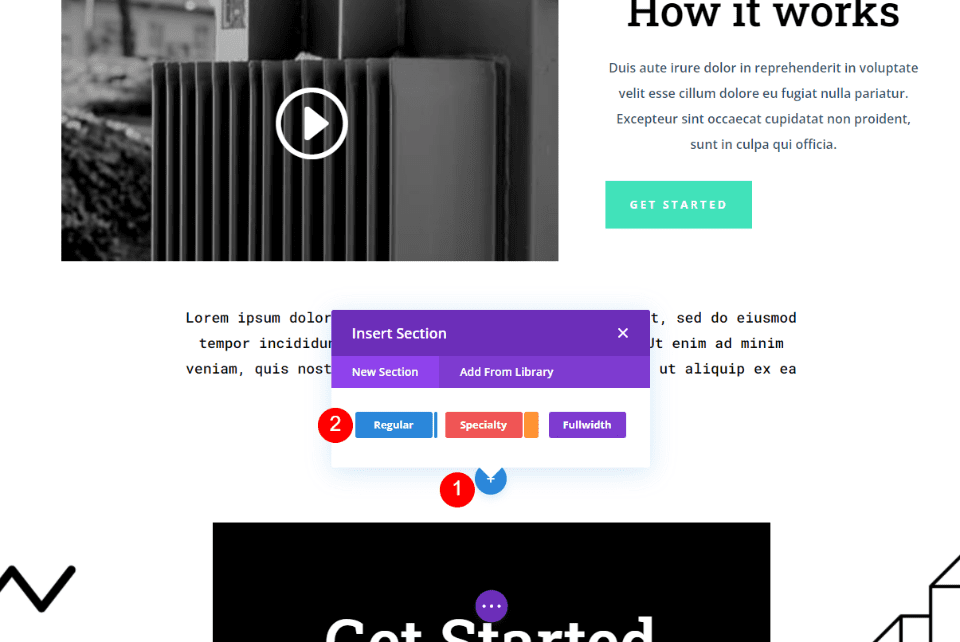
Add a Row
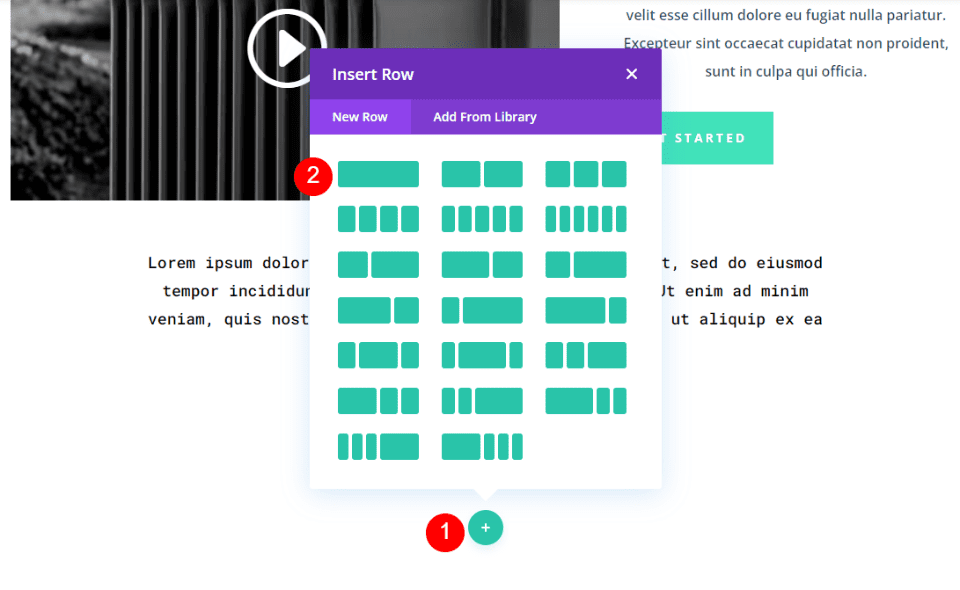
Next, add a new Row. Click the green plus icon and select a one-column Row.
Add a Blog Module
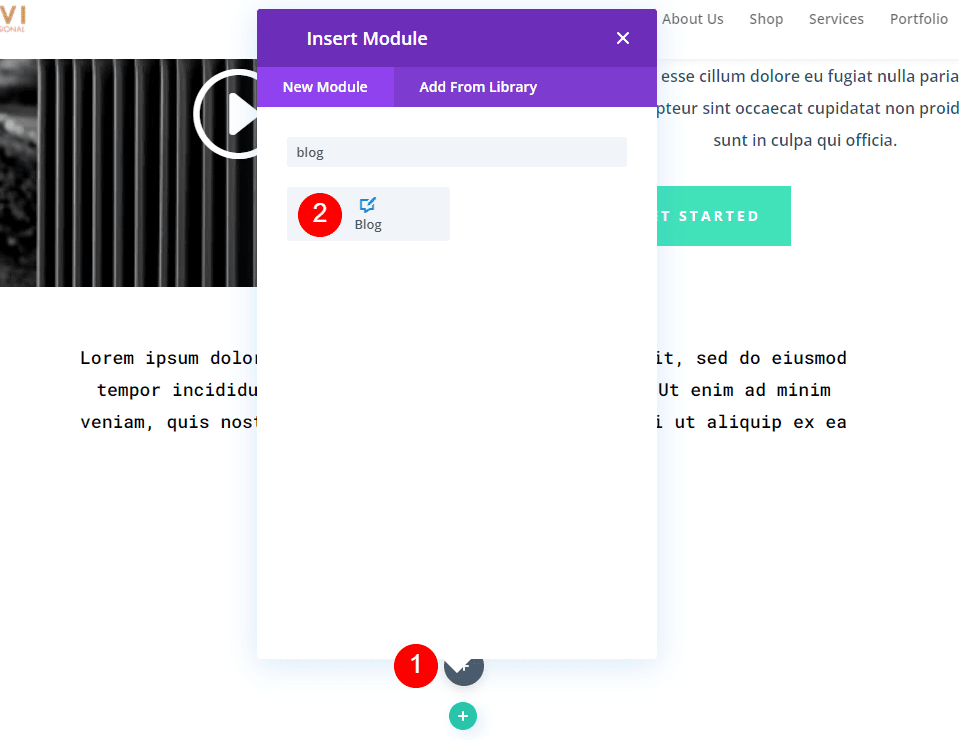
Next, add a Blog module to the Row.
Style and Setup the Blog Module
Content
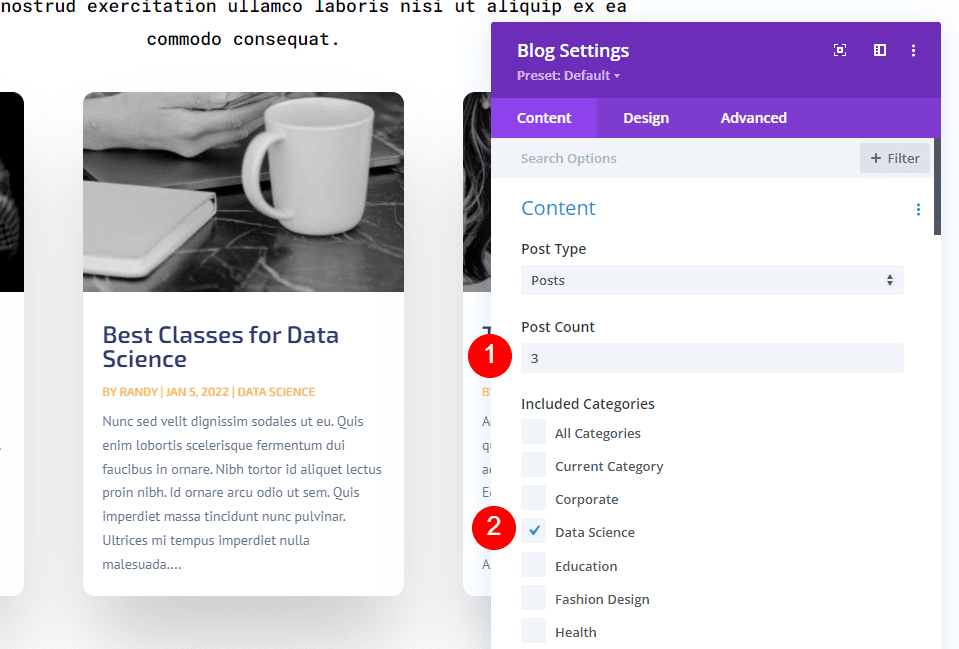
Finally, we’ll set up the module and style it to fit the page. In the Content section, select 3 for the Post Count and choose the category the module will display. I’ve selected Data Science.
- Post Count: 3
- Included Categories: Data Science
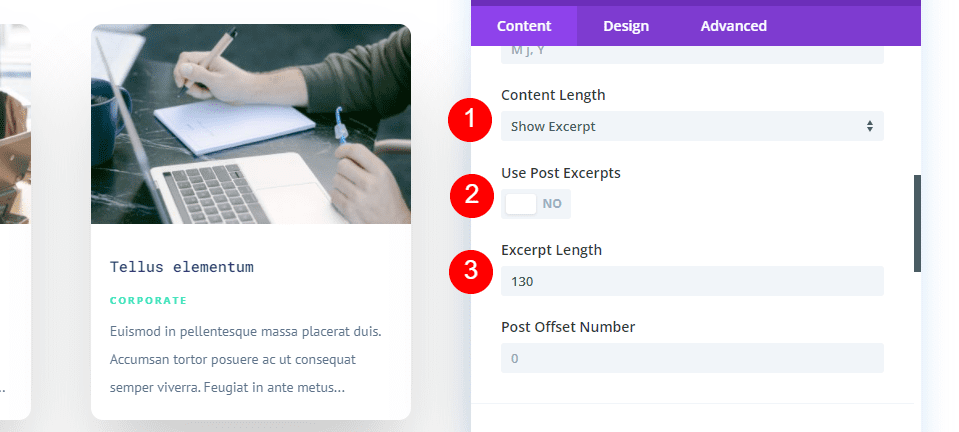
Scroll down and select to show post excerpts in the Content Length. Disable Use Post Excerpts so it shows the automatically generated excerpt. Set the Excerpt Length to 130 characters.
- Content Length: Show Excerpt
- Use Post Excerpts: No
- Excerpt Length: 130
Elements
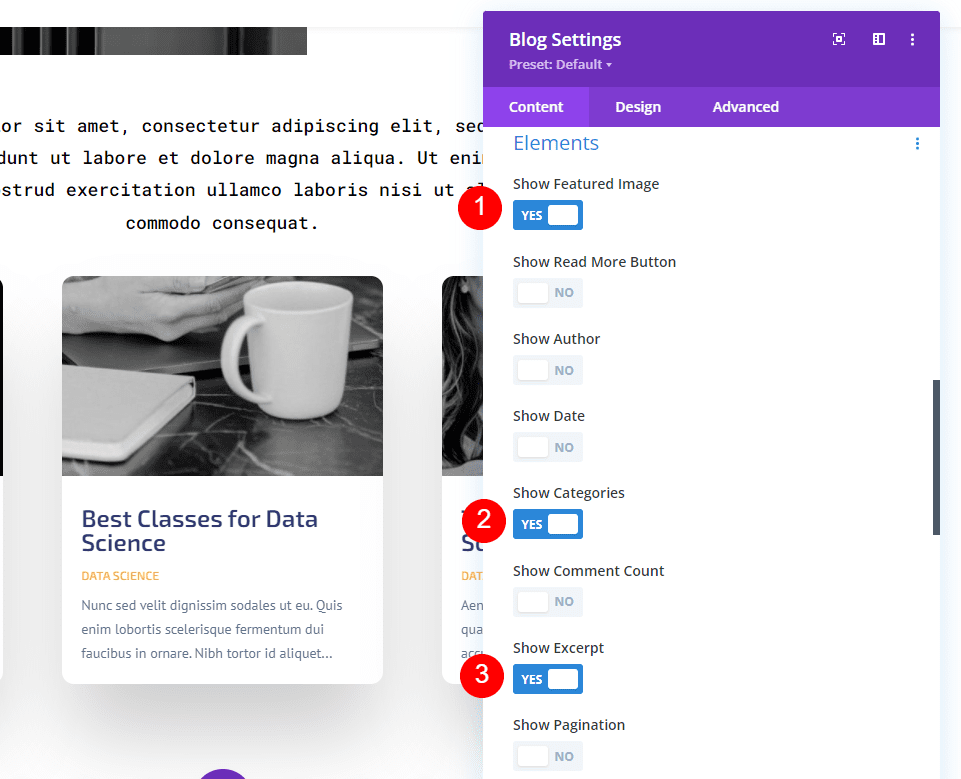
Scroll down to Elements and enable the Featured Image, Categories, and Excerpt. Disable the rest.
- Featured Image: Yes
- Categories: Yes
- Excerpt: Yes
Heading Text
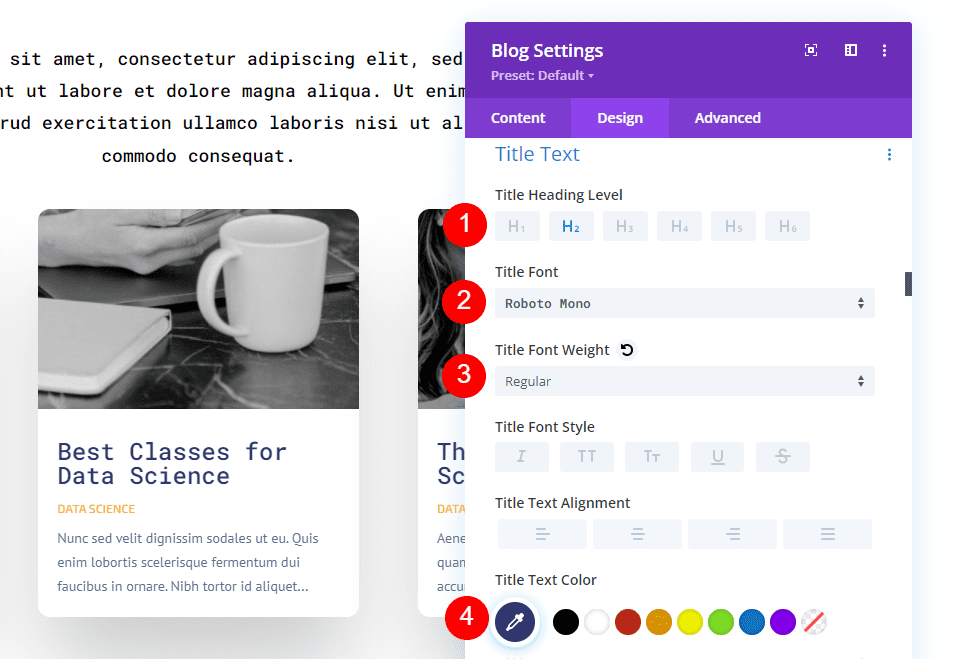
Now, go to the Design tab and choose H2 Heading Level. Select Roboto Mono for the font, set the Weight to Regular, and use the default color #323770.
- Heading Level: H2
- Font: Roboto Mono
- Weight: regular
- Color: #323770
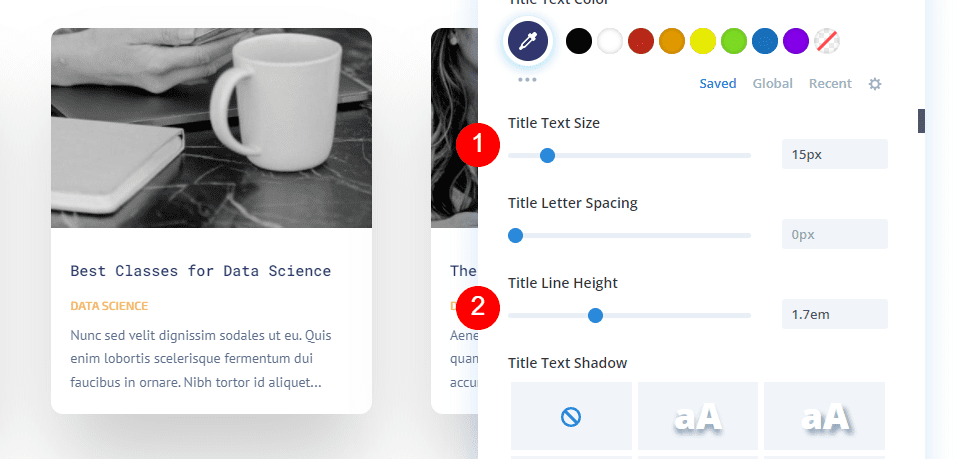
Change the Size to 15px and set the Line Height to 1.7em.
- Size: 15px
- Line Height: 1.7em
Body Text
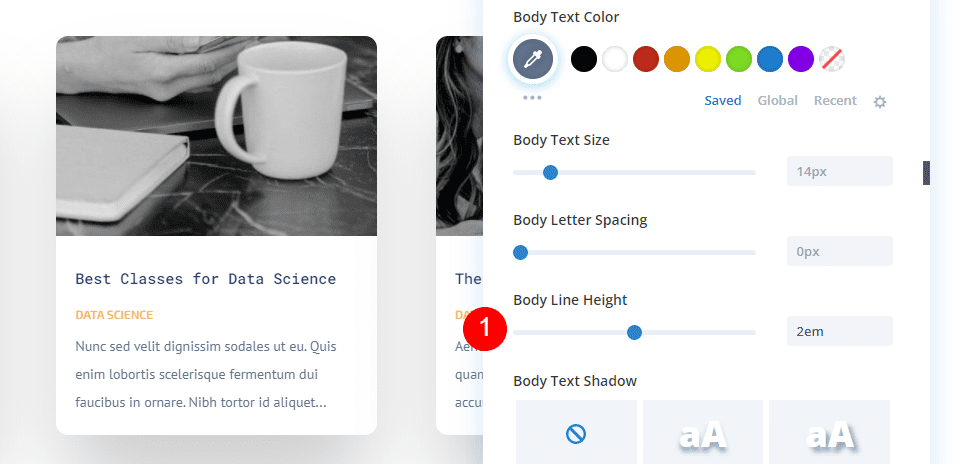
Next, scroll to Body Text and change the Line Height to 2em. Leave the rest at default.
Meta Text
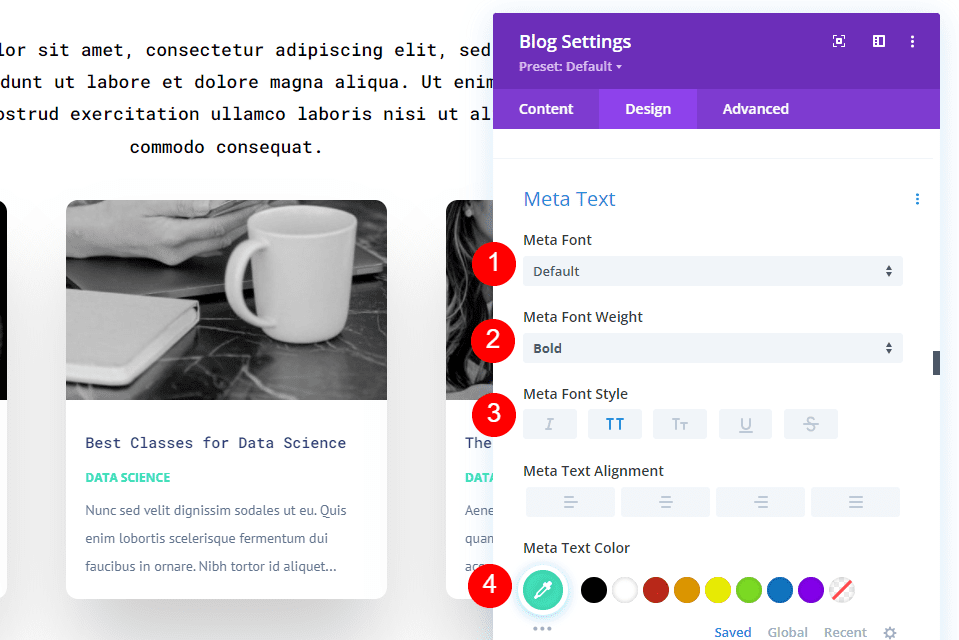
Next, scroll to Meta Text. Choose the default Font, set it to Bold, choose TT for the Style, and change the color to #41e2ba.
- Font: Default
- Weight: Bold
- Style: TT
- Color: #41e2ba
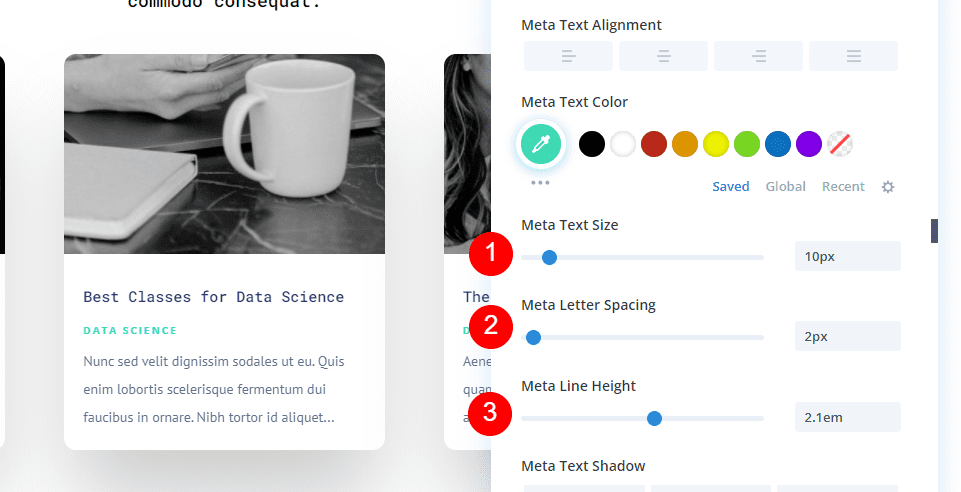
Change the Size to 10px, the Letter Spacing to 2px, and the Line Height to 2.1em.
- Size: 10px
- Letter Spacing: 2px
- Line Height: 2.1em
Spacing
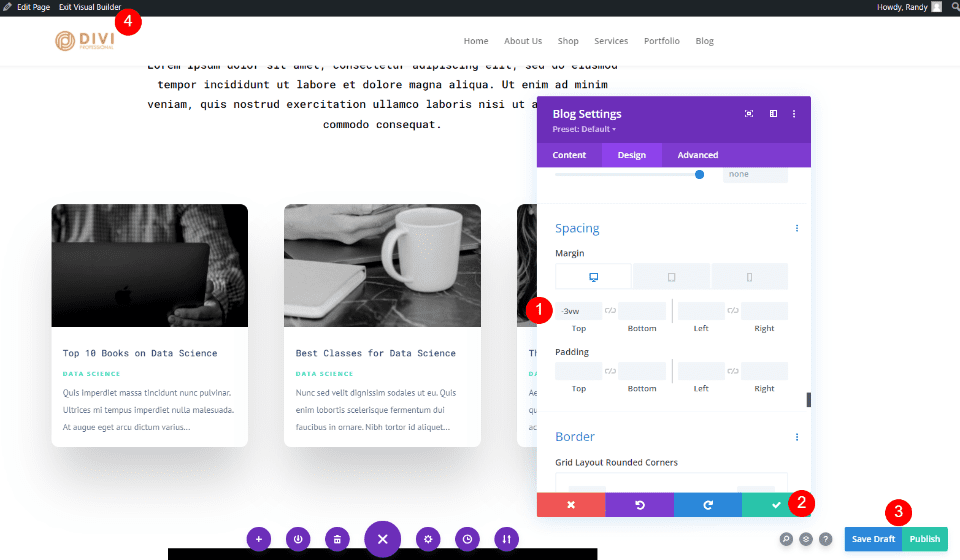
Finally, we’ll change the Spacing. Enter -3vw for the Top Margin. Close the module, save your page, and exit the Visual Builder.
Show Posts by Category on Pages Result
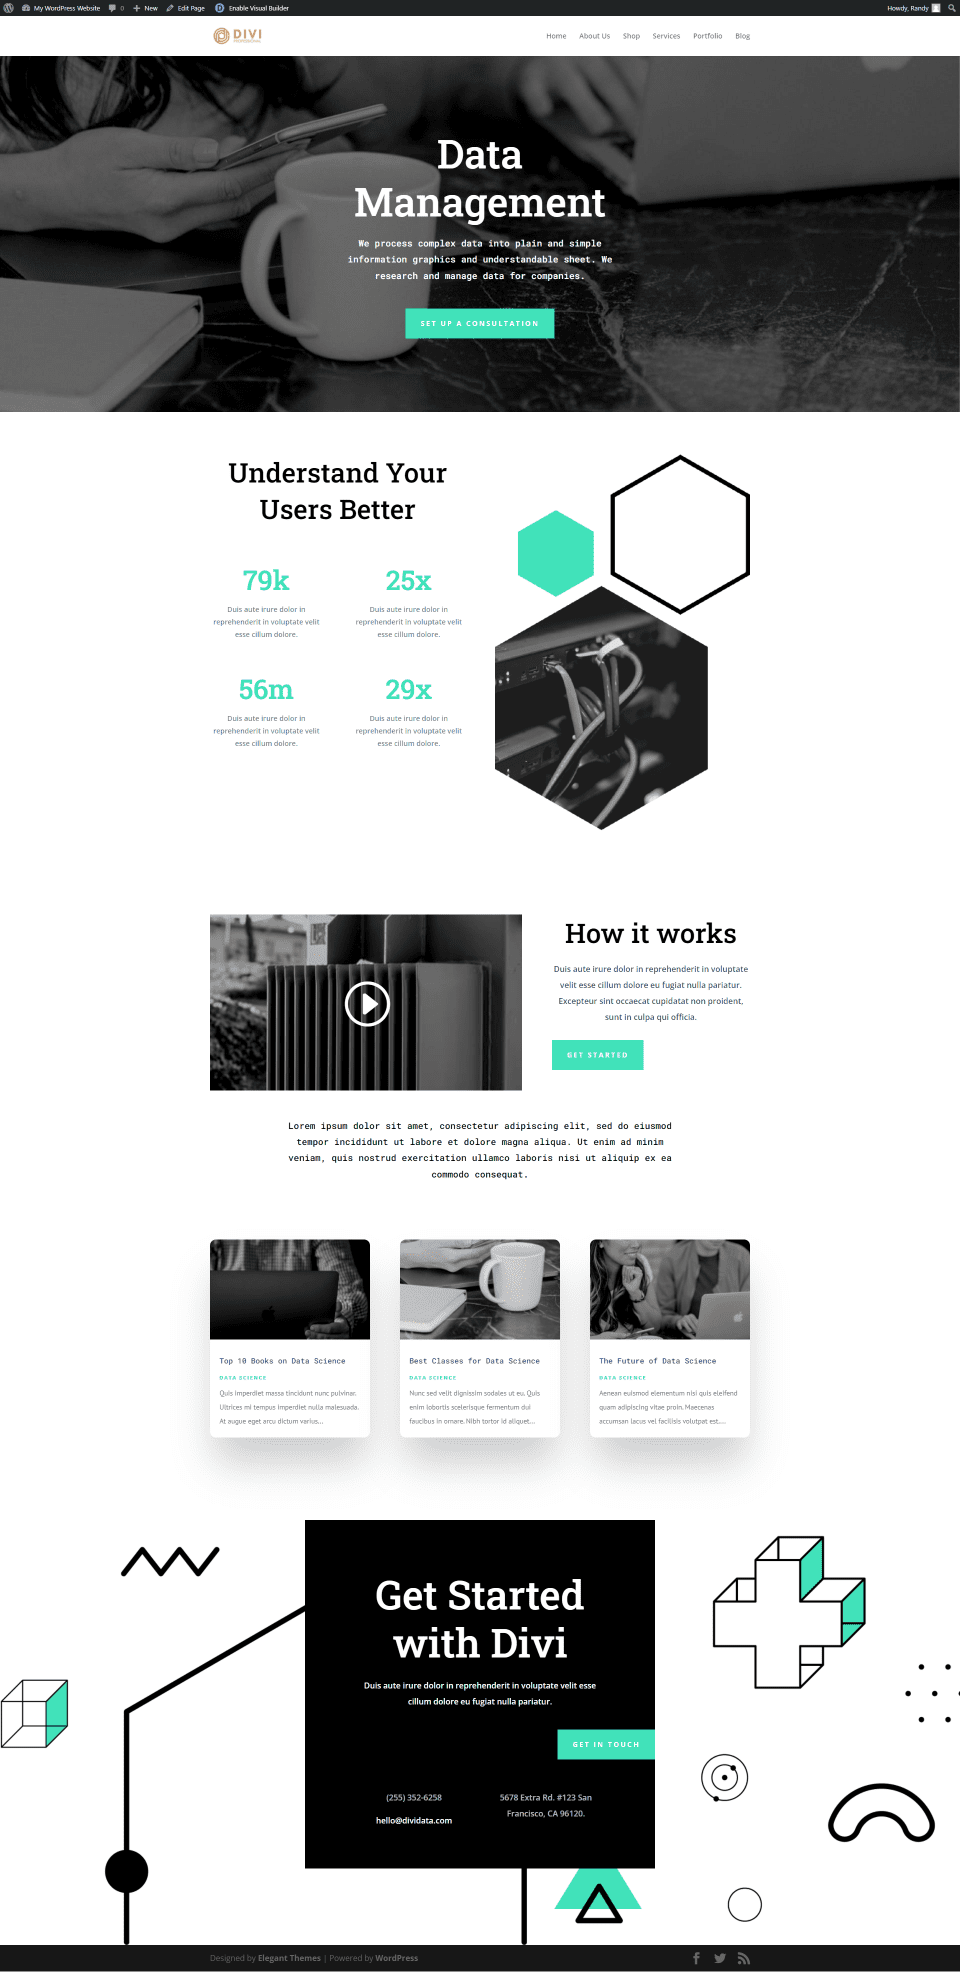
Here’s how the page looks with the Blog module. The Blog module only displays posts from the category we selected. We could expand this with a title and a Read More button that takes the user to the category.
Ending Thoughts
That’s our look at how to show blog posts per category using Divi’s Blog module. It’s easy to set up and there are several it can be used. Create archive pages and specific category pages in the Divi Theme Builder. Or, add a custom Blog module to any page to display posts just for that page’s category.
We want to hear from you. Do you use the Divi Blog module to show blog posts based on their categories? Let us know about it in the comments.
Keep reading the article at Elegant Themes Blog. The article was originally written by Randy A. Brown on 2022-02-15 11:00:00.
The article was hand-picked and curated for you by the Editorial Team of WP Archives.
