In today’s world, health seems to be neglected. People do not have time to take care of themselves because of many reasons. Stress, work, an active social life are some of the things that people put in front of their own health. One of the best health-improving habits is exercising. It eases your mind and strengthens your body.
If you have been doing fitness for a long period of time, you might’ve thought of making a fitness blog and helping others achieve their dream summer body. So, today we are going to present you with an easy tutorial on how to create a WordPress fitness blog. We are going to use the Yoga Fitness theme because that is the best one for sure. It is easy to use, has a ton of options, and is completely free. It has also shown great results, according to users.
So, if you are interested in creating your own WordPress fitness blog, be sure to scroll down and see how to do it in the best way. Without further ado, let’s start with the tutorial.
Downloading the theme
The first step is downloading the Yoga Fitness theme. A simple step, not hard at all. All you have to do is click the Download Now button, which is placed on the right side of your screen.
After that, you have to enter your email, first name, and last name.
The next step is clicking on the button that says yoga-fitness_1.0.0.
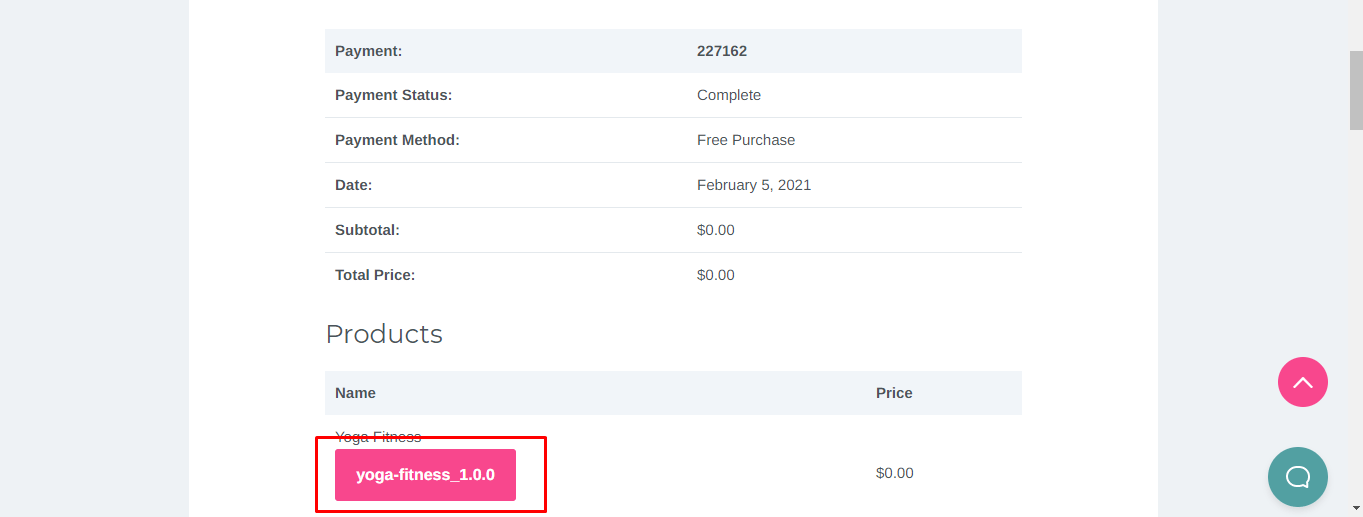
Lastly, you just wait until your browser downloads the .zip file, and that is it.
Theme installation
As with any other WordPress theme, the first thing you have to do is install it. The process is fairly simple. On the left side of your WordPress dashboard, you will see a bunch of options. You should click on Appearance, the option that has a tiny brush as an icon.
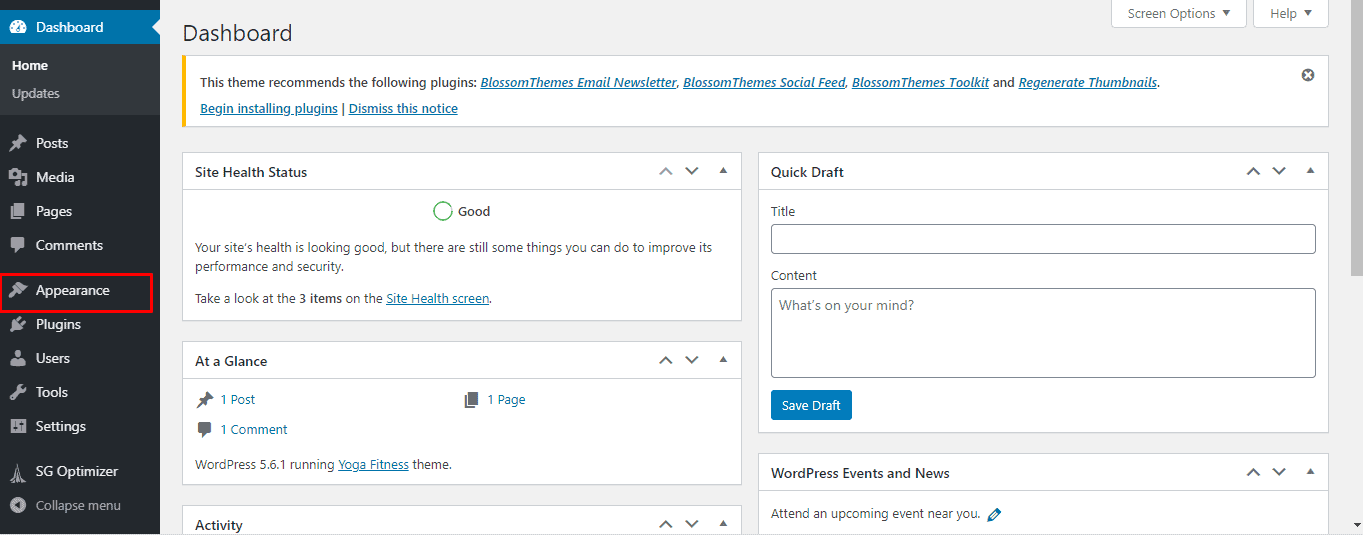
Once you click that, click on the Add New button.
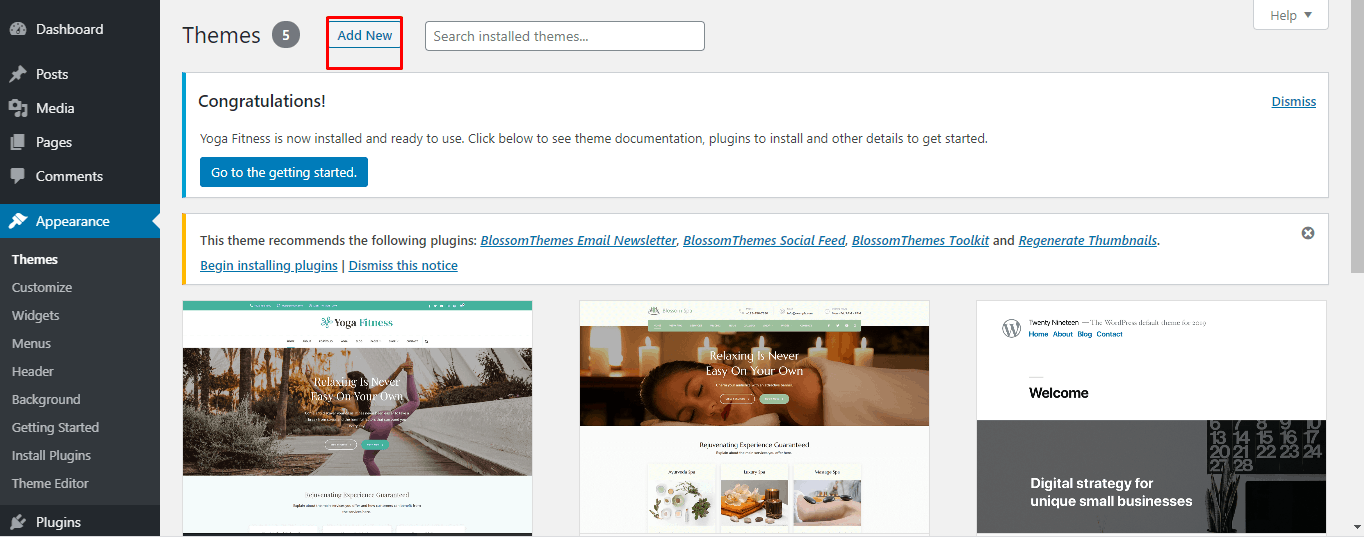
Next, in the same spot, you will find the Upload Theme button. Click on it, and then the option to browse files will pop up in the middle of your screen. Look for the .zip file you downloaded earlier, and use it to install your theme.
Getting started
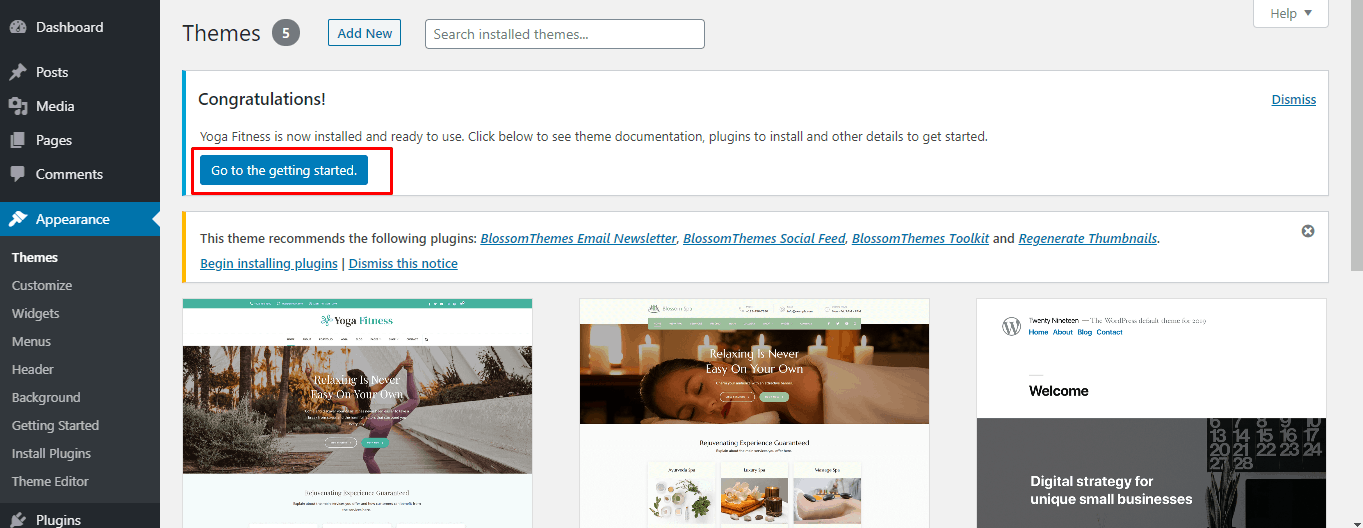
Once you have installed the Yoga Fitness theme, click the Go to the getting started button, which will appear on your screen.
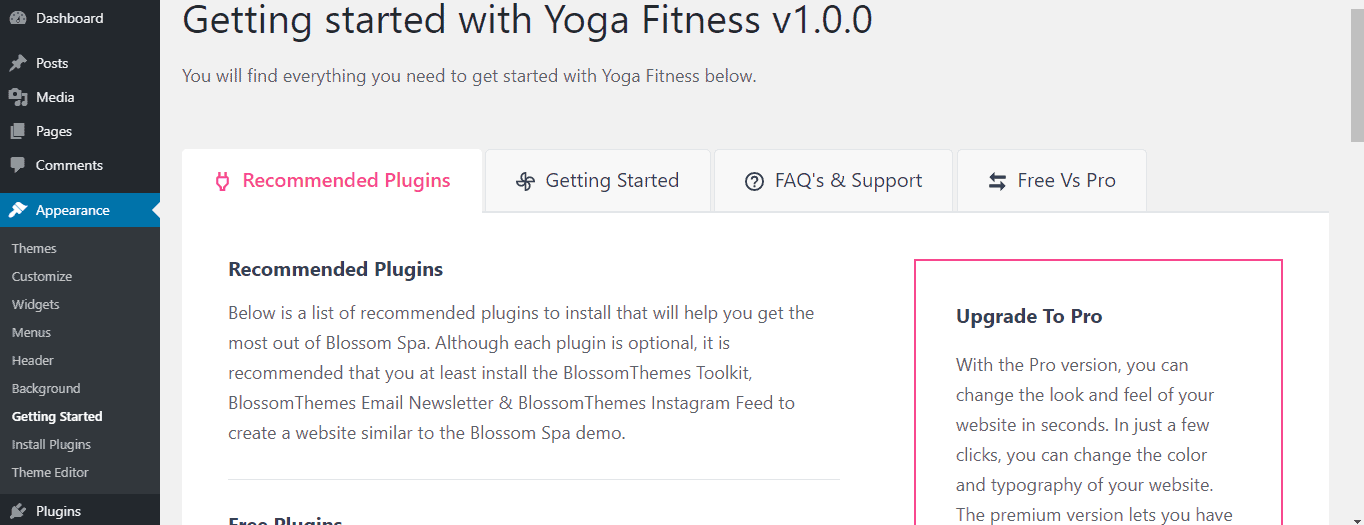
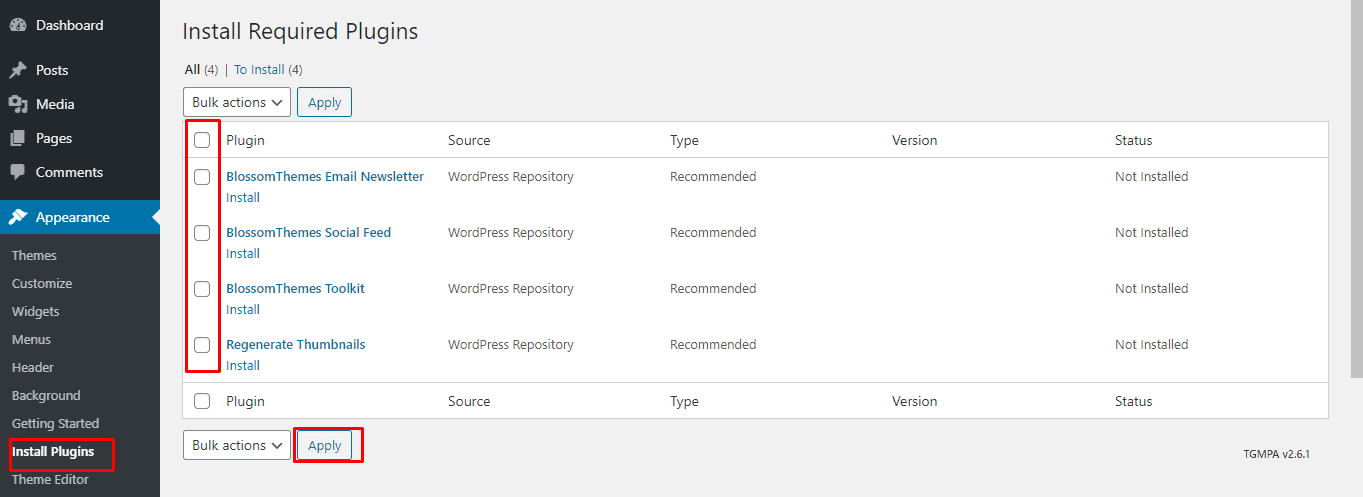
Next, you will see four tabs. The first tab is about all the recommended plugins you should install, those being: BlossomThemes Toolkit, BlossomThemes Email Newsletter, and BlossomThemes Social Feed.
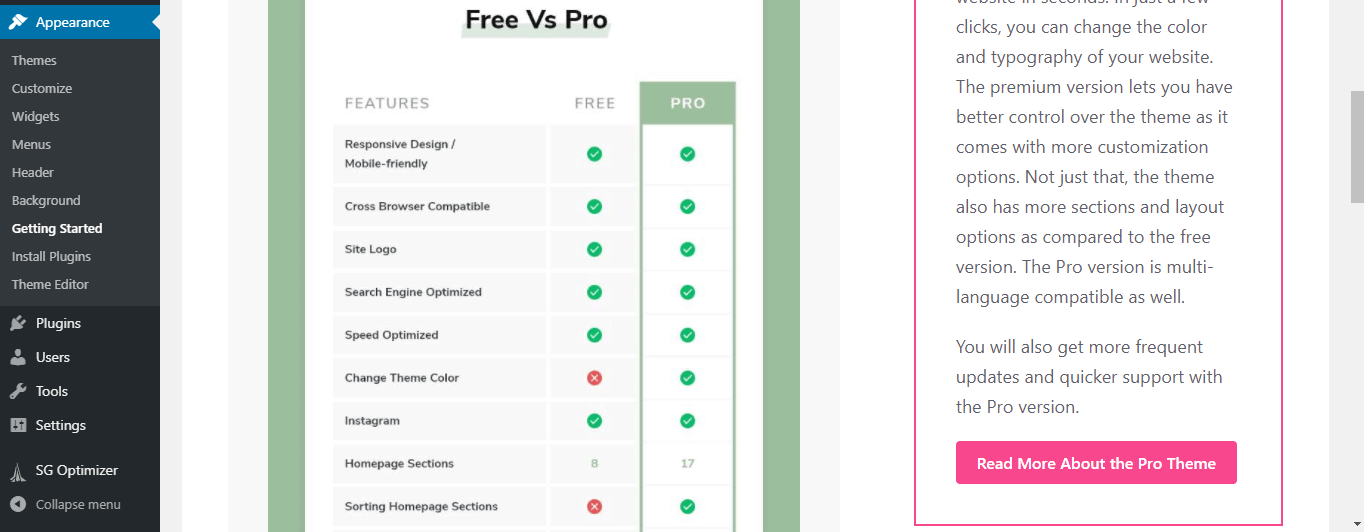
Next to that, you have a section labeled Upgrade To Pro. Since the Yoga Fitness theme has a Pro version, this section talks about the benefits of the Pro version and has a link to where you can read more about it as well as upgrade.
Then, in this tab, you have a section labeled Visit the Knowledge Base; this provides you with a link to videos and text tutorials on how to use and manage your themes.
The last section is Submit Your Site for Social Share. Through that, if you want, you can have your website be shared on Blossom Themes’ social media accounts.
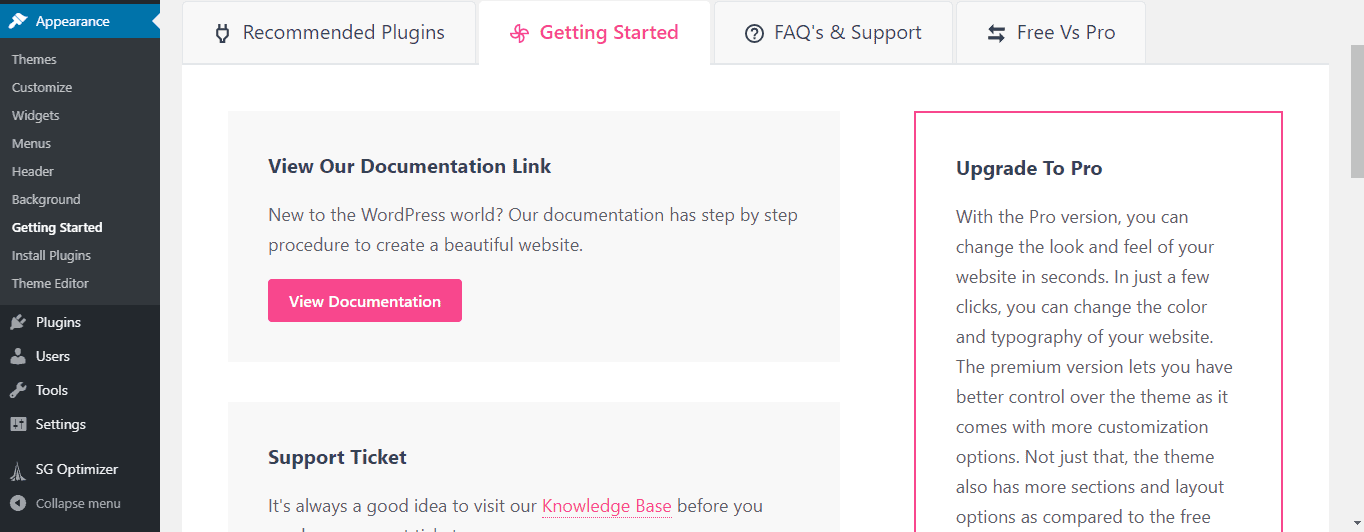
The second tab is named Getting Started. This has three sections. The first one is named View Our Documentation Link. It has a link to all the documentation for the theme. The next section is called Support Ticket. If you have any unanswered questions, you can use this section to submit a ticket to the theme’s developers. But it is recommended that you read the knowledge base first, and then, if you still have any questions, submit a support ticket.
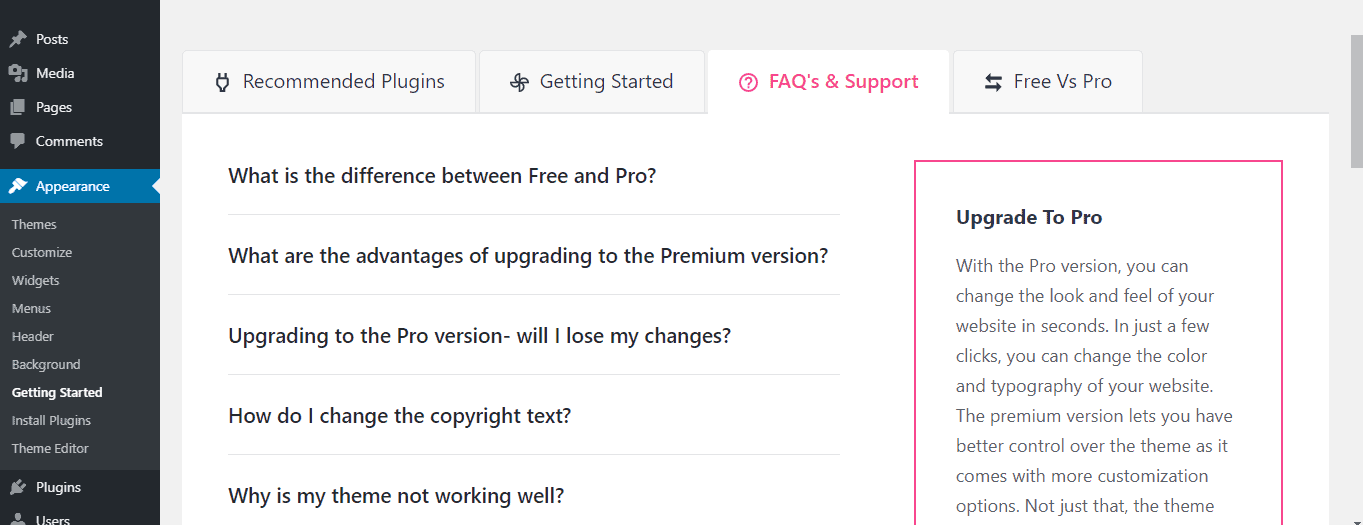
The next tab is called FAQs & Support. It has six collapsable sections that contain answers to the most asked questions about the Yoga Fitness theme. Those questions being: What is the difference between Free and Pro?, What are the advantages of upgrading to the Pro version?, Upgrading to the Pro version – will I lose my changes?, How do I change the copyright text?, and Why is my theme not working well?.
All of these questions are answered in detail, and before starting the blog-creating process, you should for sure read all of the answers in case you encounter similar problems.
The last tab is called Free Vs Pro. It lists all of the differences between the free and Pro version; plus, it has a View Pro button that contains a link to the Pro version.
Installing plugins
Earlier, we mentioned some of the recommended plugins for this theme. Well, now it is time to install them.
Go to Appearance->Install Plugins on your dashboard. Next, select all the plugins. Then through the Bulk actions dropdown menu, choose Install, and finally click Apply.
Now that your plugins are installed, again, through the Bulk actions dropdown menu, choose Activate, and then click Apply. Once you have done that, all the recommended plugins will be installed and ready to use.
Publishing blog posts
After you have installed the recommended plugins and your theme is ready to be used, you need to learn how to publish a post.
On your dashboard, there is a Posts option, which has a pin icon. The Posts option contains four more options within itself. We will cover them all one by one.

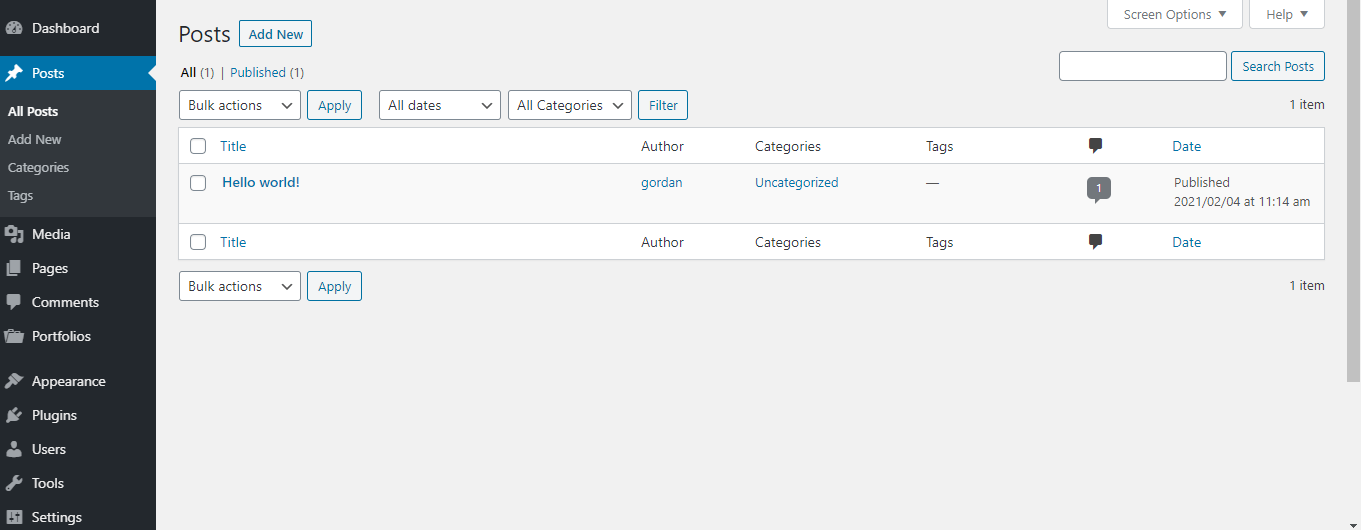
The first one is All Posts. As its name suggests, it leads you to a list of all your posts, where you can edit them, delete them, filter them, add new ones, etc.
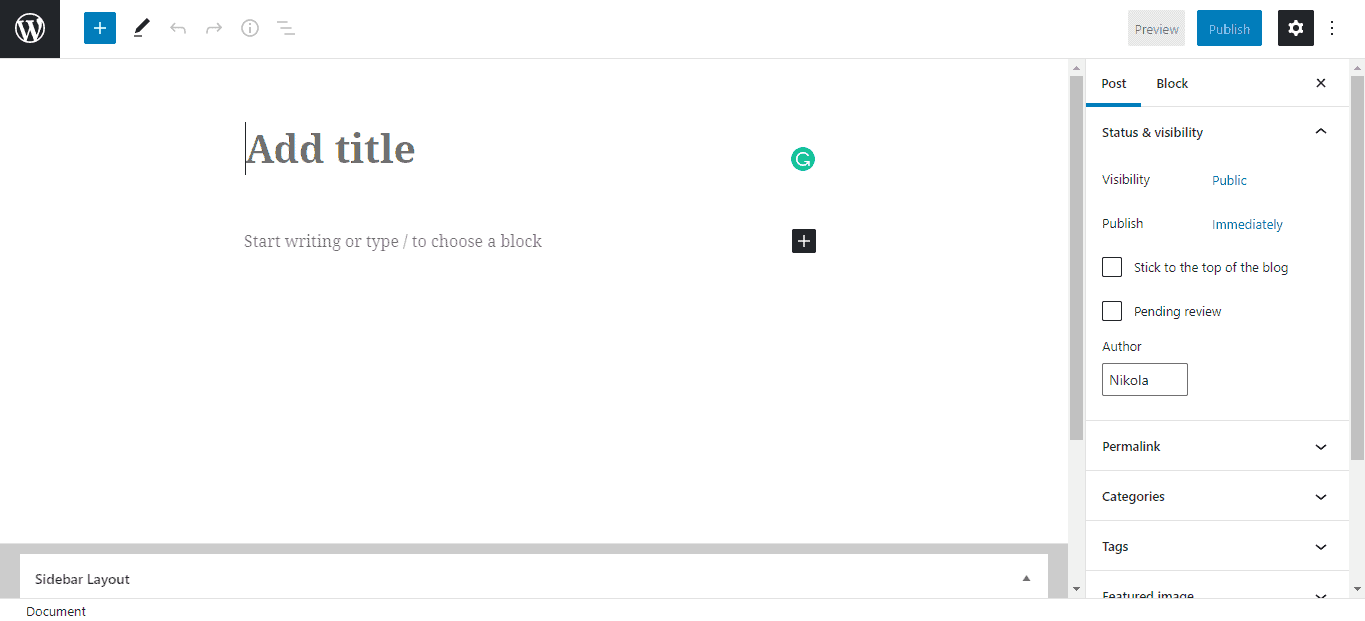
The next option is Add New. This is the most important option of all because it is the one you use when you want to create a new post.
The page for creating a new post is divided into three parts. The first one is the top part; it contains all the basic buttons like add block, undo, redo, details, outline, preview, settings, and options.
The next part is the middle part, where you place your content. It has an Add title section, pretty self-explanatory; a Start writing or type/to choose a block section where you place all the information you want to share on your blog.
The last part is the bottom part labeled Sidebar Layout. Here, you can choose a sidebar template. Your options are Default Sidebar, Full Width, Full Width Centered, Left Sidebar, and Right Sidebar.
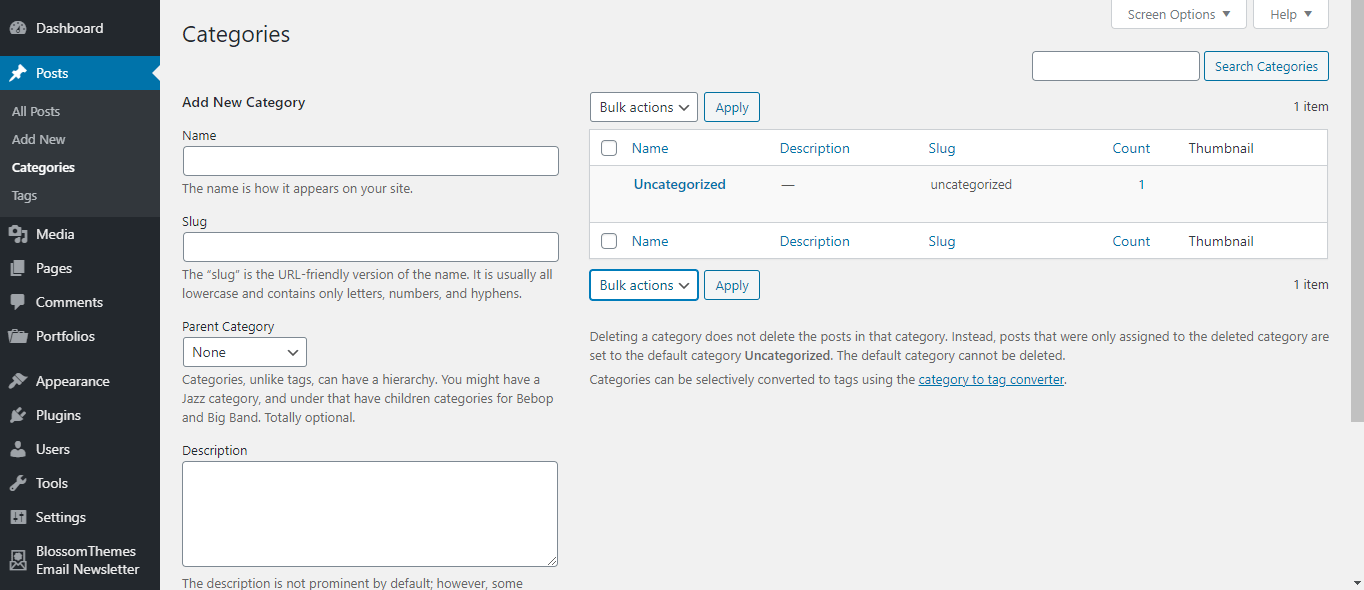
Next, we have the Categories option. This leads you to a page where you can categorize your posts. This page is divided into two sections. The first section is labeled Add New Category. Here, for a category, you can input a name, slug, parent category, and description. You can also add an image or remove it. The second section of the page is a list of categories. Here you can see all the categories you have. It also has a search bar and a Bulk actions dropdown.
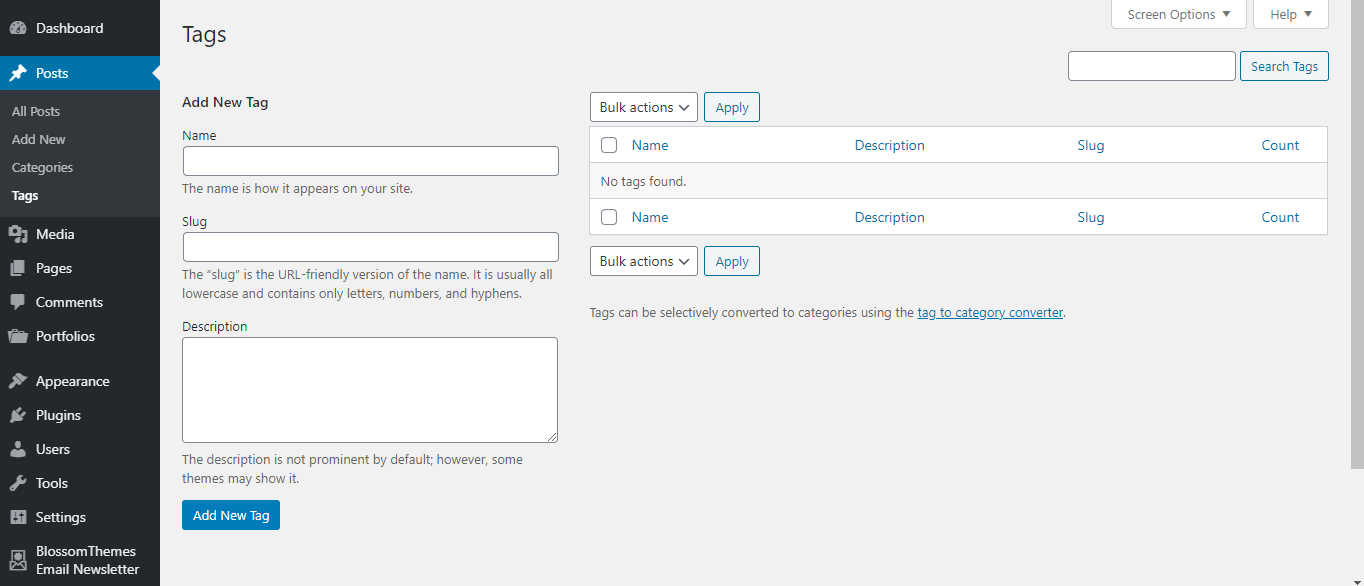
The last option is Tags. It is very similar to the Categories option. It also has two sections – one for adding tags and one containing a list of all your tags as well as a search bar.
In the Add New Tag section, you can input a name, slug, and description for a tag. And, in the second section, you have a list of all your tags and search bar, as mentioned earlier.
Blog customization
Now that you know how to post on your blog, you should also learn how to customize it.
Under Appearance, you have the Customize option.
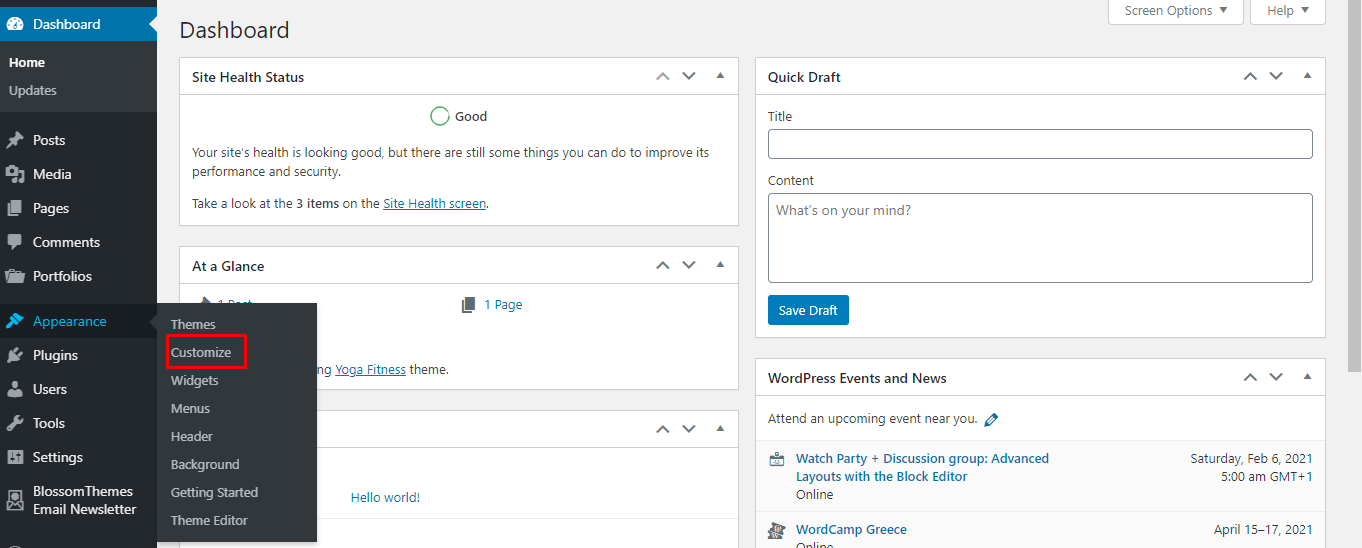
When you click on it, you will be taken to the blog customization page, where you have access to a wide range of customization options as well as a live preview of your blog.
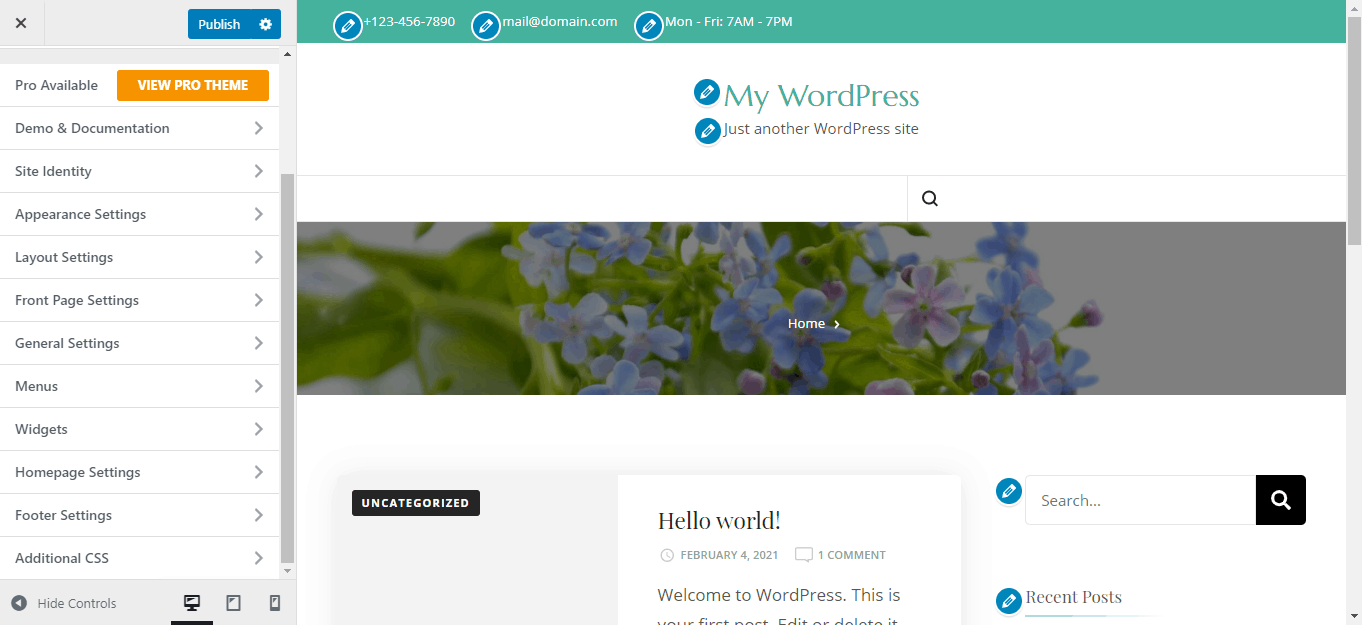
On the left side, you have all the options you need. We will explain them one by one.
The first one is Pro Available. It is an option that leads you to the page where you can get the theme’s Pro version. The next option is Demo & Documentation. It leads you to two links, a link for the demo and a link for the documentation.
Now, we are going to explain the options that actually change the appearance of your blog.
Site identity
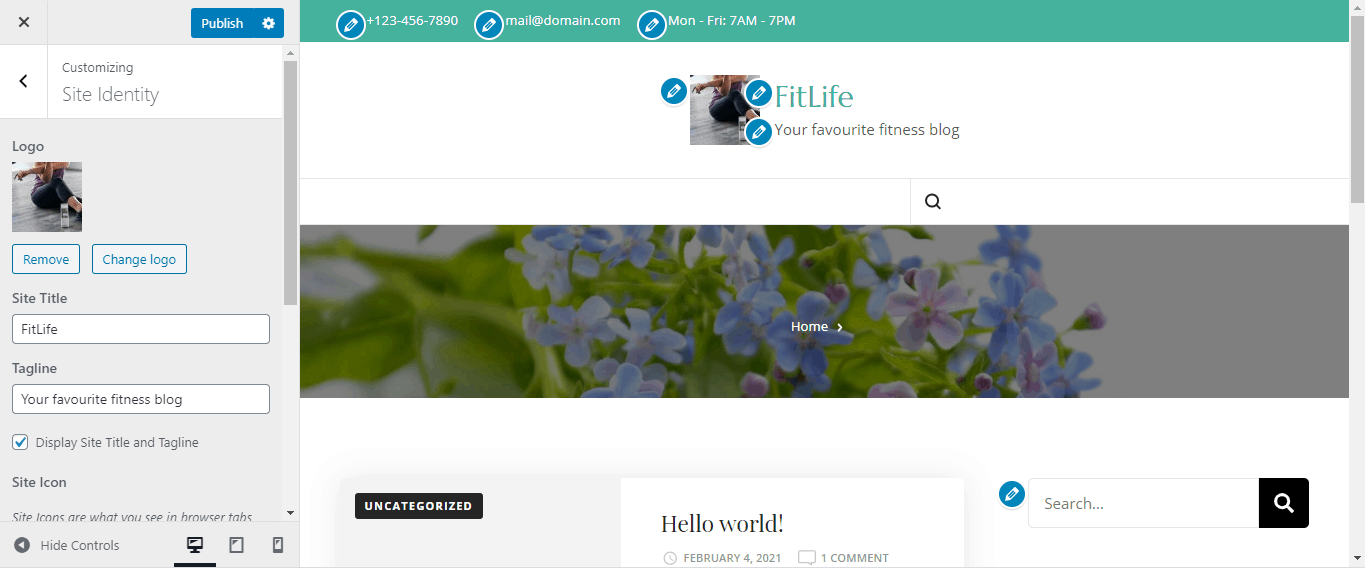
Site identity is used to manage parts of your blog that users see first – for example, your logo. Here, you can select a logo for your blog. You can drag-and-drop files or select some from your device. The maximum upload file size is 256MB. The theme developers suggest image dimensions of 70 by 70 pixels.
Next comes Site Title. Here, you can add the title of your blog.
Then we have Tagline. Here, you can input the text that will come directly under the title. You also have an option to decide if you want to hide or display your site title and tagline. It is positioned directly under Tagline.
Site Icon is the small picture you see in browser tabs, bookmark bars, and within WordPress mobile apps. To add one, click the Select site icon button and drag-and-drop a file or upload it from your device. Site icons should be square and at least 512 x 512 pixels.
Next, we have the Site Title and Tagline Font.
The last two options are Font Family and Site Title Font Size. As seen in the image below, I added a logo from a stock image website. On sites of that kind, you can find free images for all types of blogs, regardless if it is a travel blog, food blog, etc. Just enter, for example, “fitness” or some other related word into the search bar, download an image, and then upload it.
I also added a site title as well as a tagline, and this is what my blog looks like so far.
Appearance settings
Next up, Appearance Settings. Here we have 3 main options. The first is Colors. With this option, you can change the color of your background.
The second one is Background Image. Here, you can drag-and-drop or upload an image from your computer (max size 256MB). This image will serve as a background for your blog.
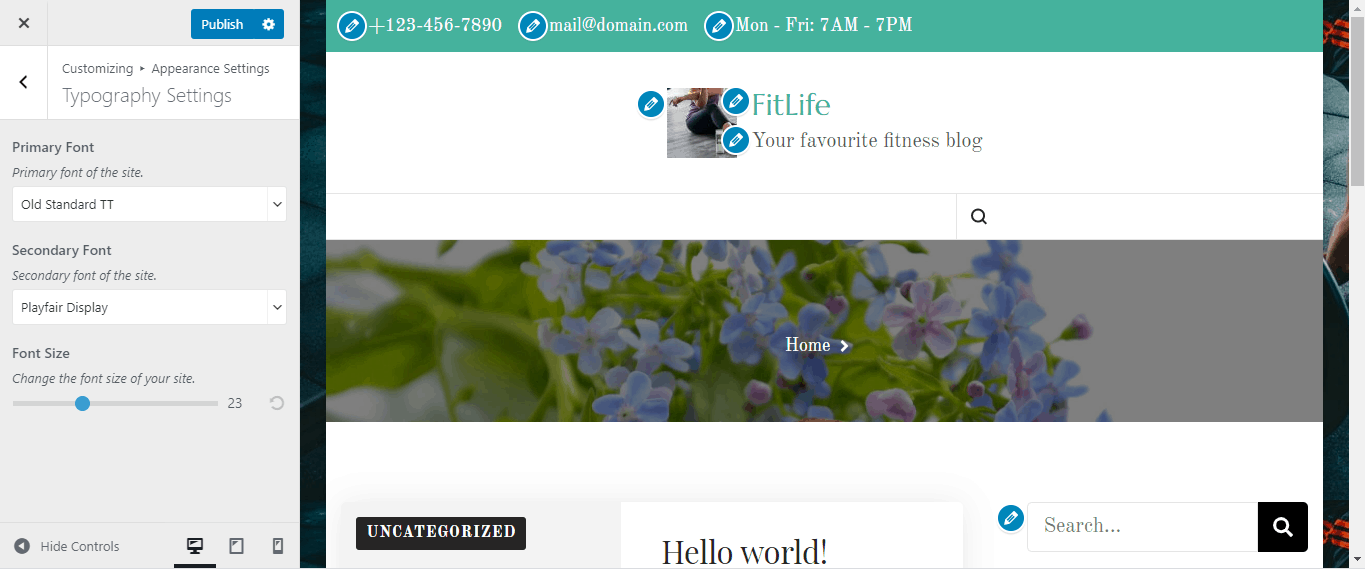
The last option is Typography Settings. Here, you can manage your primary font, secondary font, and font size.
I added a background image sourced from a stock image website, just like my logo. Because I used an image of a woman stretching for the logo to attract female readers, for the background, I used an image of a man deadlifting to do the same for male readers. I also altered the typography settings a bit. Now my blog looks like this.
Layout settings
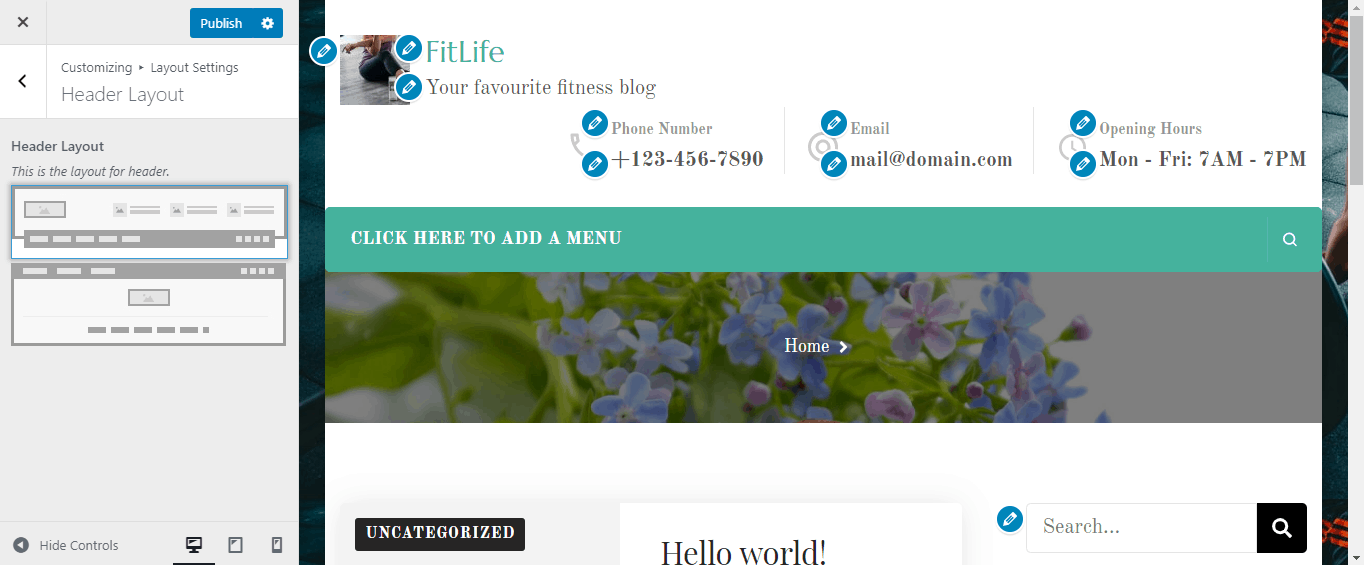
In Layout Settings, you have 3 options. The first is Header Layout. Through it, you can choose between two types of layout for your header. The second is Blog Page Layout. Using it, you can manage how your blog posts are arranged on your site. The last option is General Sidebar Layout. Here you can pick between 3 types of sidebar layouts: Page Sidebar Layout, Post Sidebar Layout, and Default Sidebar Layout.
I only changed the header layout because I liked the default settings for Blog Page Layout and General Sidebar Layout.
Frontpage settings
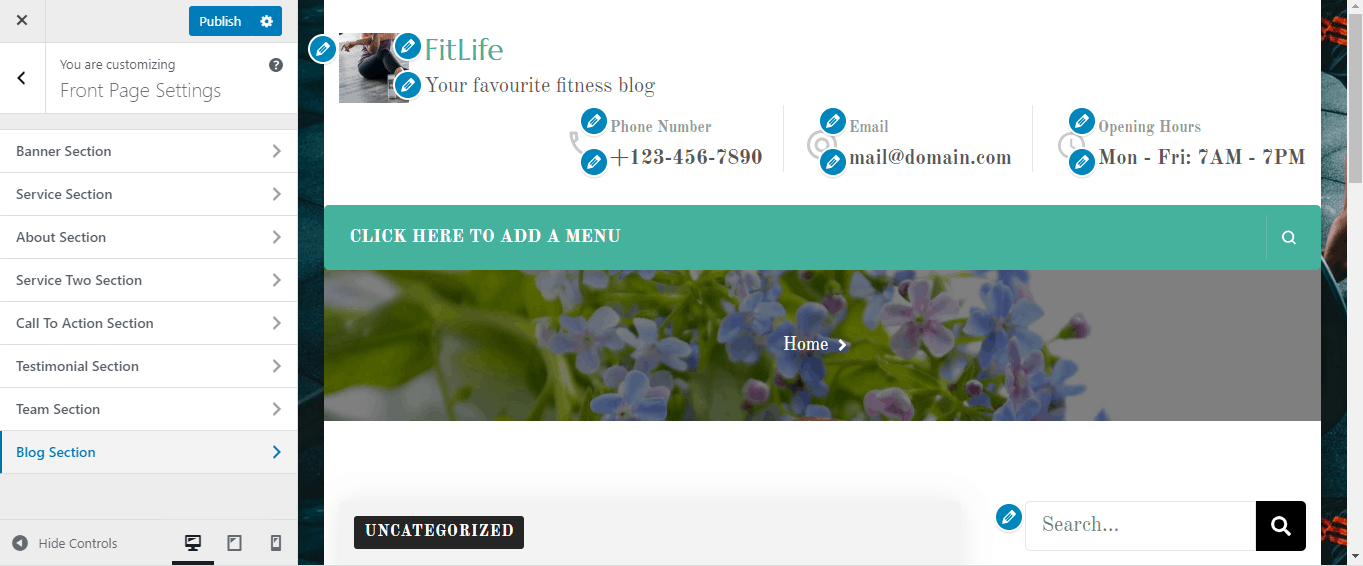
In Frontpage Settings, there are options for different sections of your frontpage. The first one is Banner Section. Here you can set the banner options, the header video (you can upload an MP4 video or add a YouTube URL), and the header image.
You can also set the Title, Sub Title, Banner Button One Label, Banner Button One Link, Banner Button Two Label, and Banner Button Two Link.
Next is Service Section. Here you add the Text and Blossom: Icon Text widget. There is also a Service Two Section; it does the exact same thing.
About Section option for managing a section that includes information about the blog creator. You can also add a widget there.
Call to Action Section, Testimonial Section, and Team Section are pretty similar options. You can use them to add widgets; plus, through Testimonial Section and Team Section, you can also edit the title and description of those sections.
Last comes Blog Section. Using this option, you can edit things like Blog Title, Blog Description, and Read More Label.
I did not change much. I wanted to make my blog simple. If you want a more detailed blog, you can play with these options.
General settings
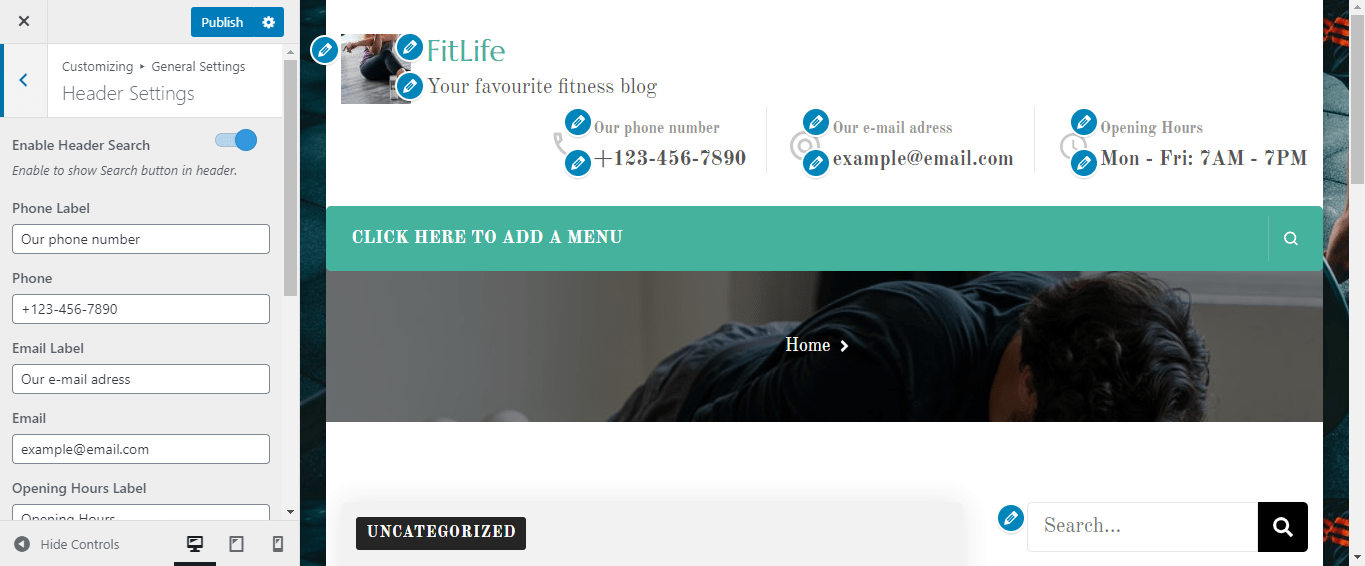
General Settings has 5 options. The first is Header Settings. Here, you can enable header search, edit the phone label, add a phone number, edit the email label, add an email address, edit the opening hours label, and add opening hours. You can also edit the header background image.
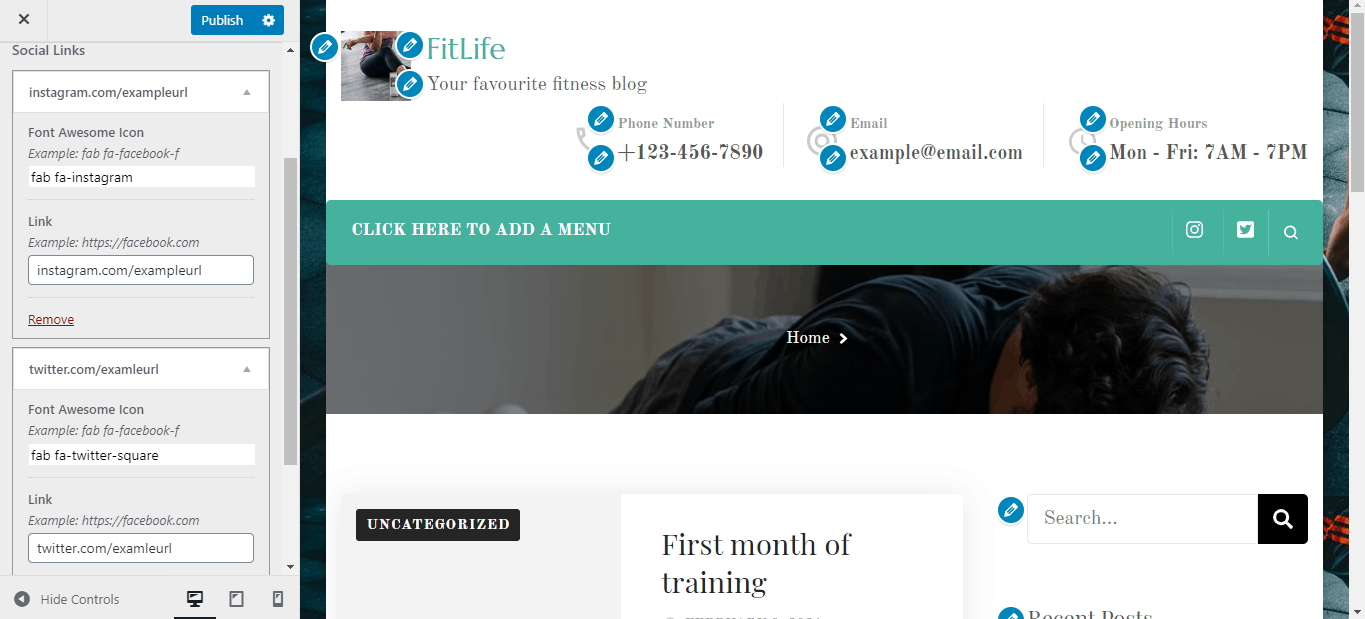
The second option is Social Media Settings; here, you can enable/disable social links and add them; the limit is 10 rows.
The third option is SEO Settings. Here you can enable/disable the last update post date, enable/disable Breadcrumb, and edit the Breadcrumb Home text.
The fourth option is Posts (Blog) & Pages Settings. Here you can hide/unhide the prefix for archive pages, enable/disable blog excerpts, manage excerpt length, add Read More text, enable/disable related posts, add a related posts section title, and hide/unhide comments, categories, post authors, posted dates and featured images.
The fifth and the last option is Instagram Settings; it only has an enable/disable switch.
For my blog, I added a phone number, email address, and opening hours.
I also added Instagram and Twitter links; you can add whatever you want.
Menus
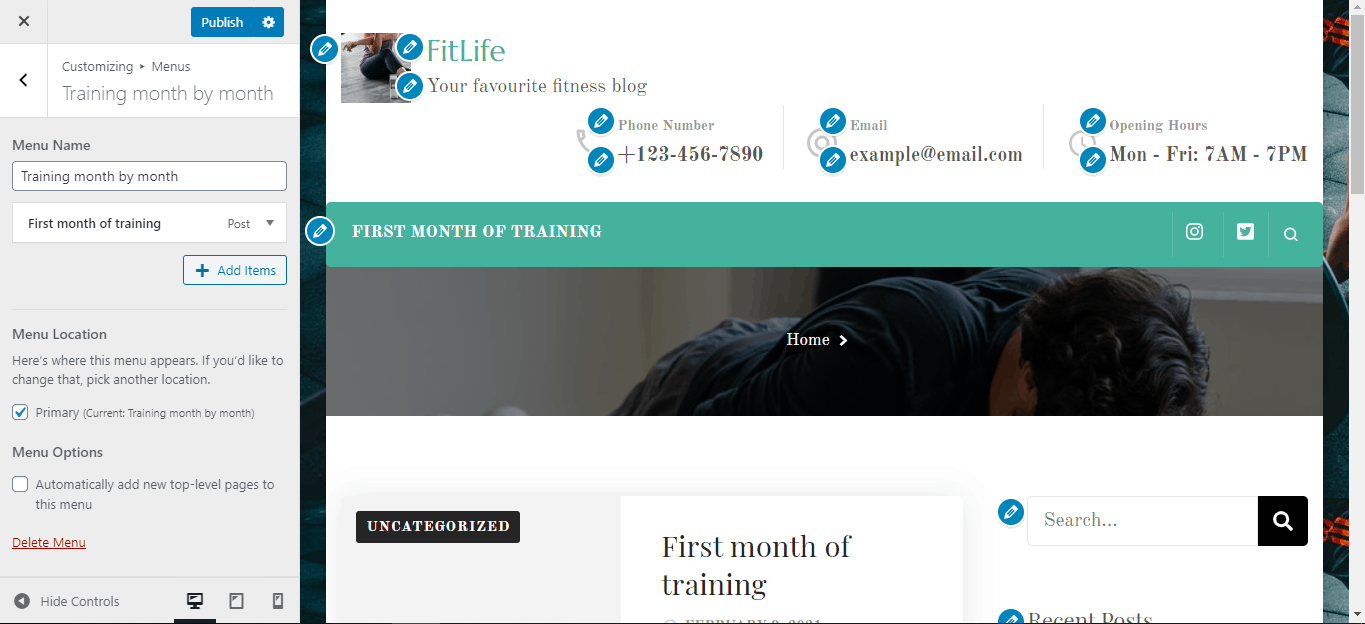
Now, we can also customize menus. This part is really important and useful but fairly simple. When you start, you have to click the Create New Menu option; after you click that, you input a menu name and tick the checkbox labeled Primary if you want to categorize a certain menu as primary.
The next step is adding items. You can add custom links, pages, posts, portfolios, categories, tags, and portfolio categories.
You also have an option to delete a menu and hide/unhide menu settings. In the theme’s Pro version, you can also add a sticky menu.
I added one menu, named it Training month by month, and then added a post named First month of training.
Widgets
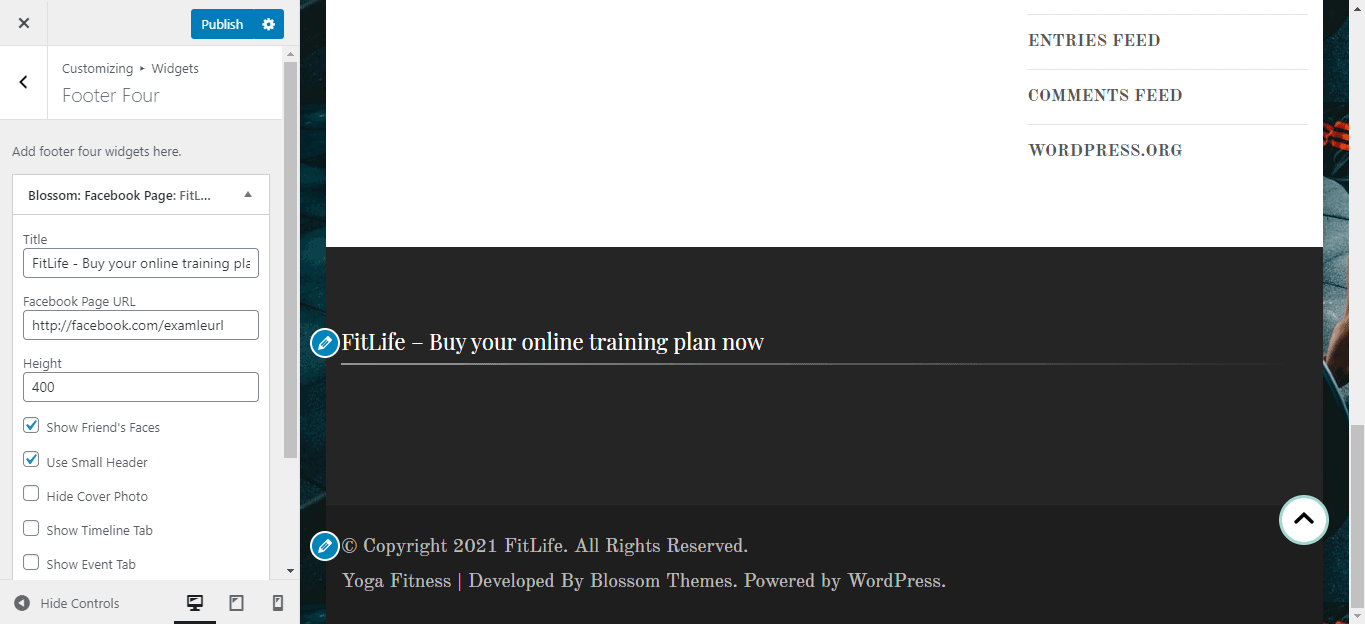
Customizing widgets is fairly simple. You can add widgets to any of the four footers.
You can also navigate to other pages on your site while using the Customizer to view and edit widgets displayed on those pages.
I added a widget with a Facebook page link where readers can buy my training plans.
Homepage settings
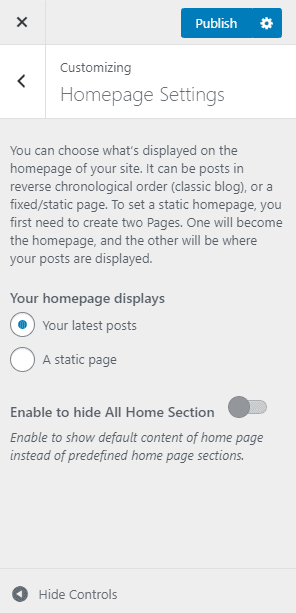
In Homepage Settings, you can modify the homepage of your site. It can be a page with posts in reverse chronological order, a classic blog page, or a fixed/static page. To have a static homepage, you need to create at least two pages. One will be the homepage, and the other one will be the page where your posts are displayed.
Enable to hide All Home Section is used if you want to show the default content of the homepage instead of the predefined homepage sections.
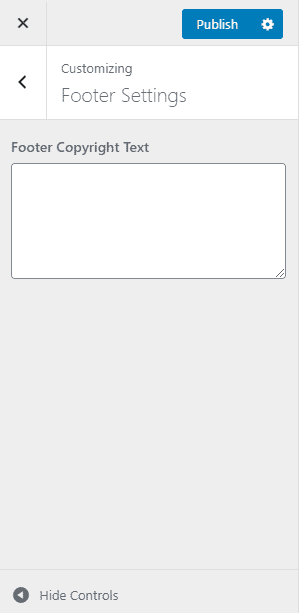
Footer settings
Here, you can add the Footer Copyright Text. Not much to explain; pretty simple.
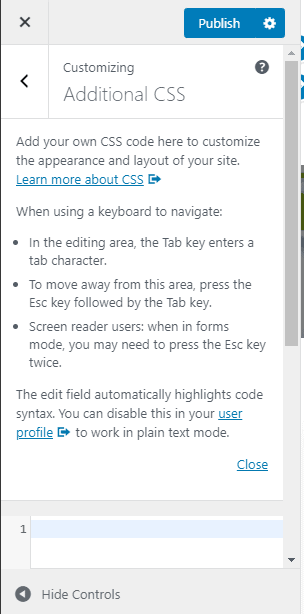
Additional CSS
The last thing you can customize is Additional CSS. Here, you can add your own CSS code to customize the appearance and layout of your site.
Now that we covered every aspect of the Customizer, all you need is imagination and motivation. Also, do not hesitate to use any of the mentioned options. Some of them are mandatory, and some are not.
For example, all options related to Site Identity should be used because they impact the things that visitors see first, which have to look nice.
In Appearance Settings, you have to find a good combination of colors, background image, font type, and font size, so your blog is aesthetically-pleasing.
Then, when it comes to the other options, just use them one by one, try out different combinations and see what works best for you. Do not hesitate to show someone else your blog before you publish it; another opinion can be useful.
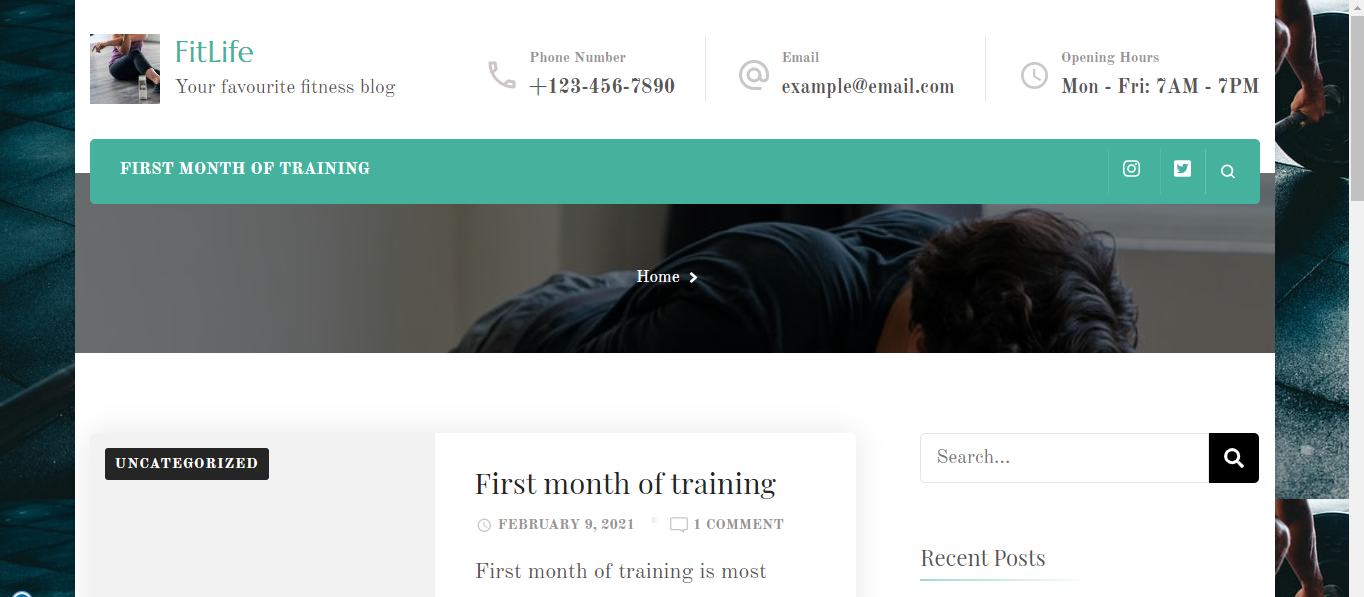
Here is my simple blog.
Yoga Fitness theme free version vs. pro version
The Pro version has a lot of benefits, so we think you should really consider it. With the Pro version, you can change theme colors; it has sorting homepage sections, a one-page website, 17 homepage sections instead of 8, 8 header layouts instead of 1, and 5 blog page layouts instead of 3. It also has unlimited sidebar options, SEO settings, a social sharing option, all the font settings, and a lot more.
FAQ
1. When is the right time to start a fitness blog?
Any time is the right time to start a fitness blog because, if you are a beginner, you can share your experience, note mistakes, track your overall progress, and help other beginners that found your blog.
On the other hand, if you have been in the world of fitness for some time, you can instantly share all your knowledge and help someone.
2. Is having a fitness blog time-consuming?
Well, given that people from the world of fitness are often organized and hardworking, you should be able to write for your blog frequently without any problems, of course, if you organize yourself properly. You do not have to post every day; it can be on some other basis as long as it is a regular one.
3. How does a fitness blog benefit me?
Having a fitness blog benefits you greatly. First, you have the satisfaction of helping other people. Along with that, you are able to track your progress, improve your working habits and your writing skills. And, last but not least, it is pretty fun, as most fitness bloggers say.
Conclusion
Here we are, at the end of the article. If you read and understood everything, you are ready to create a fitness blog. So, go for it, work hard and let your imagination guide you. Best of luck!
Latest posts by Nikola Slijepčević (see all)
Where Should We Send
Your WordPress Deals & Discounts?
Subscribe to Our Newsletter and Get Your First Deal Delivered Instant to Your Email Inbox.
Thank you for subscribing.
Something went wrong.
Keep reading the article at WP Newsify. The article was originally written by Nikola Slijepčević on 2021-03-05 10:10:48.
The article was hand-picked and curated for you by the Editorial Team of WP Archives.

