If you ever even tried sending newsletters, promotions, or other marketing material over email manually, you probably know how hard it is to write everything up and send it by yourself.
So, after you give up on the manual route, you’ll probably ask yourself, “Is there an easier way for all of this to be done?” and the answer is: Yes.
With a useful tool named MailPoet, you can easily create and send emails from inside WordPress without having to open another tab ever again.
Besides the ease of use you get with MailPoet, you will also have the option not to design any emails by yourself if you don’t want to.
MailPoet is packed with beautiful, customizable templates that will catch the attention of every customer that gets your email. Pretty useful, huh?
So, if you don’t want to bother with emails ever again, let’s proceed and see how to set this tool up.
Installing MailPoet
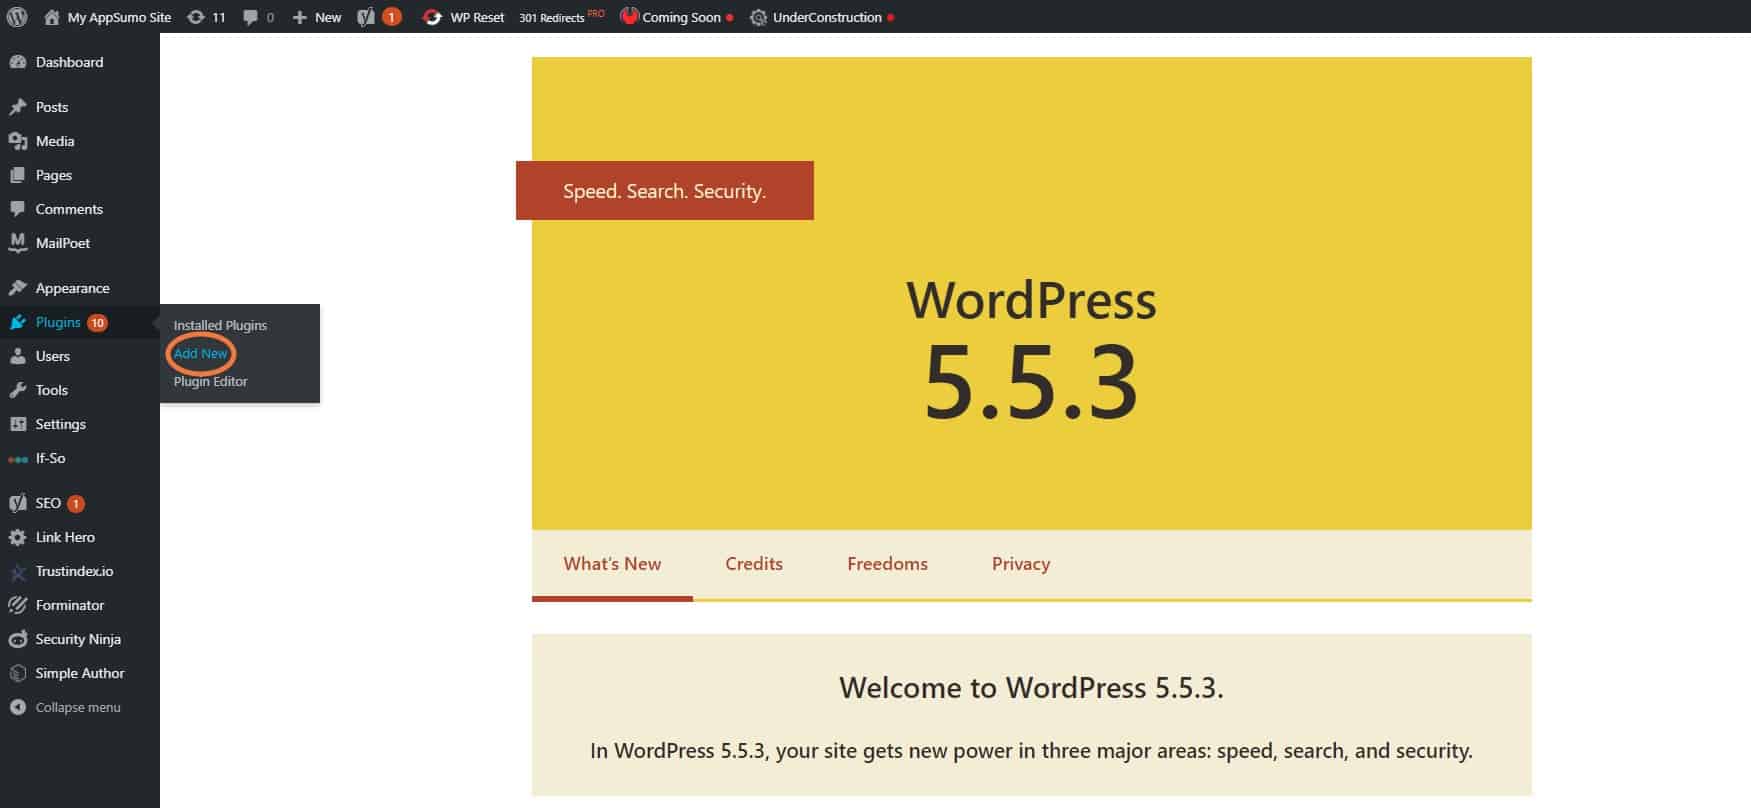
The installation of MailPoet is very easy; all you gotta do is head to the “Plugins” tab and click on the “Add New” option.
After doing that, type in “MailPoet” into the search bar.
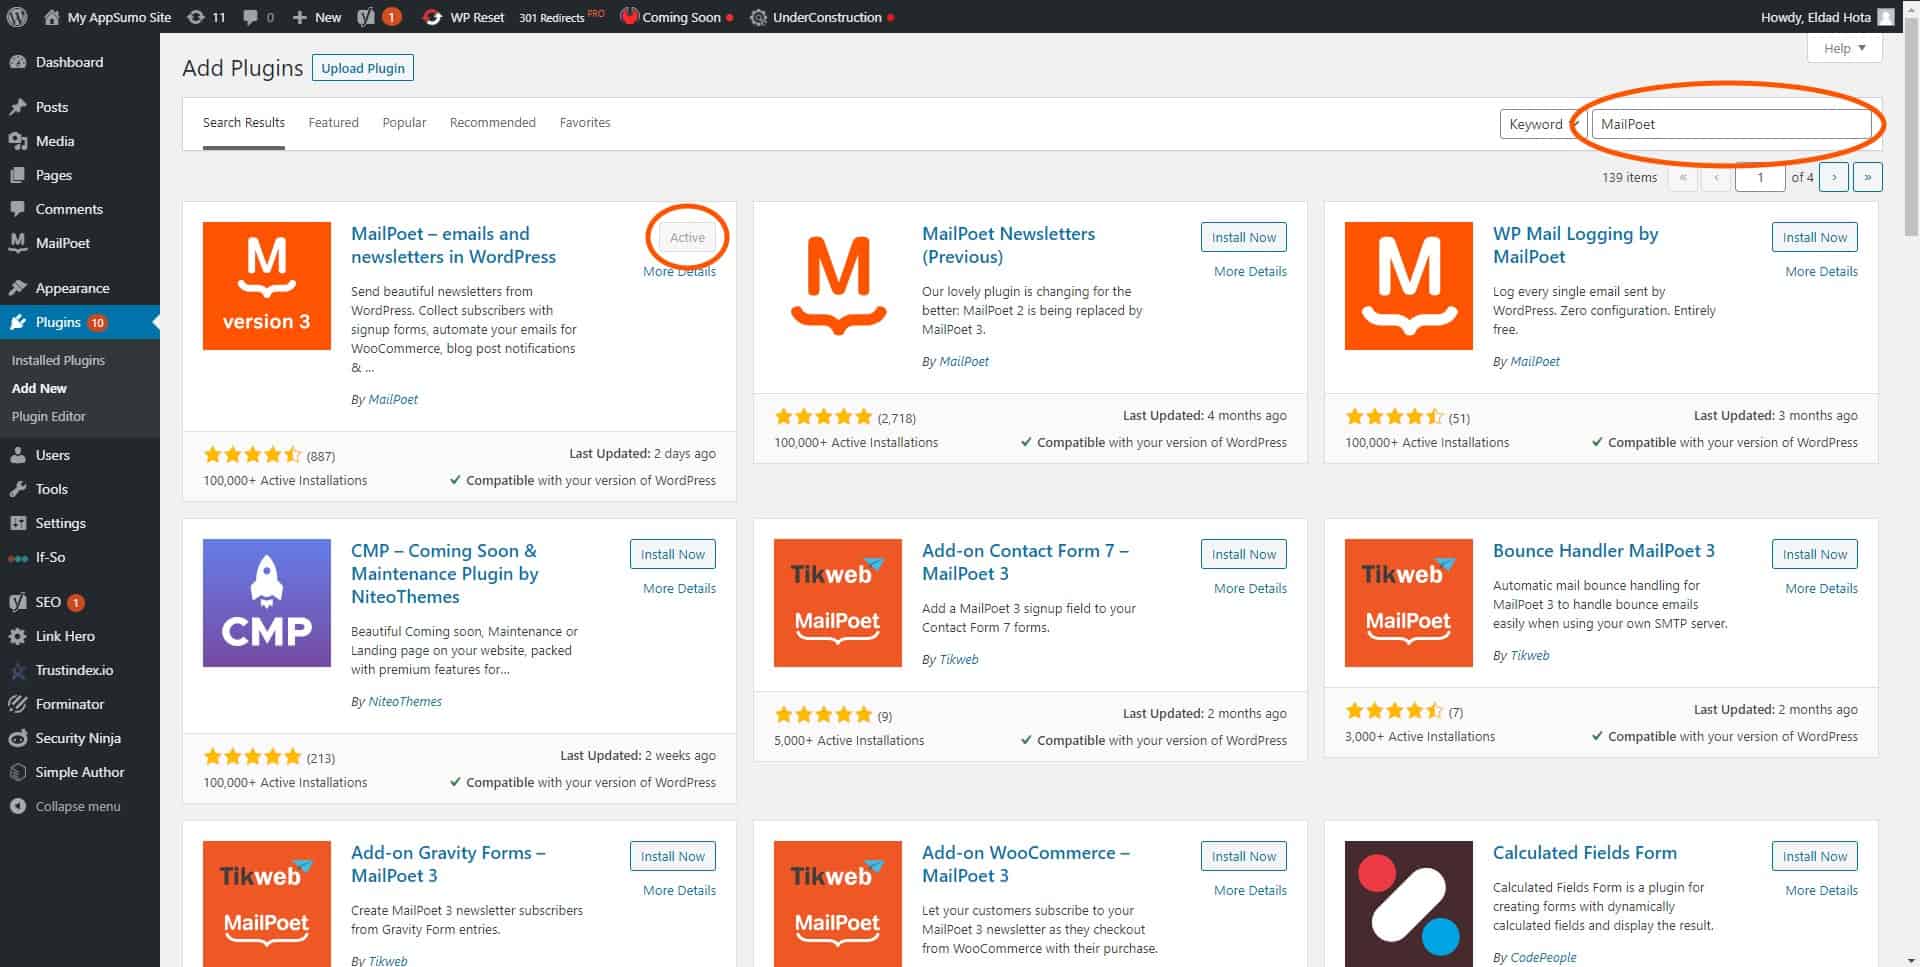
When you find the MailPoet plugin, click on the “Install Now” button.
Once you click the button, WordPress will download everything automatically and set the plugin up for you to use.
Using MailPoet
After we have the plugin installed, there will be 6 different menu options:
- Emails
- Forms
- Subscribers
- Lists
- Settings
- Help
Although we will go over every option, let’s start with the main and most important one: “Emails”.
Emails
As soon as you click on “Emails”, a list of newsletters and welcome emails will pop up. Our list is currently empty, so let’s add a newsletter and go over the process of setting one up.
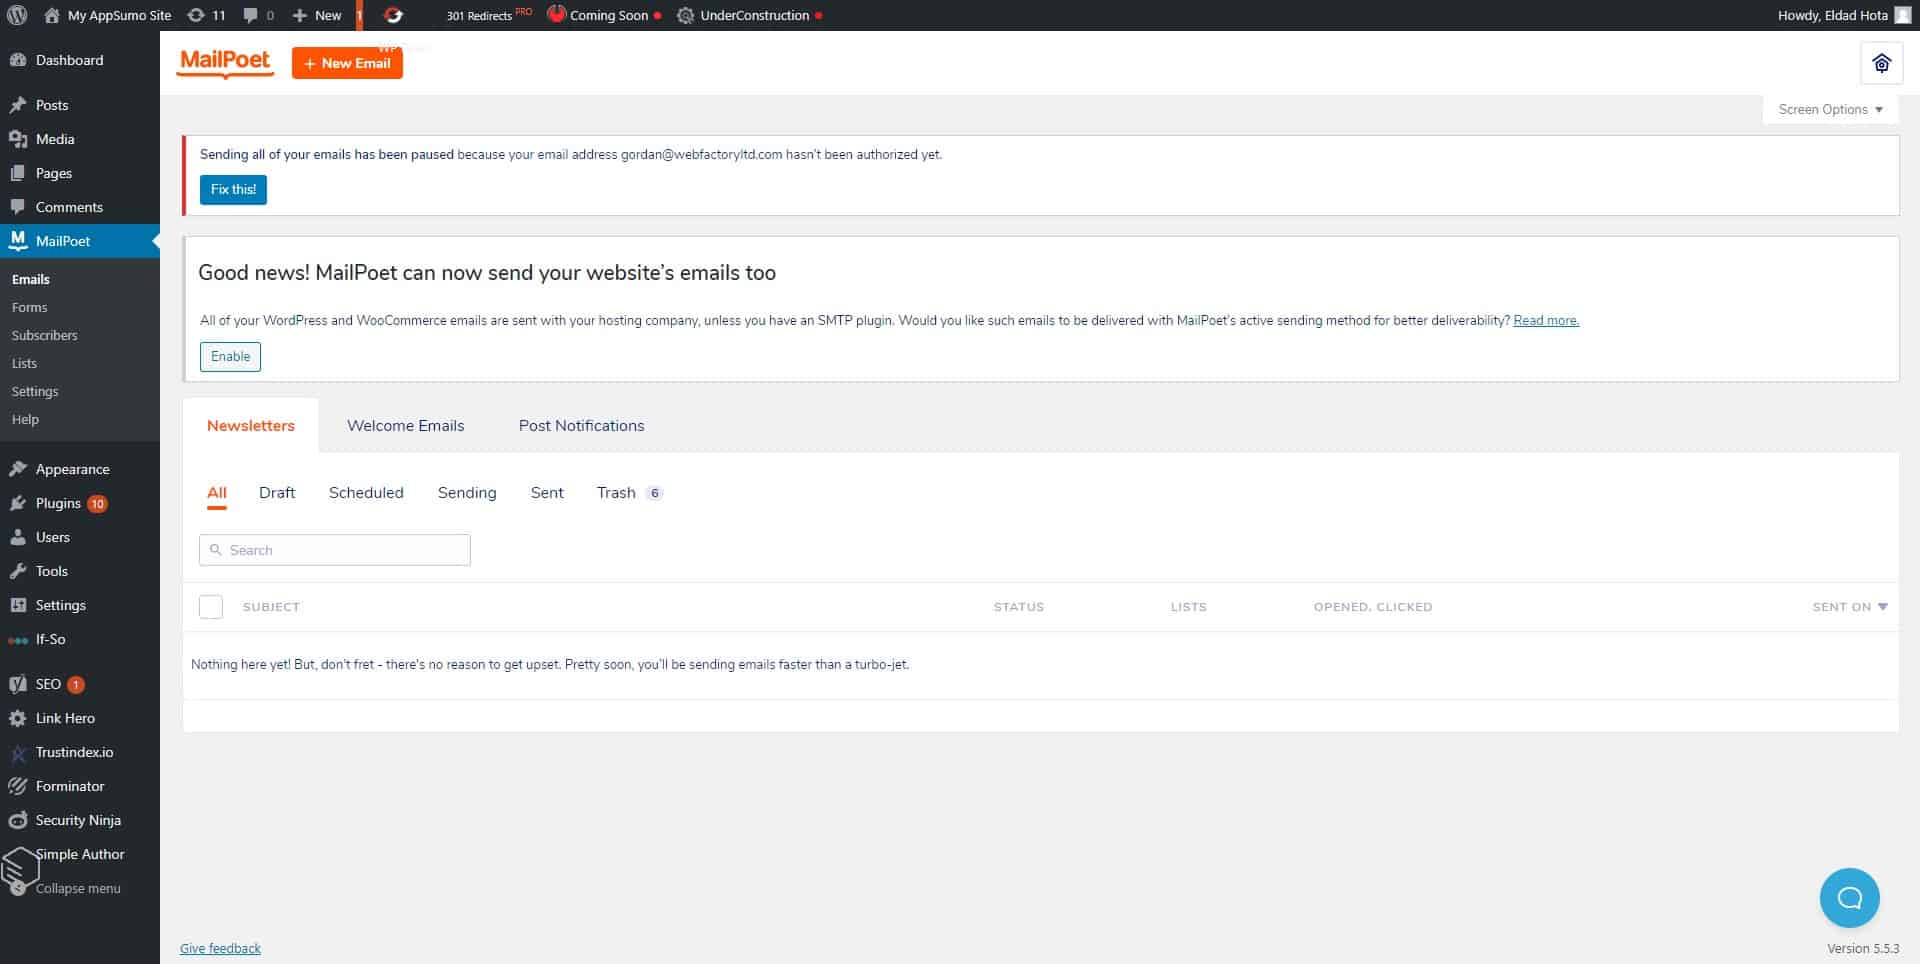
After we click the “New Email” button at the top of our screen and chose “Newsletter” as our type of email, we will be welcomed with a wide selection of premade templates that you can use based on your needs.
In case you don’t like any of the templates (which probably won’t happen), you are free to create your own right from scratch using the creation tool.
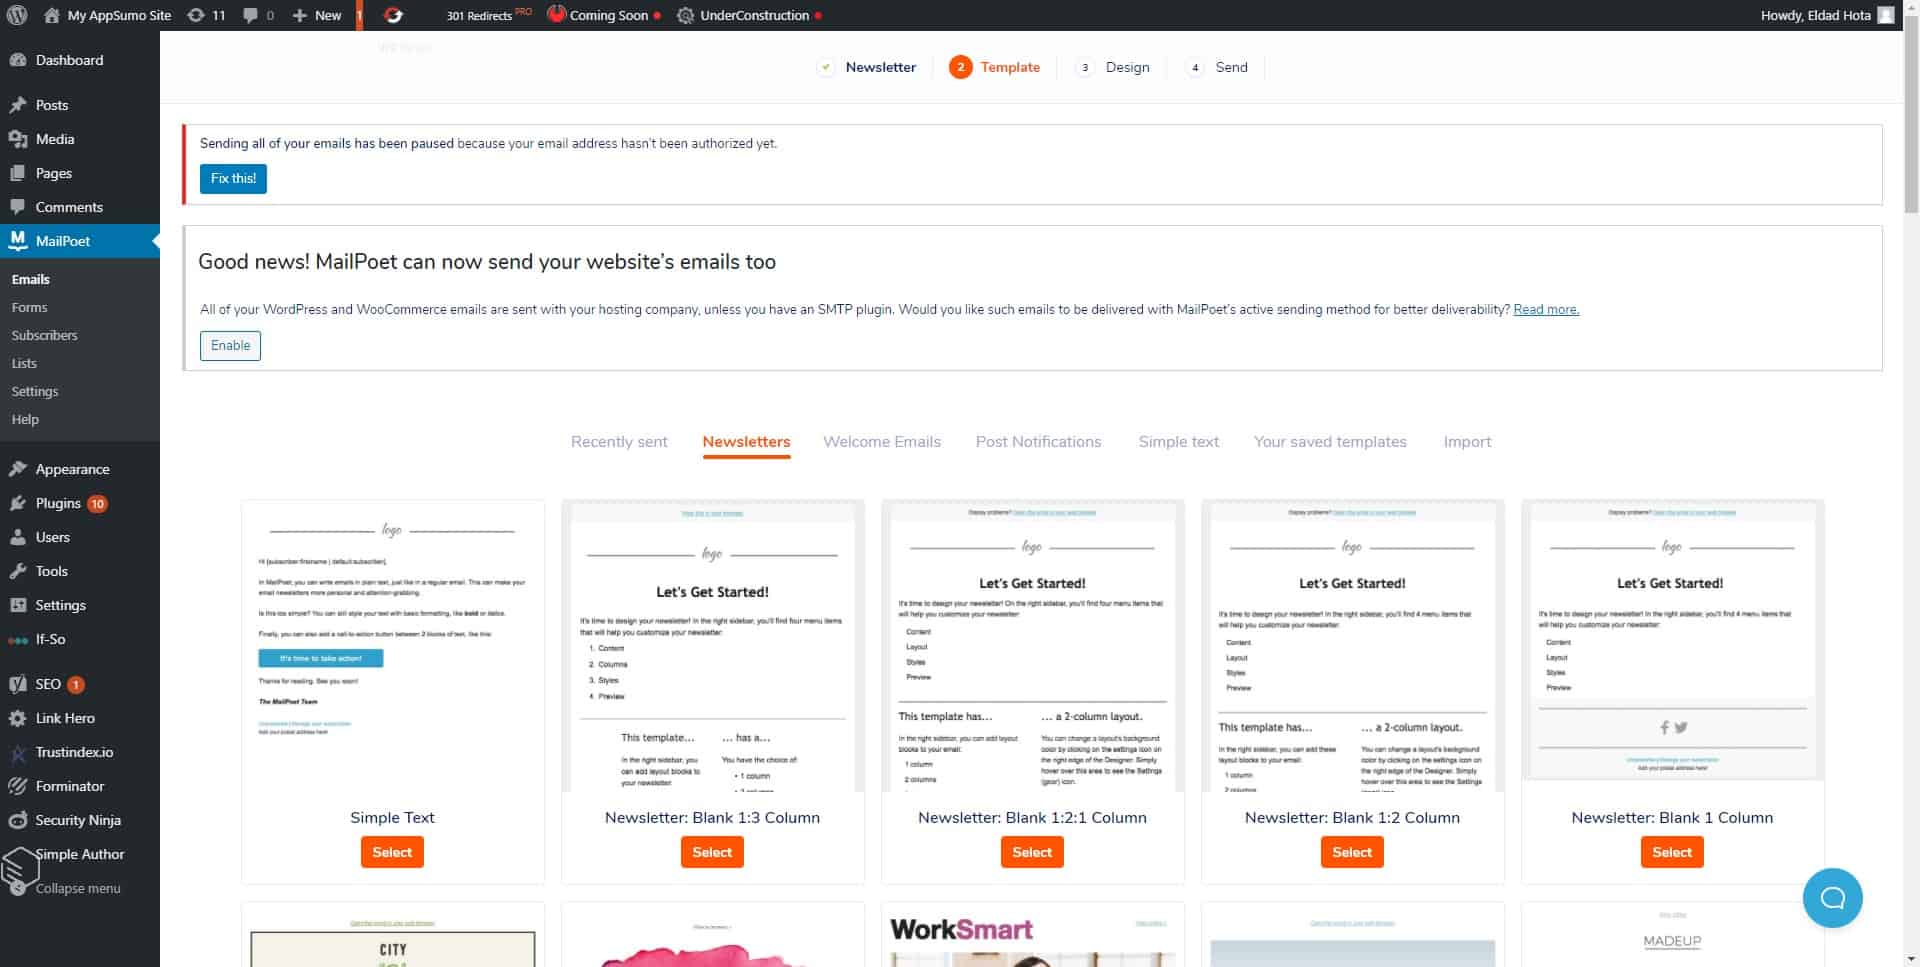
In our case, we picked the “Jazz Club” template to notify our customers about new shows that are going to happen in our club.
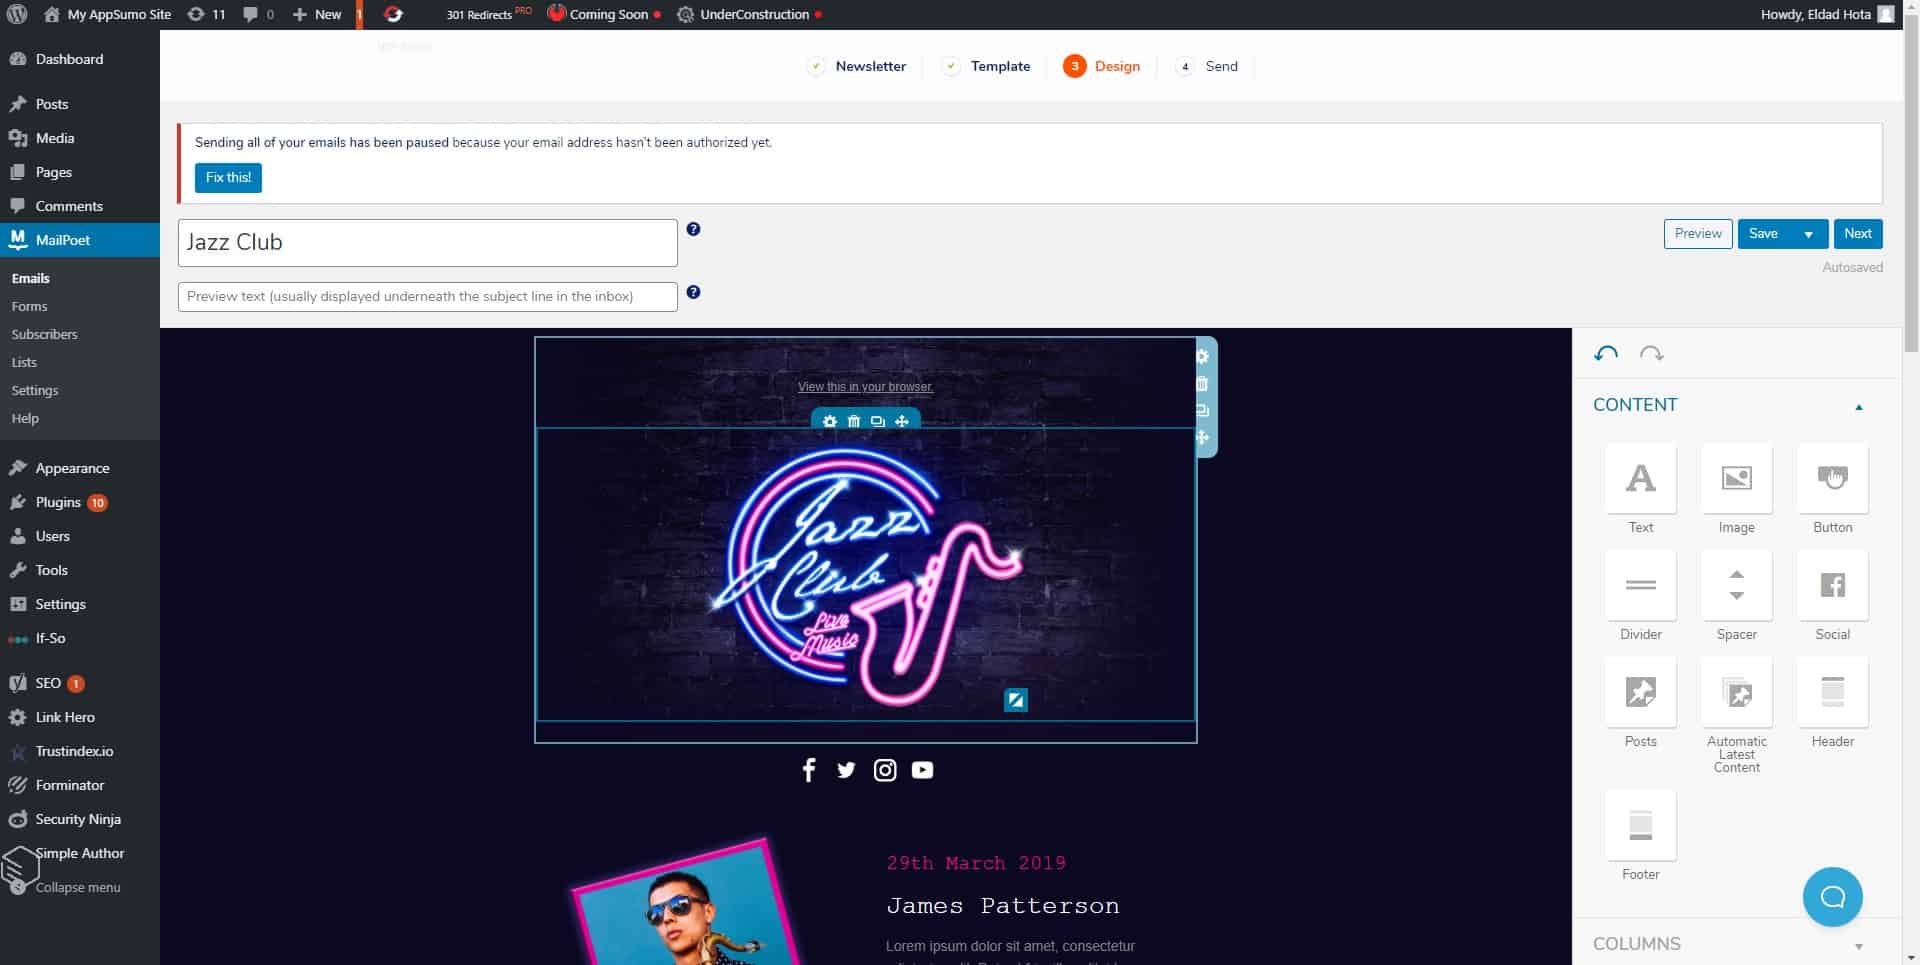
Alright, we picked out a beautiful template, but we have to change some things up, that’s for sure.
When we are talking about changing things and designing emails in general, MailPoet’s editor, which’s both good-looking and easy-to-use, comes in handy. The number of things we can change with this editor is almost limitless.
Everything from the main logo, colors, and background to the text and its font – it can all be changed here.
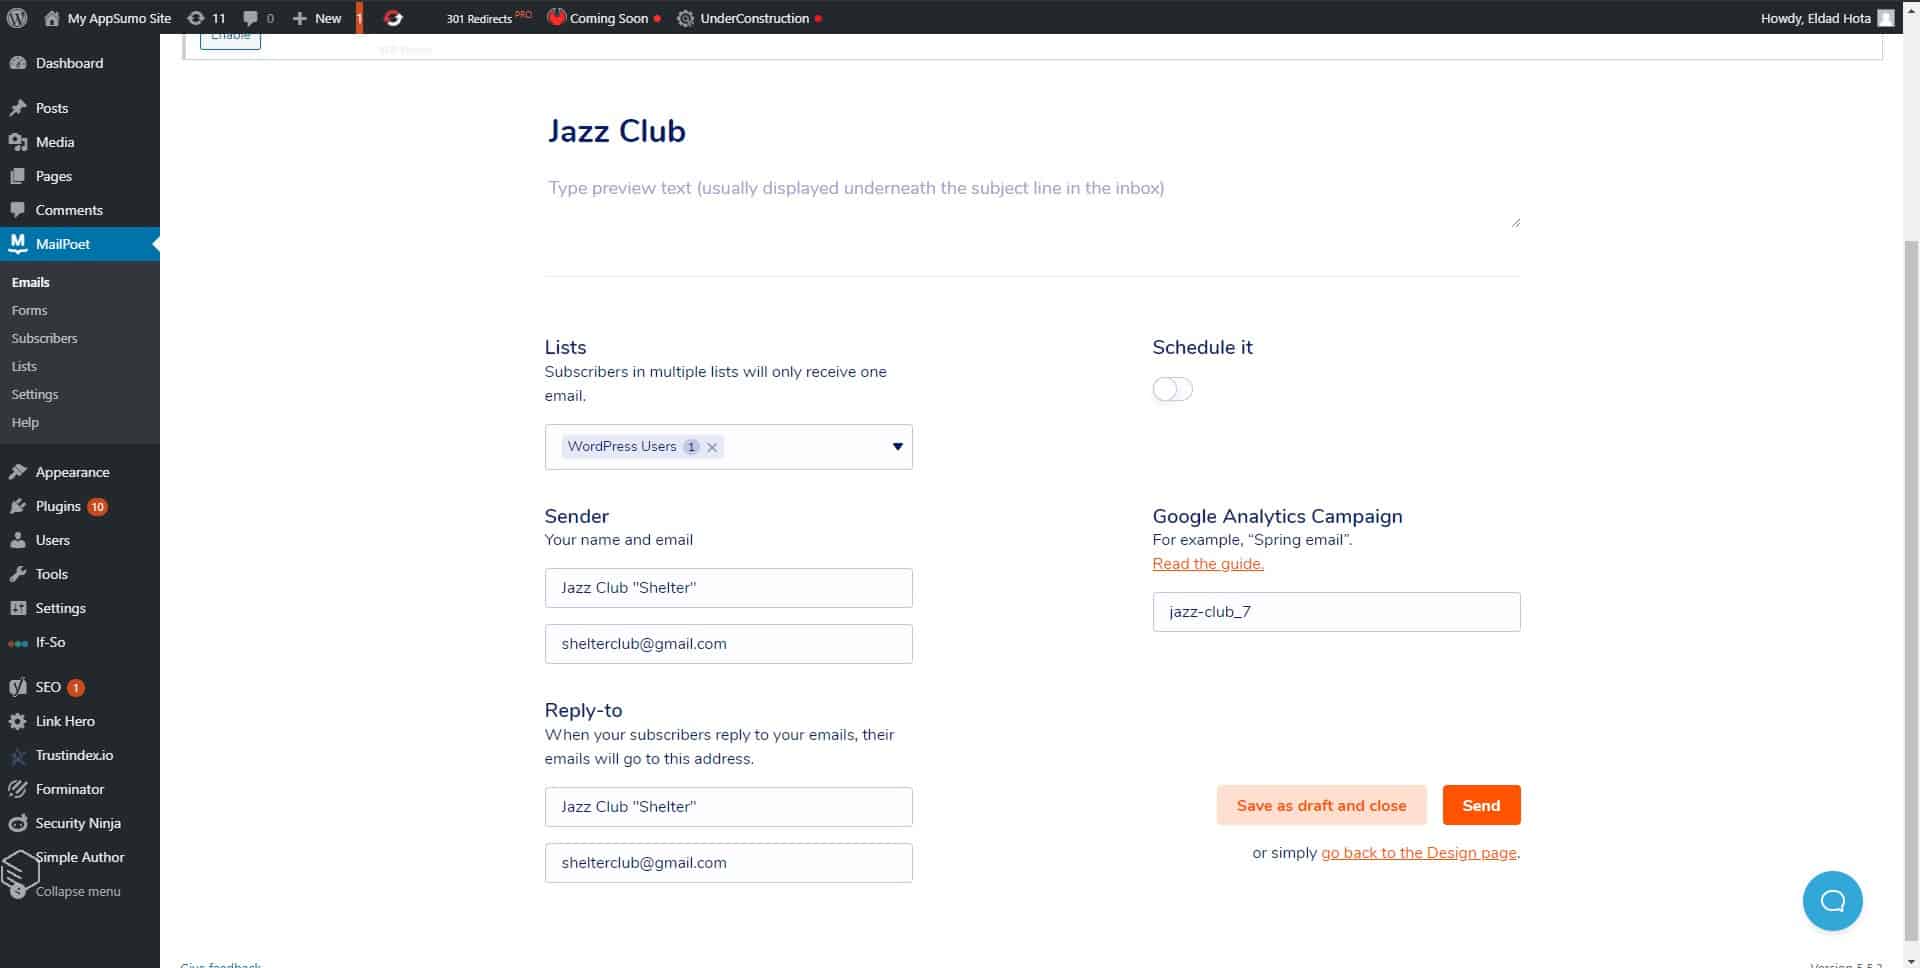
Now that we are done designing, we can click “Next” and go over the last part of making a newsletter.
The details we have to fill in here are the email list (which we will talk about pretty soon), our sender email address and name, as well as our reply-to email address and name.
You can also schedule when your newsletter email will go out to the public, picking the exact date and time.
After you filled in all the info and maybe scheduled the email, you are free to click the “Send” button, which will notify your whole email list about your new newsletter.
Forms
Okay, now that we have finished our newsletter and sent it out to our lovely contacts, let’s proceed to create a nice pop-up form that will welcome our visitors.
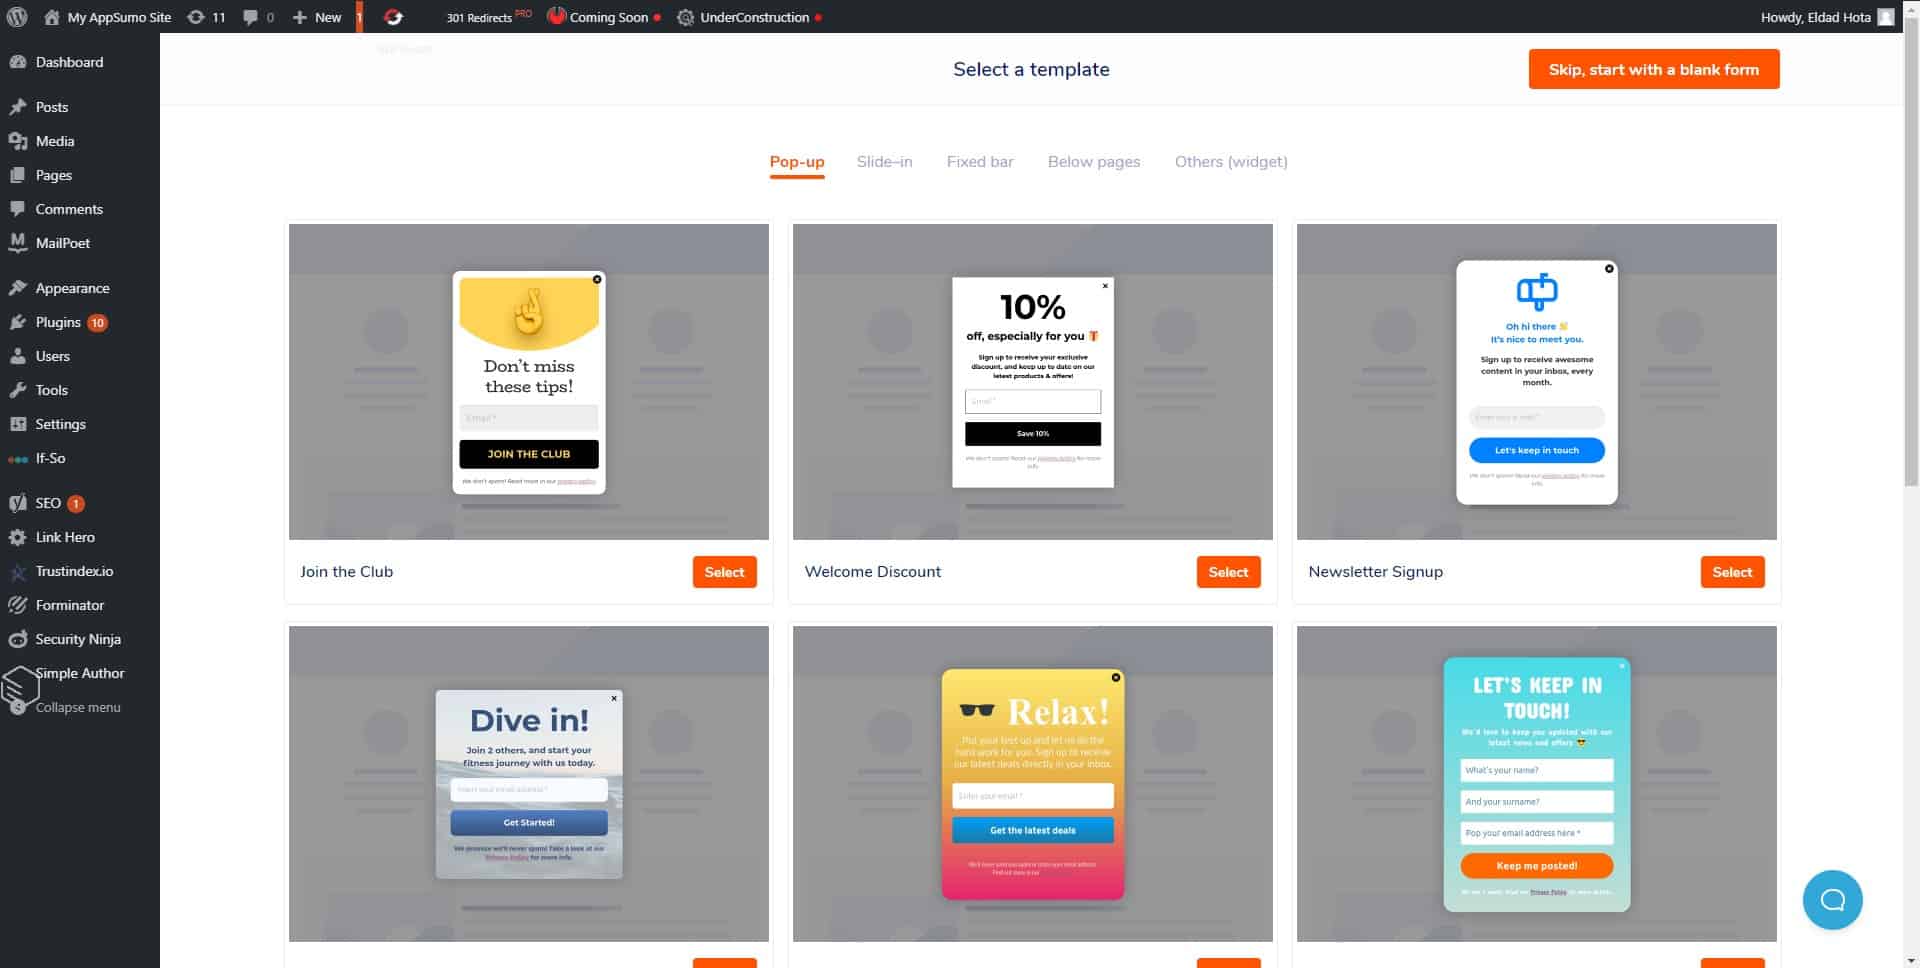
Just like for emails, we also have lots of beautiful templates for forms too.
Besides the pop-up form templates shown in the image above, there are also pre-made templates for slide-in forms, fixed bar forms, forms located below pages, and some other form types as well.
In our case, we’ll pick a pop-up form that fits our jazz club theme.
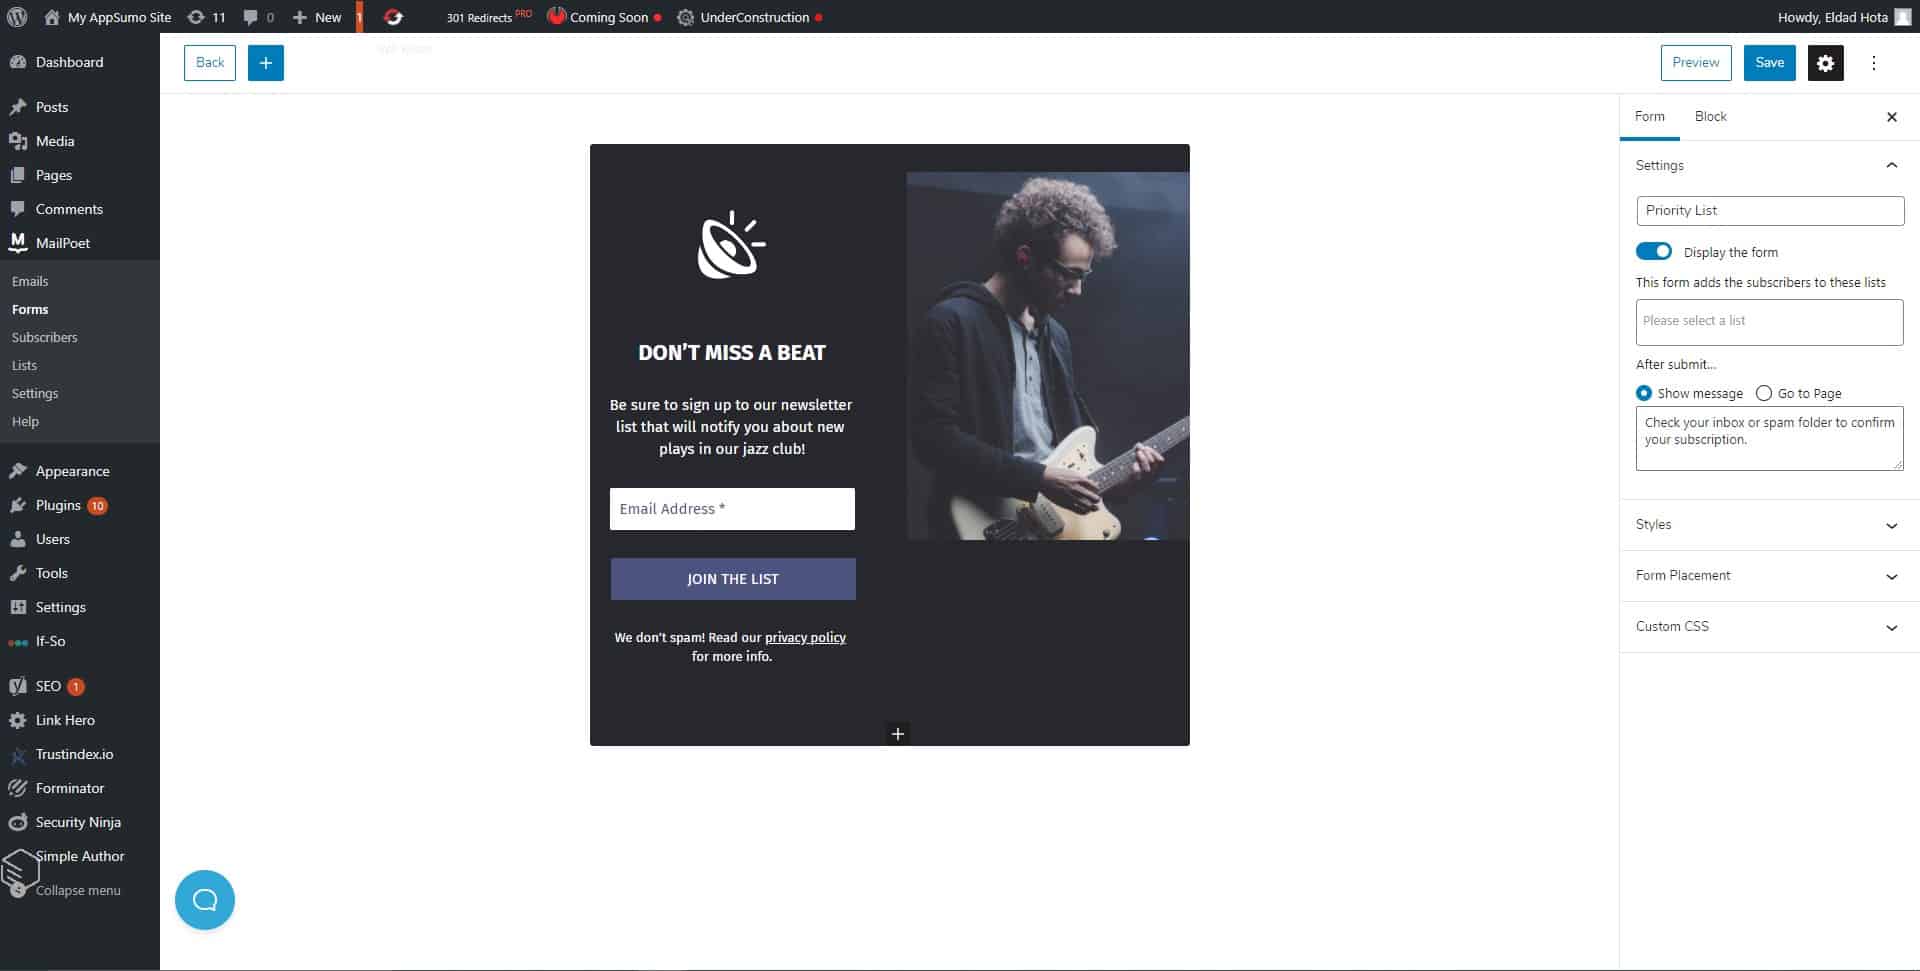
Again, the editor that we met before is also present here. With it, you can completely customize every template you pick, everything from its text to colors, pictures, and icons.
After designing your form, all you have to do is connect an email list to it that will gather all the email addresses entered into the form, and that’s about it. After doing all of this, you’ll have a beautiful form waiting for your visitors.
Subscribers
As you can see below, once we click on “Subscribers”, we’ll be able to see a list of our subscribers along with the total number of them. The list showcases the names of our subscribers along with their email addresses.
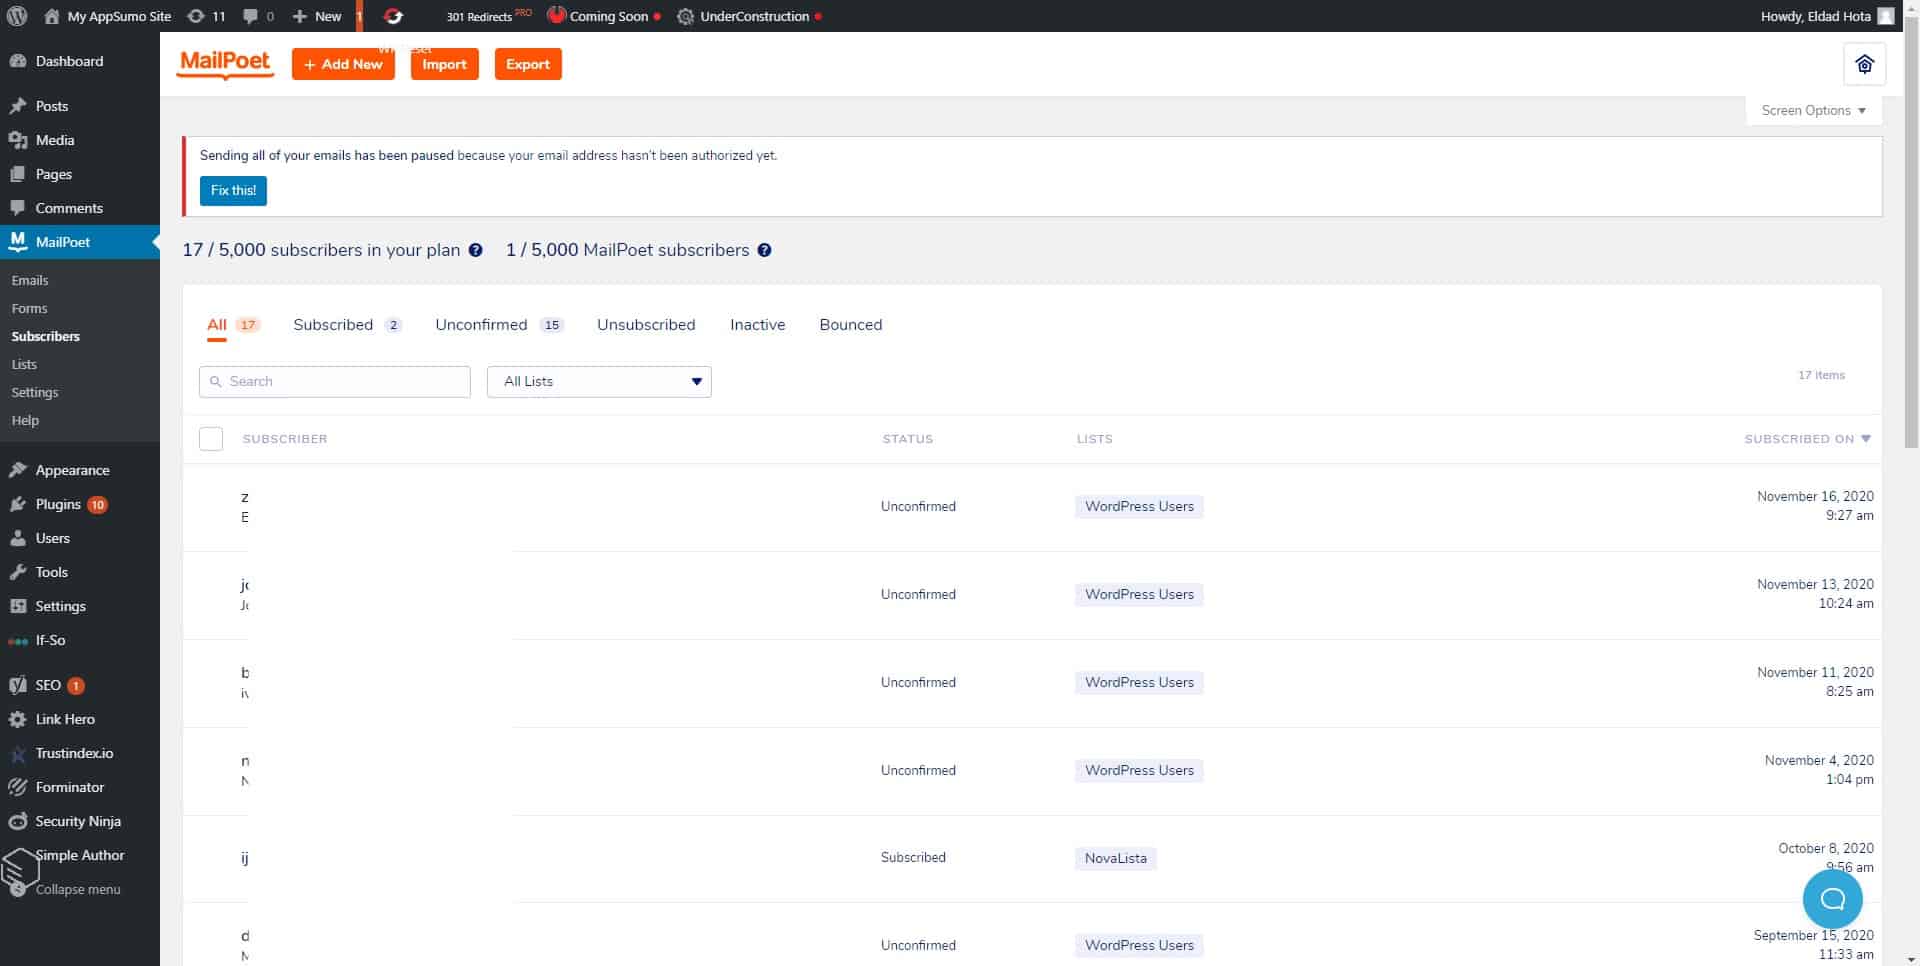
Besides the basic info about your subscribers, you can also see their status (if they are confirmed or not), which list they are on, and at which time and date they subscribed.
Here, we can also add in a subscriber manually using the “Add New” button. Once we click that button, we’ll have to fill in their name, email, status, and the list they will belong to.
In case you are too lazy to add in subscribers one by one, you can import a list of subscribers using either a raw text file, pasted list, or you can import your subscribers from MailChimp if you use that tool.
If you have lots of subscribers on your MailPoet list and want to export their info somewhere else, feel free to click the “Export” button which will put all the info about your subscribers in either a CSV or an Excel file, up to you.
Lists
Doing more or less the same thing as the “Subscribers” option, this one just shows you all the lists of subscribers you ever created, along with the number of subscribers on each list, how many of them are confirmed, and how many are inactive, plus, some other basic info.
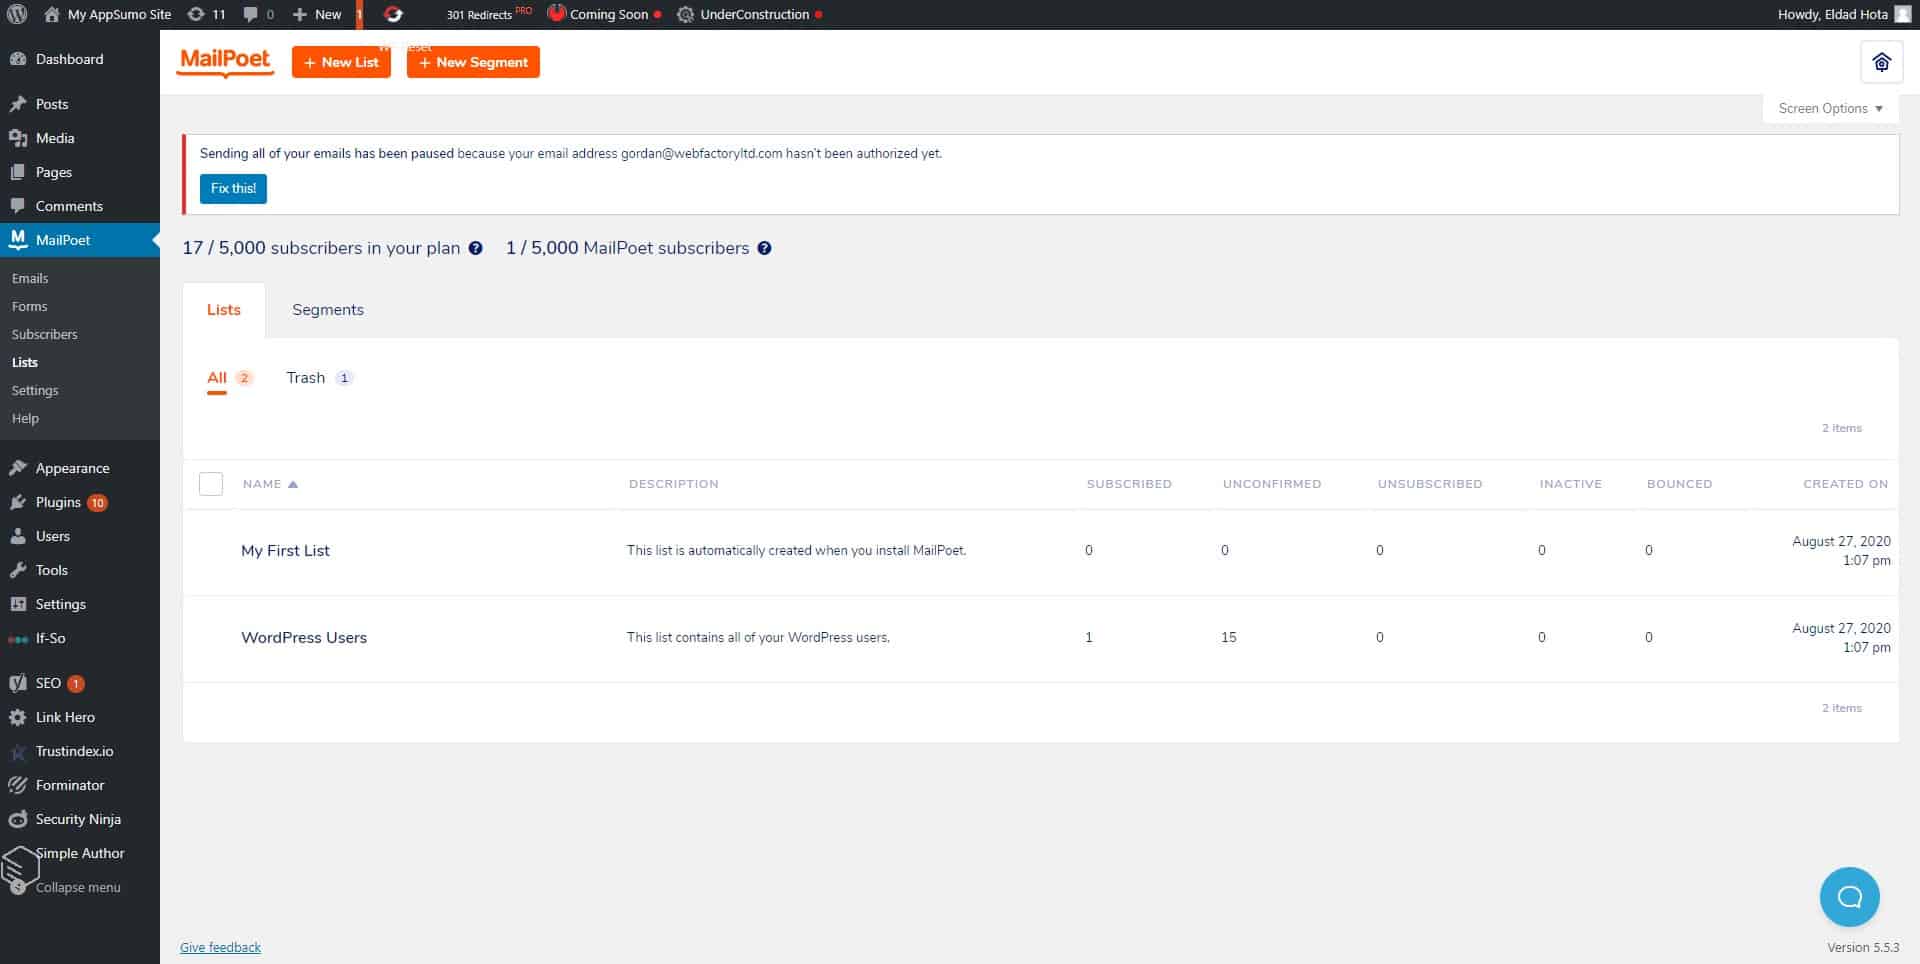
Here, you can also add a new list or a new segment if you wish.
Settings
As you could have guessed, here we have all the settings for this tool.
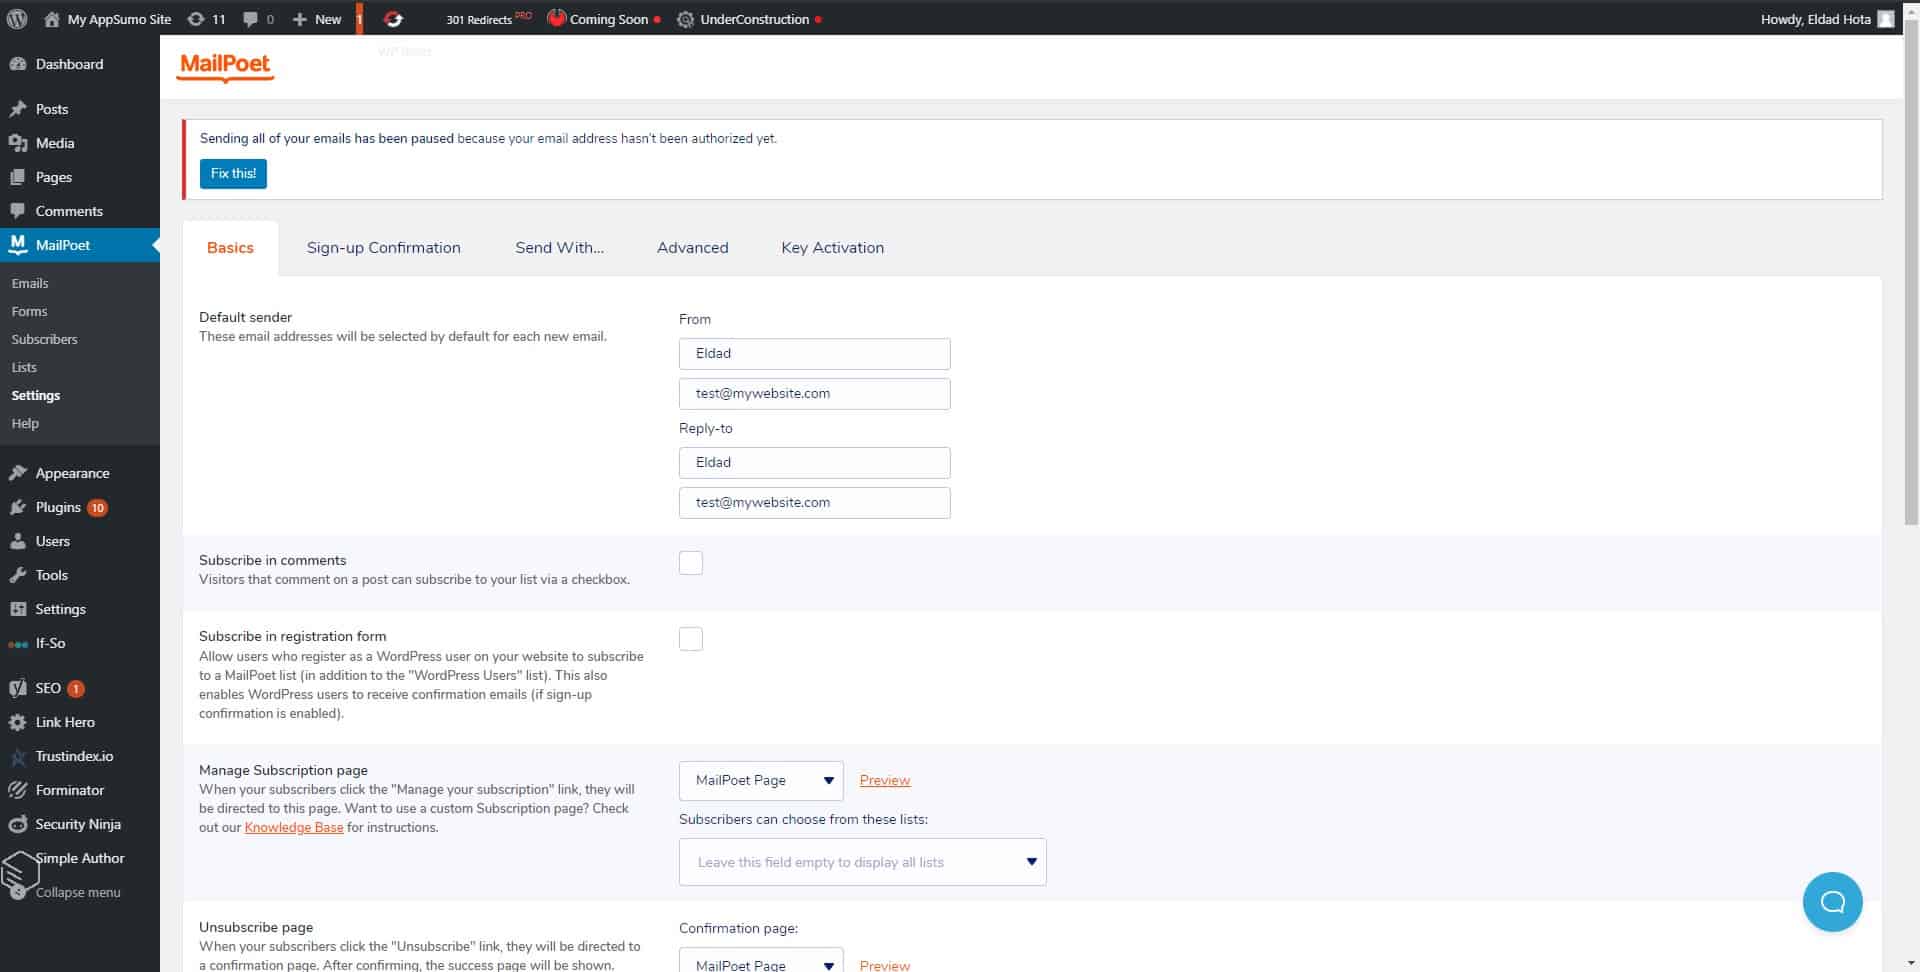
In the “Basics” tab, we can set up the default sender for all of our emails along with the sender’s name. Besides that, there are other things that you can tune to your needs, everything from notifications up to shortcodes.
The second tab is there mainly for creating the sign-up confirmation email which is mandatory for every MailPoet account. You can edit it here and put in the text that fits you best.
In the third tab named “Send with…”, you guessed it – you can pick the service you are going to send all of your emails with. That can be either MailPoet’s service (which is recommended) or some other third party service of your choice.
At the fourth tab, we have all the advanced settings you might want to change, based on your preferences.
Here, you can also configure where your bounced emails will go, for how long will you send emails to your inactive subscribers, or whether you want to include click tracking in your emails – it’s all up to you.
At the end of this tab, is the “Reset” button, which will delete MailPoet and install it again, allowing you to start from scratch.
In the “Key Activation” tab, you can activate your MailPoet premium subscription, in case you bought one.
Help
Under “Help”, you don’t only get all the help you need when using this tool, but you also get some useful additional info that will mostly interest tech geeks.
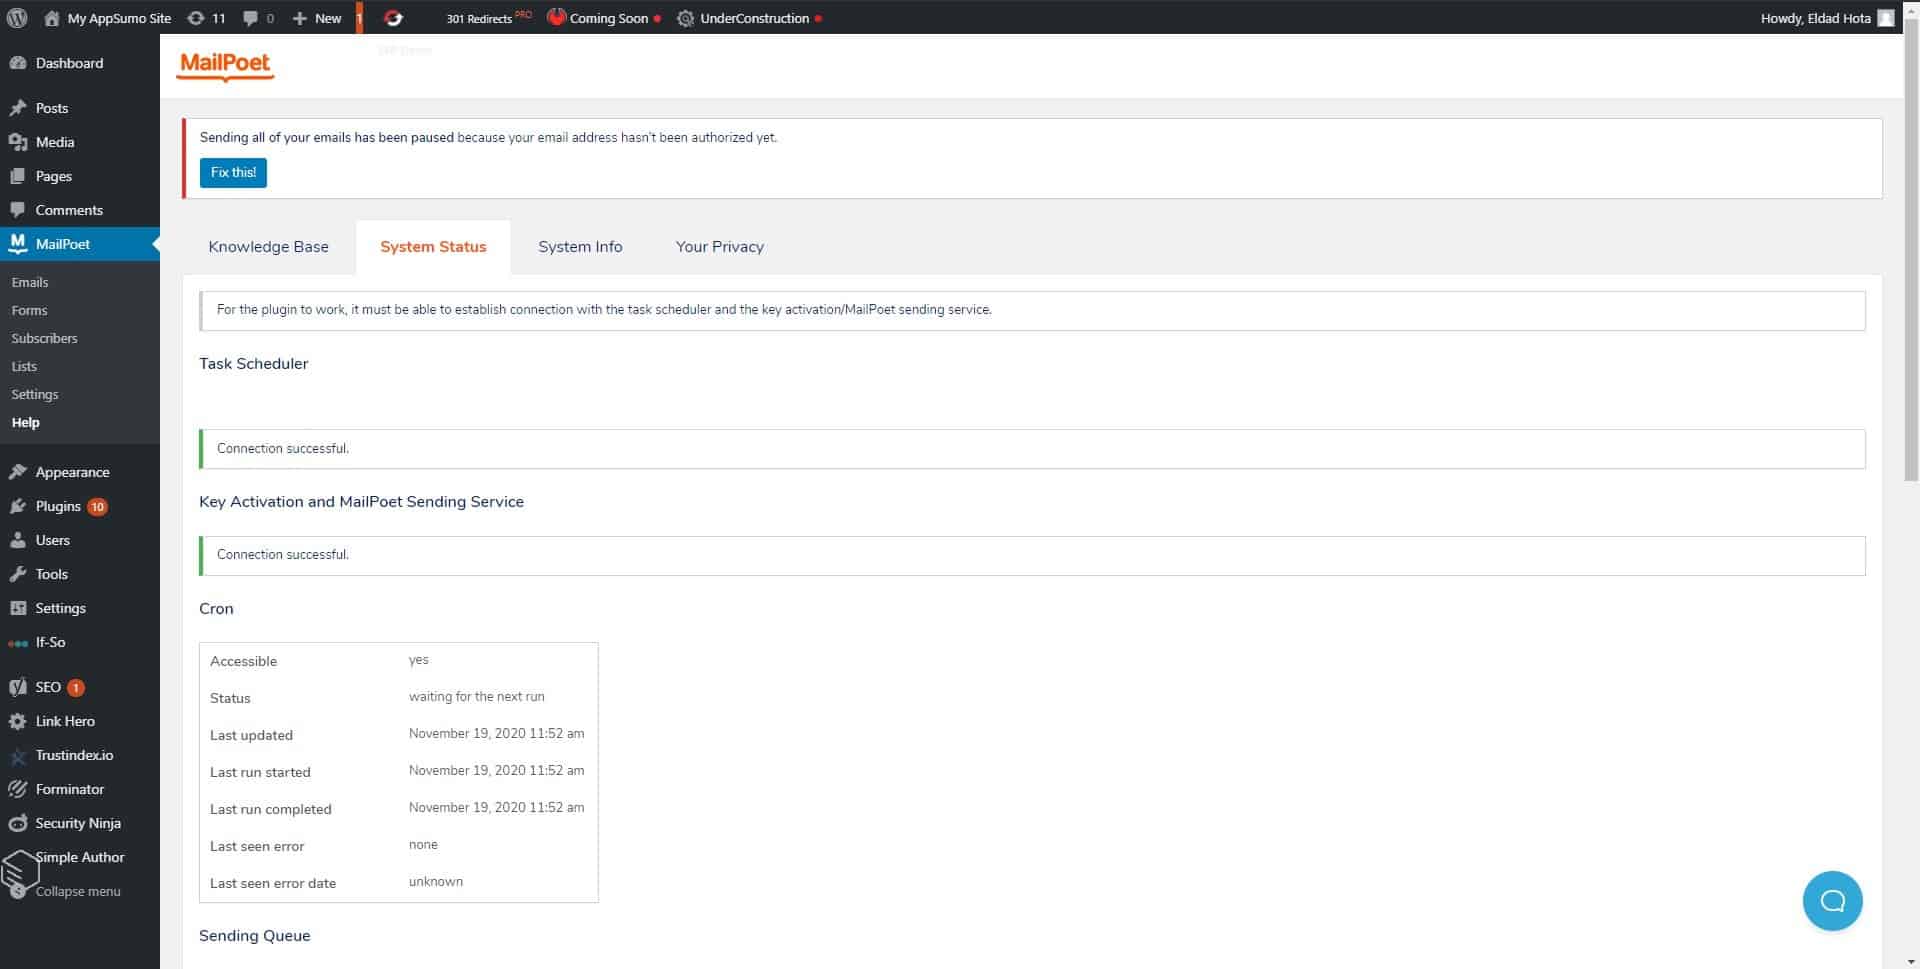
You’ll have access to your system status, so you can see if everything on your website is up and running properly, but you’ll also get system info, which will show you every detail about the plugin and how it works with WordPress.
Pricing
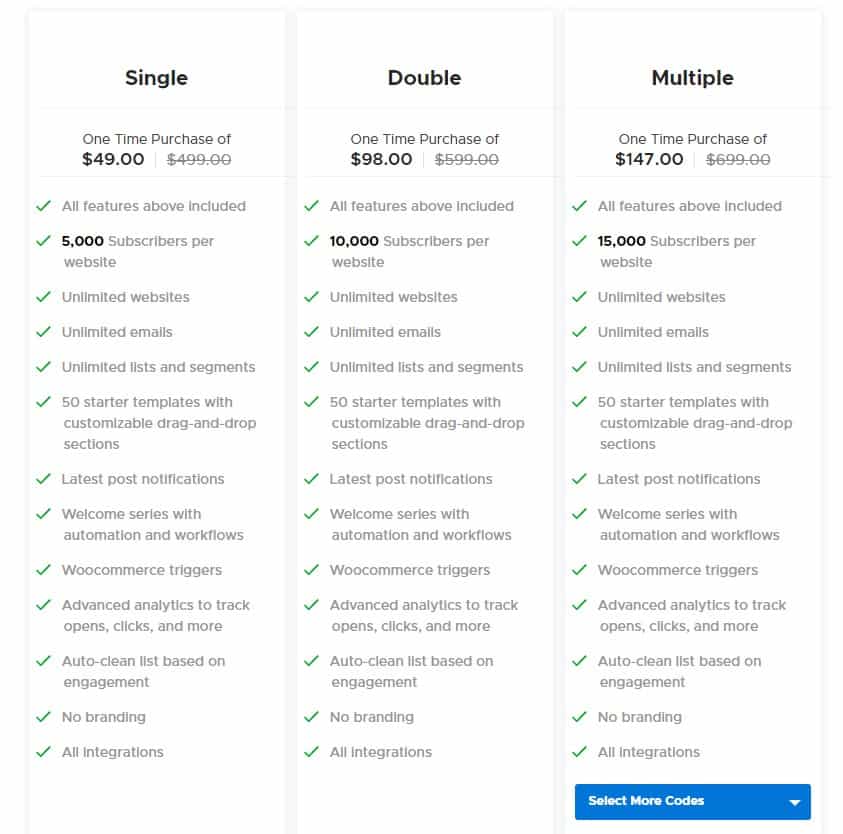
If you buy the “Single” MailPoet package, you’ll get all the premium features and unlimited usage, along with a limit of 5.000 subscribers per website, which is enough for most basic users.
In case you want to have more than 5.000 subscribers on your list, your choice will have to be either the “Double” or “Multiple” package, in which you get an additional 5.000 subscribers with every code you buy.
Conclusion
Regardless if you are an owner of a small website and want to create a nice list of subscribers or an owner of a big website who wants to expand even more and organize everything properly, MailPoet should be your choice.
Offering low prices, ease of use, and well-designed emails and forms, you simply can’t go wrong with using MailPoet when it comes to email marketing.
![]()
![]() Latest posts by Editorial Staff (see all)
Latest posts by Editorial Staff (see all)
Where Should We Send
Your WordPress Deals & Discounts?
Subscribe to Our Newsletter and Get Your First Deal Delivered Instant to Your Email Inbox.
Thank you for subscribing.
Something went wrong.
Keep reading the article at WP Newsify. The article was originally written by Editorial Staff on 2020-12-24 16:13:54.
The article was hand-picked and curated for you by the Editorial Team of WP Archives.

