Want to create a professional real estate website that converts?
Studies show that more than 51% of buyers find their dream home through the internet. This goes to show how important it is for every realtor to have a real estate website.
Creating a real estate website has several advantages for your business:
- It helps you establish credibility in the market
- It’s easier to create brand awareness
- Users can easily contact you and get in touch for an appointment
- You can entice your customers with great pictures of listed properties
These are just a few benefits of setting up a real estate website. There’s a lot more that your website can do to improve your business.
In this tutorial, we’ll tell you how to set up a real estate website for your users without needing to use a single line of code. But before that, let’s take a look at what makes a good real estate website.
What Makes a Good Real Estate Website
Creating a website is super easy with WordPress. But you probably knew that already. What’s more challenging, however, is creating an impressive real-estate website that has the power to convert.
But if you have a well-laid plan for your website design, you can easily come up with a site that converts. For that, you need to know what makes a good real estate website. Here are some factors that every visitor looks for when searching for a home online:
- Ease of Navigation: No one like sites that are difficult to navigate. If you want to retain users on your website, make it easy to navigate.
- Responsive Design: Your website should look equally good on bigger screens as well as on smaller screens. So make your real estate website responsive enough to look great on desktop, tablet, and mobile devices.
- Map Listing: Viewing the property on a map lets prospective clients get an idea about the property’s location. You can also use it to highlight key information about the area around the property to boost engagement.
- Image Gallery: Before visiting a property, visitors definitely want to view pictures of what they’ll see. Images make the most impactful content on a real estate website and lead to more in-person visits.
- Contact Details: If your visitor likes your website content, they will want to contact you. Create a page that makes it easy for them to get in touch with you when they see a property they love.
- Appointment Page: An appointment page makes it easier for visitors to book appointments with you. This simplifies a tedious administrative task and keeps your phone lines free from scheduling calls.
Now, let’s look at how to create a real estate website that has the above features.
Step 1: Creating a Real Estate Website
The first step to getting started is to create a website. For that, you’ll need 3 things.
- A Web Host: the space where your website will live
- A Domain Name: the address through which visitors can navigate to your website
- An SLL Certificate: a protocol that will protect your website from malicious threats
There are several web hosting services that you can choose from. But we recommend you check out Bluehost.

With Bluehost, you don’t need to purchase your domain and SSL certificate separately. It offers both of these features for free along with its hosting plan. So choose a good domain that reflects your brand.
To start creating a WordPress website quickly, you can also use their one-click WordPress install feature. To learn more, read this review of Bluehost . Once you’ve signed up for Bluehost and used their one-click WordPress install feature, you can move on to the next step.
Step 2: Selecting a Good Theme to Style Your Real Estate Website
Now that you’ve created your website, its time to design it. Don’t worry, you don’t need any web design skills for that. WordPress offers great themes that let you make your website visually stunning.
The best option for this particular website, however, is Astra.

Astra is a multipurpose, user-friendly, and well-coded WordPress theme that offers powerful design options. It can be used by advanced and first-time web creators with equal ease. Read more about Astra here.
The premium version of Astra offers various pre-built demo templates that can be imported with a single click. Go ahead and install the Astra theme from your dashboard.
Now go to your dashboard and click on Appearance » Starter Templates.
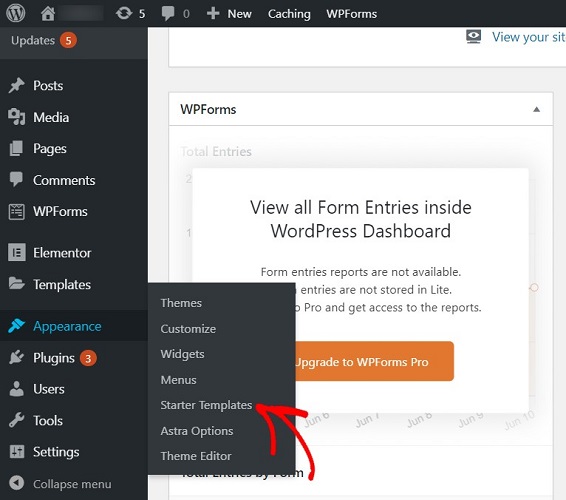
Here you’ll see various pre-built templates. You can select any one of these templates that you like.

For the sake of this tutorial, lets select the Interior Designer template. This template will closely resemble your website so it’ll be easier for you to modify.
If you click on the template, you’ll see a preview.
Just below that, you’ll see a button labeled Import Complete Site. Click on that.
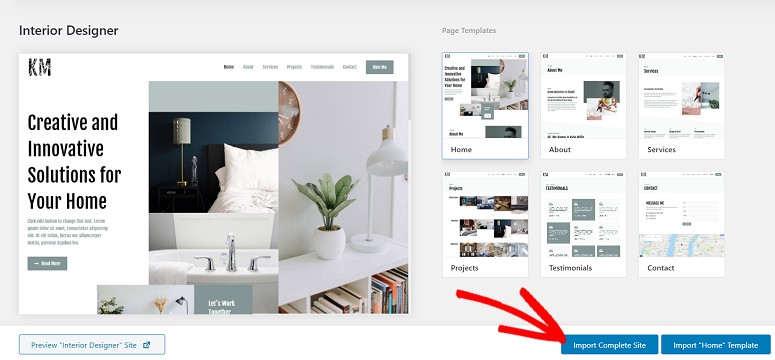
You’ll now see a message on your screen with a few recommendations like importing customizer settings, widgets, and so on. Click on the Import button to import them.
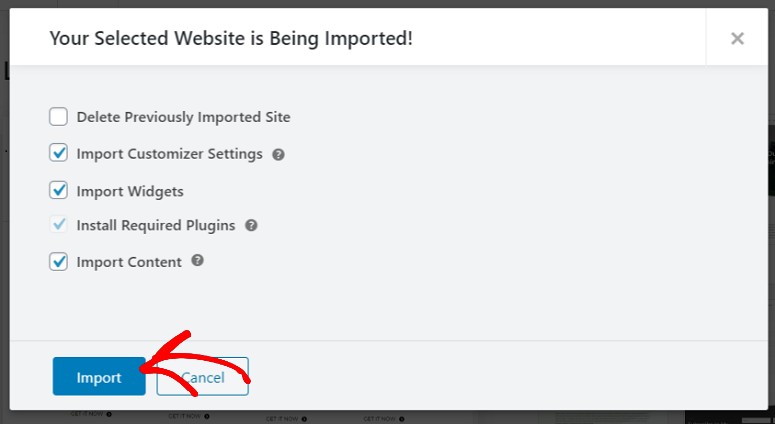
Your website will be ready in just a few seconds.
Step 3: Adding a Contact Form
The next step is to add a contact form to your website. By adding a contact form, you can let your users get in touch with you by simply filling out a few basic questions.
To add the contact form to your website, you need to install the WPForms plugin.
If you’ve never installed a WordPress plugin before, no worries. Read this guide on how to install a WordPress plugin.
Adding a form with WPForms is easy. All you need to do is select a template, customize your fields and settings, and you’re done. Here’s how to create a contact form with WPForms.
Step 4. Listing Your Properties
Now its time to list your properties. For that, you need to install the Essential Real Estate plugin.
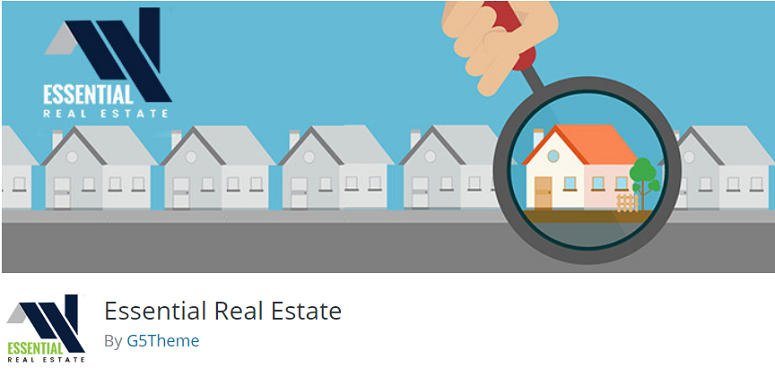
Once the plugin is installed and activated, you’ll see the Setup Wizard Introduction. Click on the Continue to page setup button.

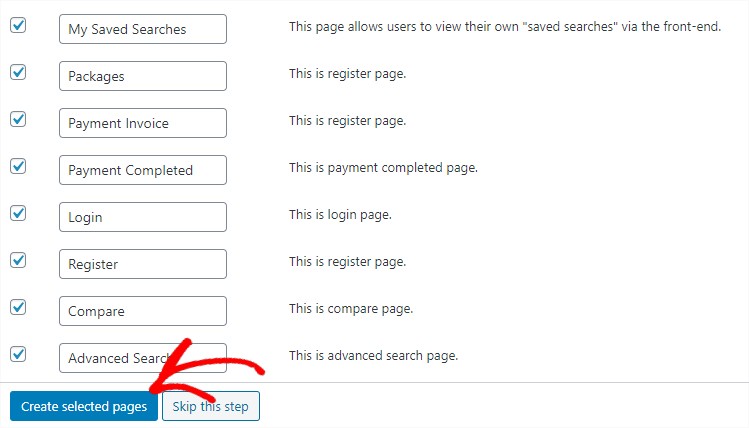
This will take you to a new page where you can create other pages. You can either make all the suggested pages or select the ones that you think are essential for your website. To help you choose which pages you want, you can see what these pages are about in the page description column next to the Page title section.
Here you have options to let users list, manage, and edit a property on your website. Your users can also view and edit their profiles, save their searches, and more.
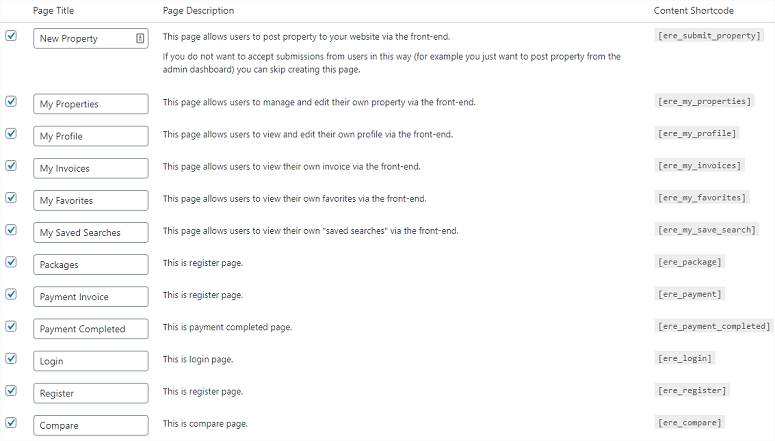
Once you’ve selected which pages to create, click on Create Selected Pages.
Now you’ll see the following on your screen.
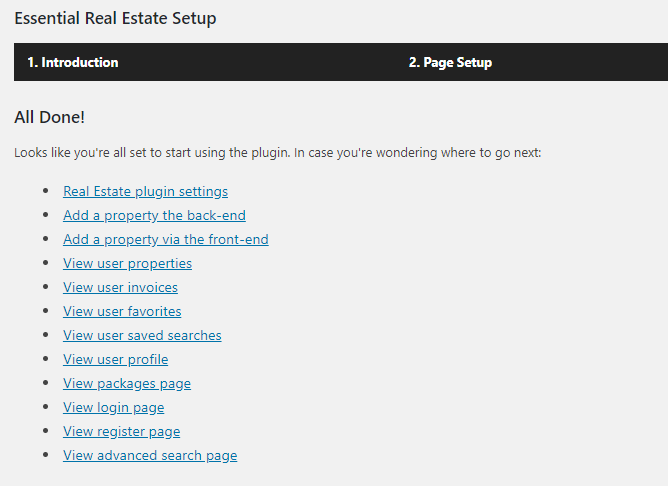
Click on the Real Estate Plugin Settings link (the first option in the image above).
Step 5: Setting up Essential Real Estate Plugin
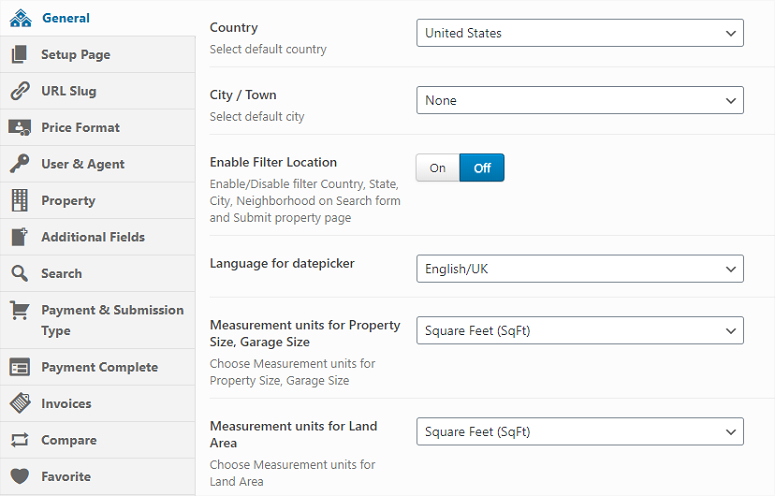
The next step is to set up the plugin. After clicking on the Real Estate Plugin Settigs, you’ll be directed to a new page with several options on the left. In the General tab, add the country, city, and enable filter location. You also have the option to add a unit for your property like sq feet.
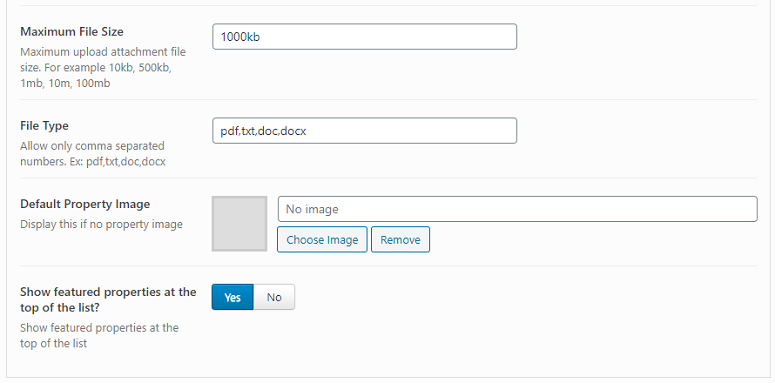
Now go to the Property tab. Here you can enable or disable auto-publishing of the submitted property, work on the submission form layout, or make other configurations as needed.
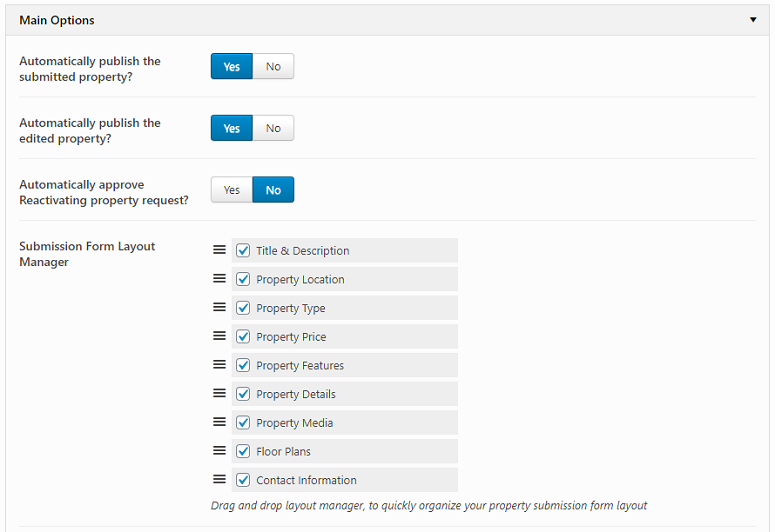
You can also select a default image and display featured properties at the top.
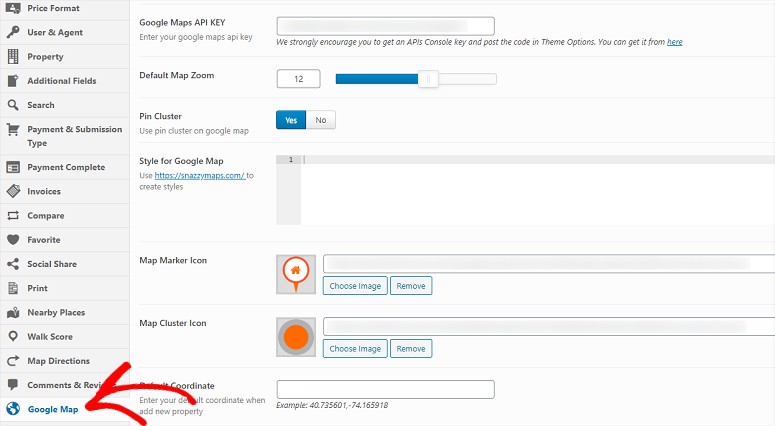
Next, go to the Google Map/> tab. Here you can add your Google Map API key, enable default map zoom, pin clusters, map marker icon, and more.
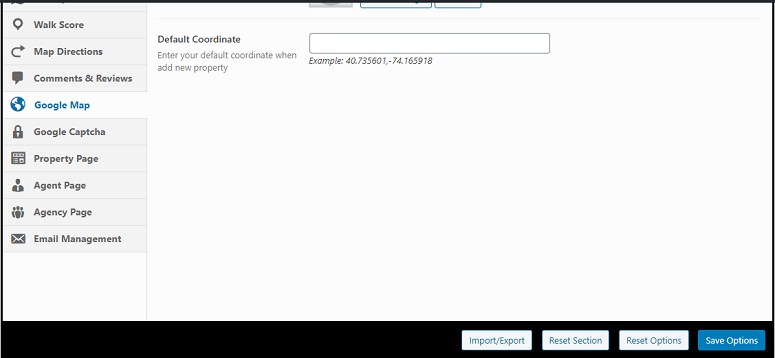
Once you’ve done that, click on the Save Settings button.
Step 6: Adding Your Properties to Your Real Estate Website
Once you’ve finished the settings, its time to add your properties. For that, go to Properties » Add New from your dashboard.
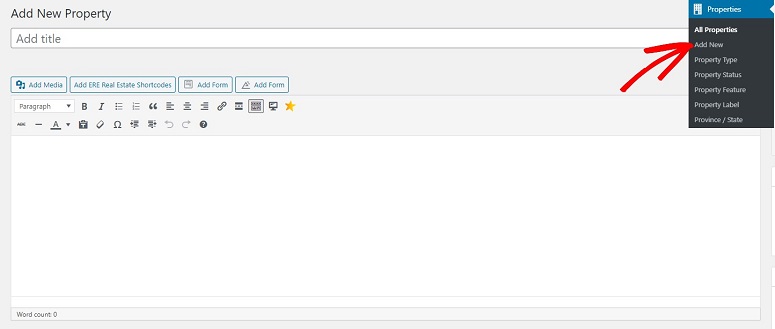
Then add a title to your property. Now scroll down to find the Property Information section. You can use these tabs to enter details about your property like adding the property price, area, number of rooms, property images (under Gallery Images tab), and more.
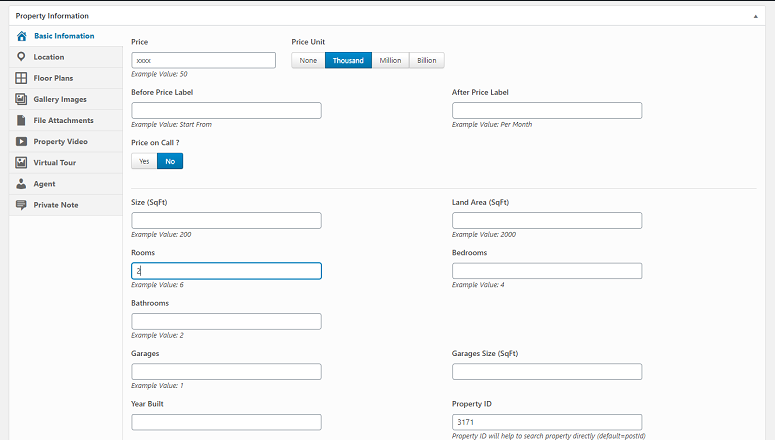
Once you’ve added all the necessary details for your propery, hit the Publish button on your right.
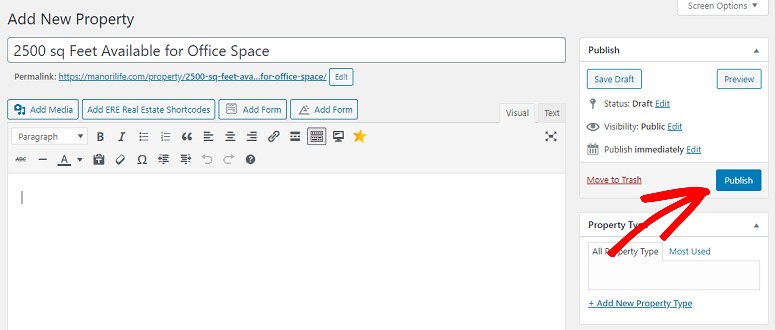
And that’s it. Your property is now listed.
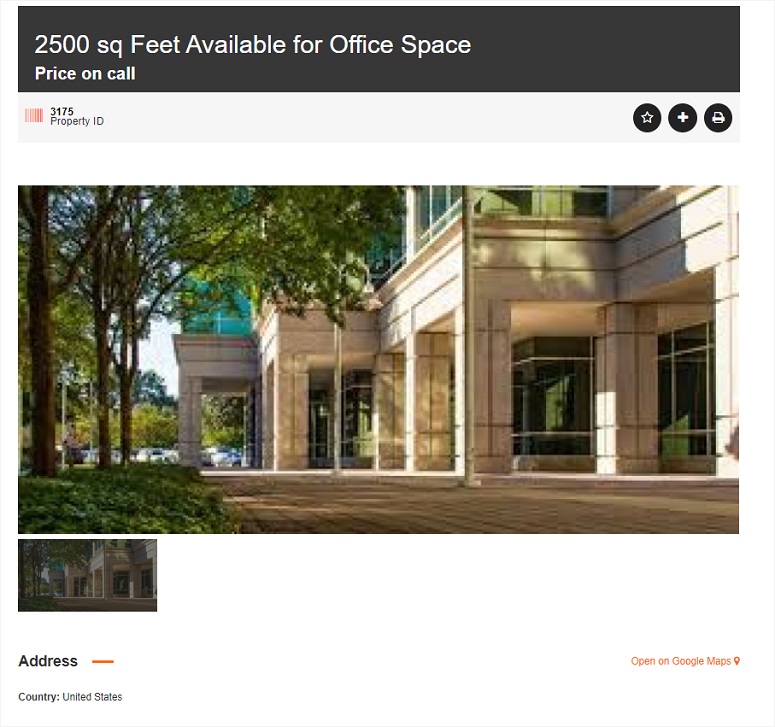
You can use the same process to add as many properties as you want.
Once your real estate website is ready, you’ll definitely want your site to be visible to more people. That way, you can get more clients. The best way to do that is to work on the SEO of your website.
With a good SEO plan, you can make your website appear in the top pages of search engine results. This will bring your site more traffic and, more importantly, will bring you more interested buyers.
Keep reading the article at IsItWP – Free WordPress Theme Detector. The article was originally written by Editorial Team on 2020-07-14 06:40:30.
The article was hand-picked and curated for you by the Editorial Team of WP Archives.

