You might be surprised to learn that WordPress was not originally designed to create ecommerce stores. Rather, WordPress was envisioned as a CMS for managing content for websites.
Today, dozens of plugins can turn a WordPress website into a professional ecommerce store. On the list, WooCommerce is perhaps the best known and probably the most feature-rich option.
Before explaining how to install WooCommerce and configure it, I will describe why WooCommerce has managed to capture and sustain its position as the top WordPress ecommerce plugin.
WooCommerce: An Overview

You will find dozens of ecommerce plugins designed for WordPress: WPecommerce, Cart 66, Jigoshop, MarketPress, Shopp, WP shop, and more. In this case, the few examples of ecommerce plugins that I just mentioned offer the right feature set for setting up ecommerce stores on the WordPress platform.
Nevertheless, WooCommerce as an ecommerce plugin stands out clearly. WooThemes (bought by Automattic in 2015, the creator of WordPress) launched it in 2011. It is the most powerful, the most flexible and complete ecommerce plugin for WordPress. You can do almost anything with WooCommerce, as I will demonstrate below.
Remember that creating a WooCommerce store is different than creating an ecommerce store from a platform specifically dedicated to ecommerce (Magento, Shopify, Prestashop, etc.). WooCommerce is especially recommended if you wish to:
- Have complete control over your store. With proprietary platforms, you are often limited by the platform restrictions. For example, you cannot always set SEO parameters (meta tag description, URL, etc.). Then, more generally, you have limited options for modifying the platform code (example: the addition of tags in the header). With WooCommerce, you can edit, customize, and manage everything.
- Being able to have an ecommerce store that is not only a store, but also a website that hosts a blog, various pages, and so on. By using WordPress, you get the best blog editor in the world.
- Don’t pay commissions on your sales or a monthly subscription (like in Shopify) as is the case for all proprietary platforms.
- Be able to start small and build your ecommerce store as your business grows. WooCommerce makes it possible to create very simple stores, but can also answer all the complex needs, current, and future. For example, in the case of payment management, you can start with simple to manage tools, such as PayPal, Amazon Payments or Google Wallet, before implementing SSL for better store performance.
Note: You can also read a series of comparative articles between:
Now that the choice of the platform is out of the way, let’s move on to the next step – set up a WooCommerce store.
Launch WooCommerce (Using Cloudways)
First, sign up for Cloudways Platform by filling out the simple form and click Launch Now. If you have already signed up, log in to your account.
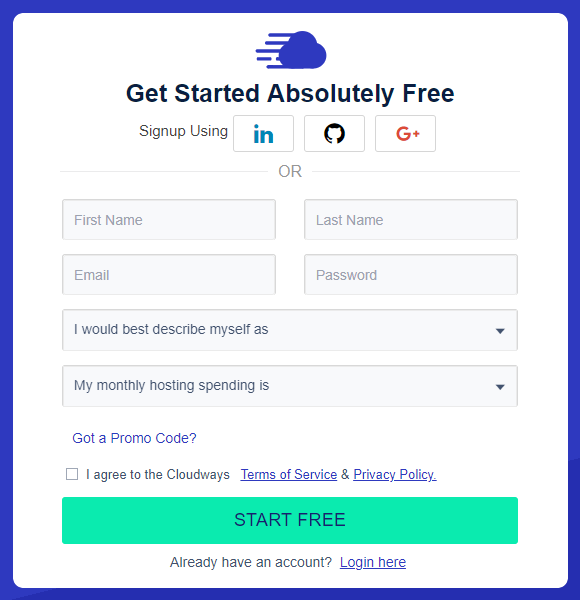
Now verify your email address to complete the signup process.
Enter Server & Application Details
Cloudways offers WordPress in four configurations:
- WordPress with optimization (through the Breeze cache plugin)
- WordPress with WooCommerce (optimized through Breeze)
- WordPress Multisite
- WordPress without any optimization
For the purpose of this tutorial, I choose the latest version of WordPress with WooCommerce (optimized), named my Managed App and Server and selected my Project.

Select Cloud Provider
Being a user-focused PaaS (Platform as a Service) provider, Cloudways offers the choice of five top-of-the-line cloud providers. I choose DigitalOcean, a popular IaaS provider.

Select Server Size
With the DigitalOcean server, you have the option to host a WordPress website on a 1GB to 192GB server. I choose a 2GB server, which has 2GB RAM, 50GB SSD, 2TB Transfer, and 1 Core Processor.

Select Server Location
Choosing the location of the server is of utmost importance since it has a direct impact on your website load times and latency. To offer the best user experience to the visitors, you should choose a location that is nearest to your target audience.

Launch Your Server
After entering the server and application details, click Launch Now button. It generally takes a few minutes to set up the server and the application.

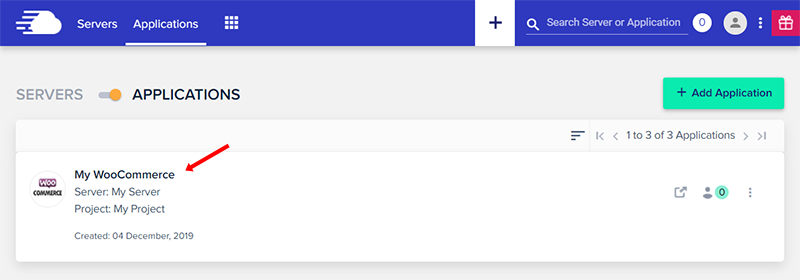
Once your server is ready, go to Cloudways Platform and click Applications in the top-left menu.
![]()
Click on your WooCommerce store to enter the application area.
Log in to WooCommerce Admin Panel
Go to Access Details → Admin Panel. From there, you can find your login credentials and the URL for the WooCommerce store. Click the URL and use the credentials to log in to the WooCommerce Dashboard.
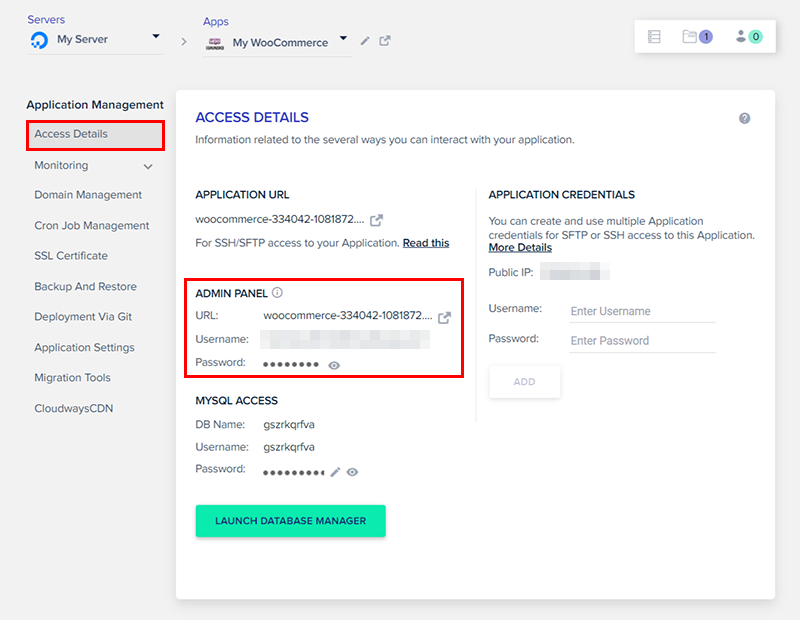
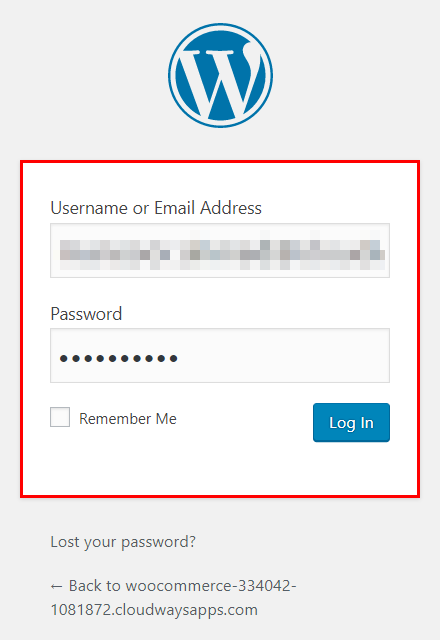
Copy Username and Password from the Admin Panel, paste them into WooCommerce Login Page and click Log In.
Set up WooCommerce Store
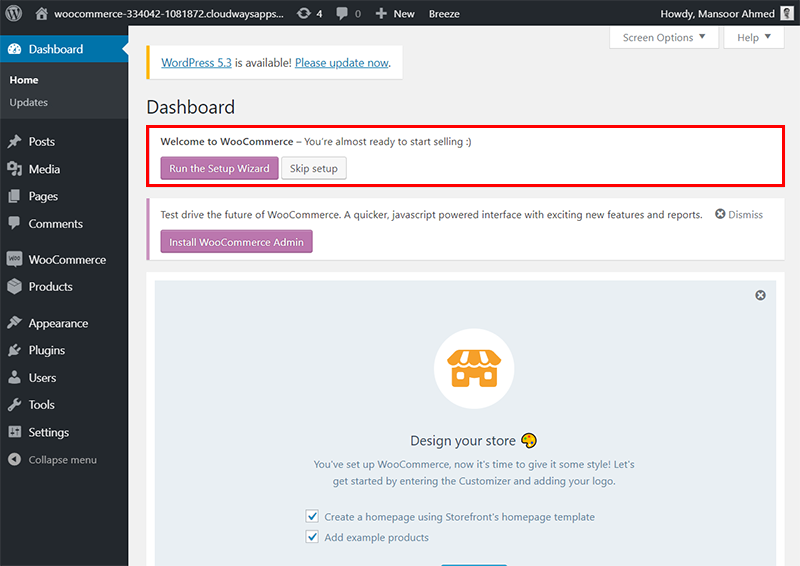
You will see the following message in the WooCommerce Dashboard:
“Welcome to WooCommerce – You’re almost ready to start selling :)”
WooCommerce offers a very simple solution to the problem of store configuration. Simply, click the Run the Setup Wizard button. if you accidentally hit the Skip setup button, you can still run it from Help → Setup Wizard.
Store Setup
In this first step, you must specify the location of the store.
Accuracy is important because this information would be used for calculating the shipping costs and the taxes on the invoices.
Depending on the country you select, all or some of the fields will be displayed:
- Where is your store based? (select the country)
- Address
- City
- State
- Postal Code/ZIP
Next, select the currency you would accept at the store. You also have to specify the type of product you are going to sell. In this regard, WooCommerce offers three options:
- I plan to sell both physical and digital products
- I plan to sell physical products
- I plan to sell digital products
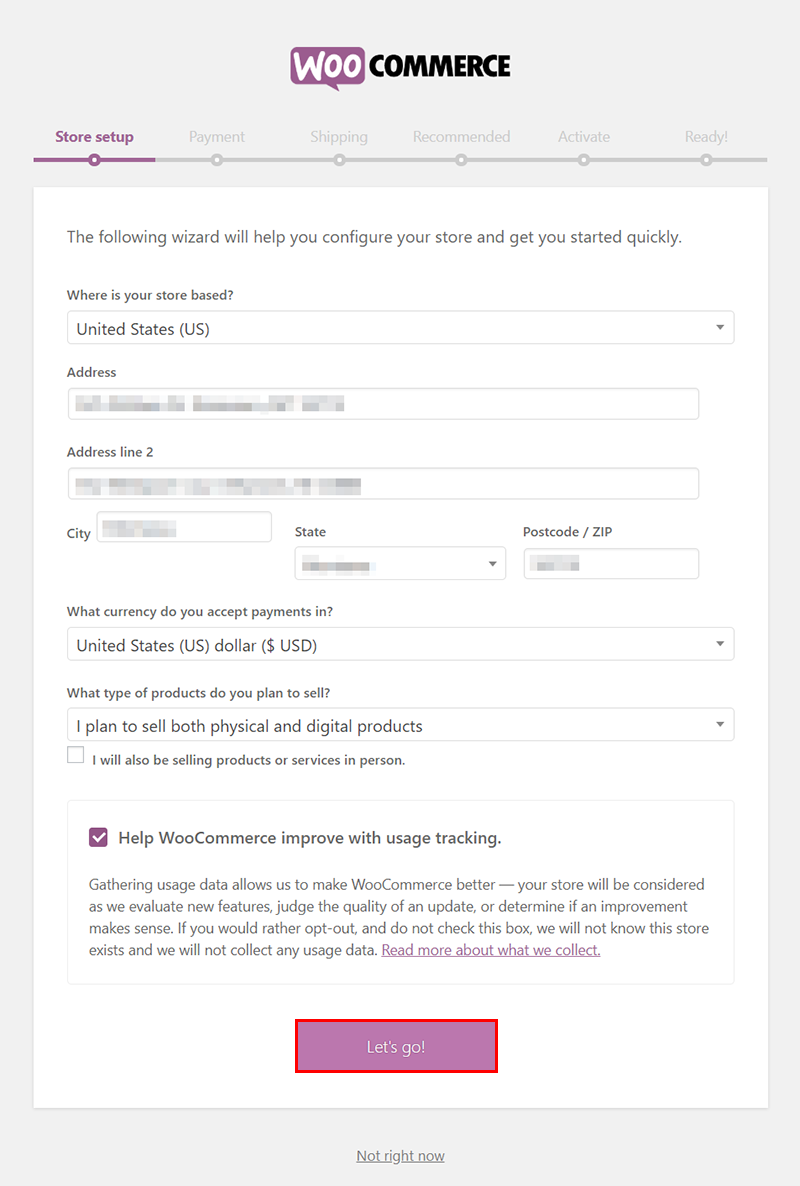
Finally, the setup wizard asks you for permission to collect usage data. Click Let’s go! to go to the next section.
Payment
In this second step, select the payment platforms that you will integrate with your WooCommerce store. You would find the following two options:
While PayPal is convenient, Stripe offers lower commissions. These two options offer a choice to your customers. In addition, the customers can complete the transactions without leaving the checkout page.
If you click Offline payments, you will find more traditional payment methods such as:
- Check
- Bank transfer
- Cash on delivery
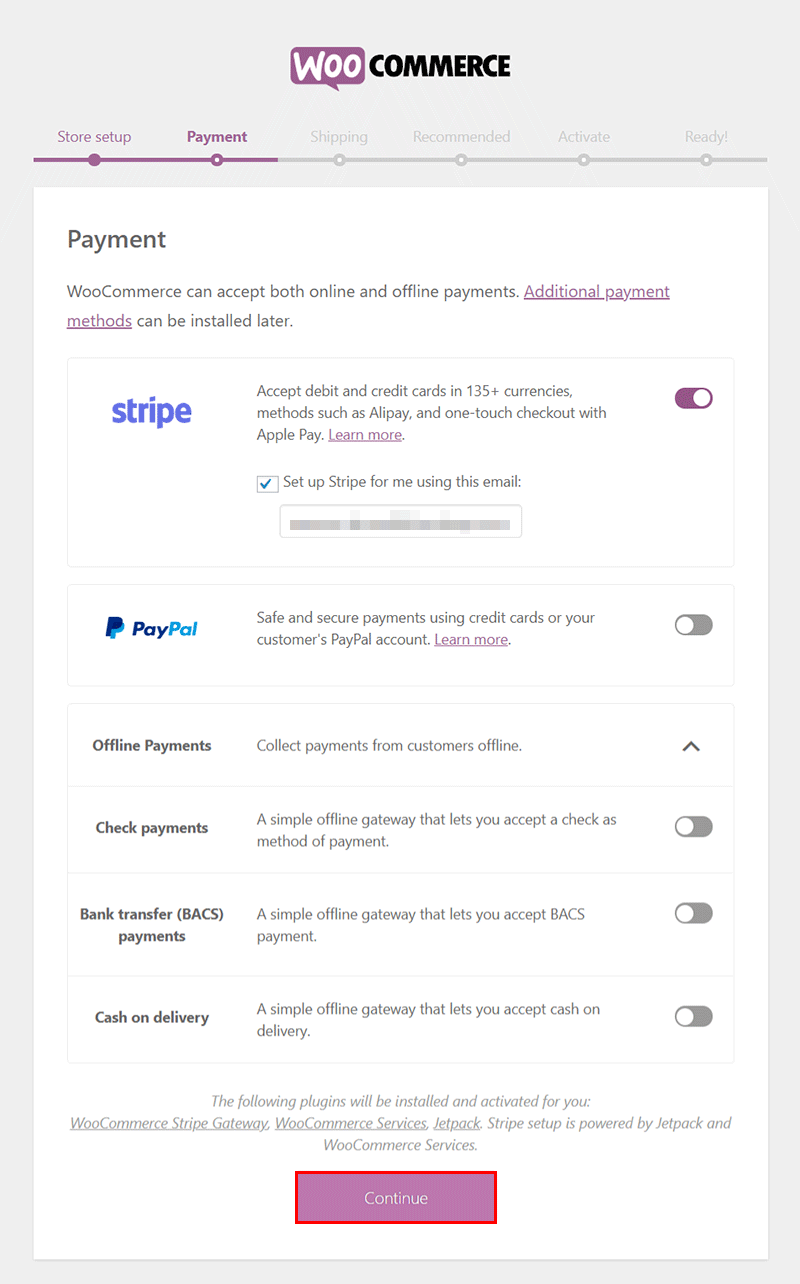
Depending on the selection you make on this screen, WooCommerce will install different plugins necessary for your store. Click Continue to go to the next section.
Shipping
WooCommerce establishes two zones where you can ship from your store. In addition, you must set the Shipping Method and a price model, either fixed or free shipping.
Depending on the countries where you are going to sell, you might have to make further adjustments to the WooCommerce configuration once you finish with the wizard.
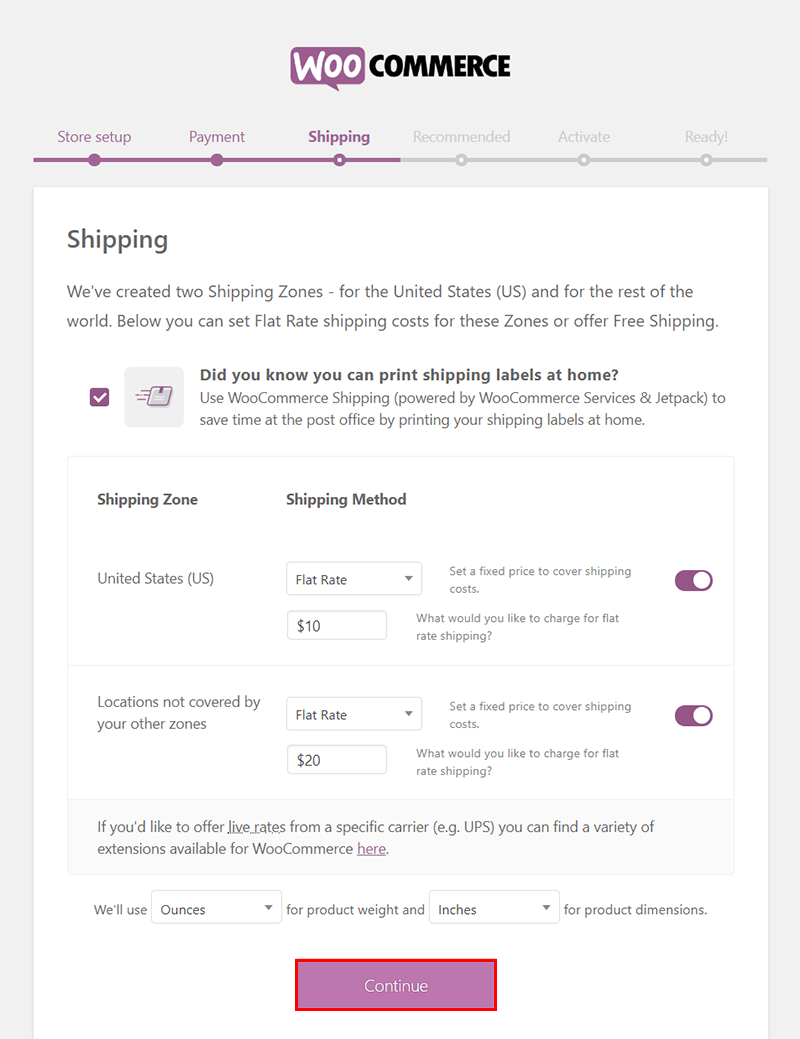
Finally, the setup wizard will ask you to opt for a measurement system. In my case, I leave it as shown (in Ounces and Inches) and move to the next step.
Recommended
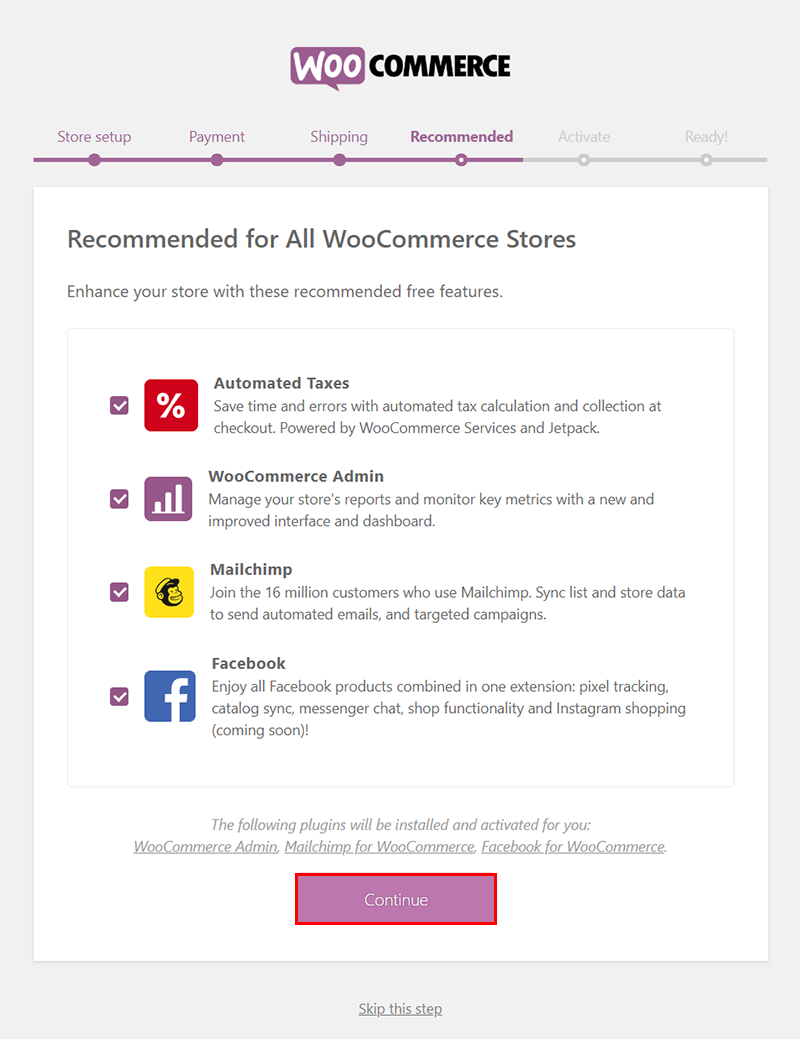
Depending on your location and the configuration you already have in WooCommerce, the setup wizard offers to install various extensions to add the required functionality.
I suggest you choose all four extensions and click the Continue button.
- Automated Taxes: This extension takes care of tax calculation at every sale. In return, the tax rates will not be shown to the customer until he has agreed to finish his purchase (be sure to show your tax rates in a very visible place).
- MailChimp: This email-marketing tool collects subscriber data and sends out emails to encourage new sales.
- Facebook: Add the functionality of social networks if you wish and add the tracking pixel, catalog synchronization.
Activate
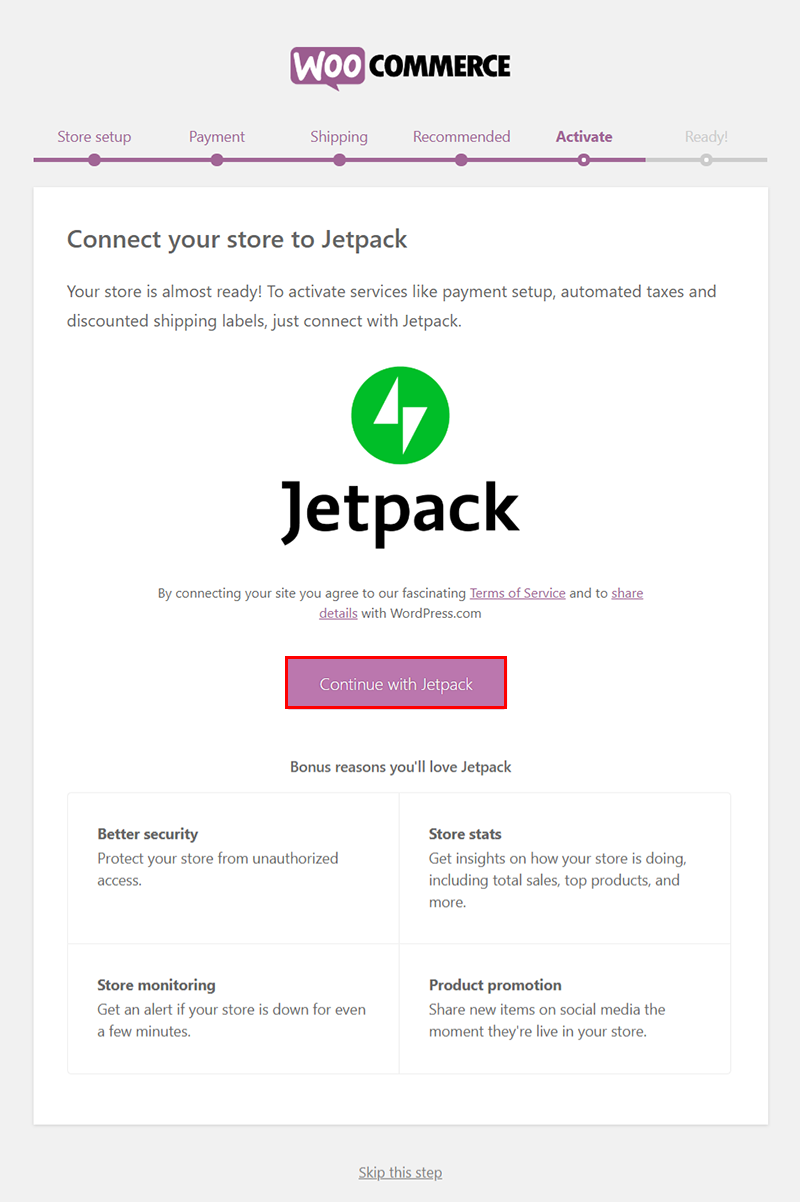
Next on the screen, you would be asked to connect the WordPress Jetpack extension with your WooCommerce store. This step is necessary to enable all the options that you have selected in the previous steps.
Click Continue with Jetpack and follow the instructions accordingly. Once you have finished the process, the last page of the setup wizard will appear.
Ready!
This is the last window of the setup wizard. The basic WooCommerce configuration is now over and you can start creating your products.
As a logical step, the wizard shows a shortcut “Create a product” to add your first product to the store. If you already have a file in CSV format, you can import them and store the entire catalog at once.
Finally, you can optimize your store even more by checking the settings and appearance options.
Depending on the type of online store you are setting up, it is important that you check the settings to verify that you have configured all the options that your store needs.
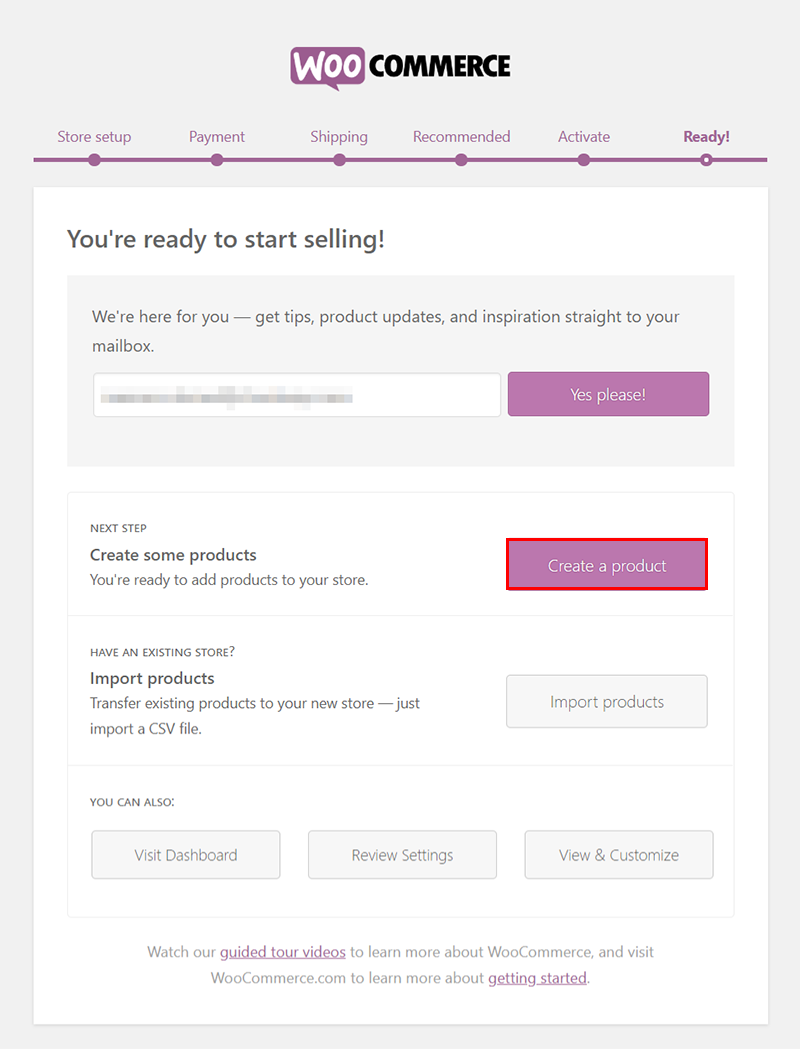
As a recommendation, click Review Settings and see what else you can optimize.
Configure WooCommerce Settings
Go to WooCommerce → Settings. You will notice a long list of default settings, including the settings you have already configured in the setup wizard and the settings automatically configured by WooCommerce.
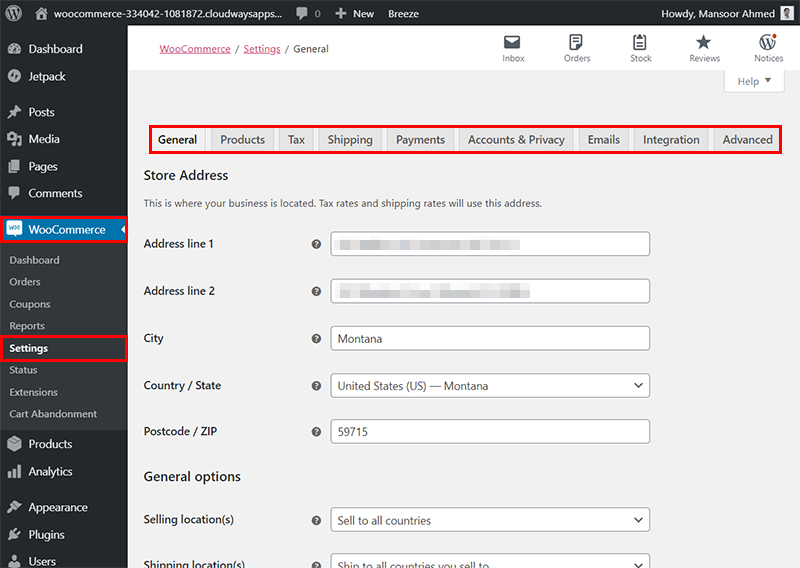
WooCommerce → Settings → General
The first tab corresponds to the options related to the address of the store you have already seen in the setup wizard. In addition, you can see a section for selecting the countries you want to sell and options to configure the currency.
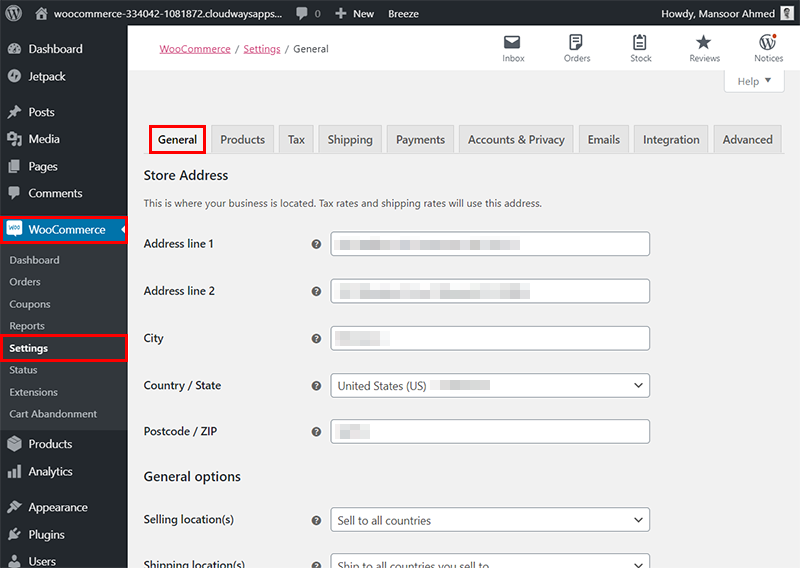
It is also where you should go to enable the use of coupons and to determine if you want tax calculations done automatically (recommended).

Save the changes and go to the next tab.
WooCommerce → Settings → Products
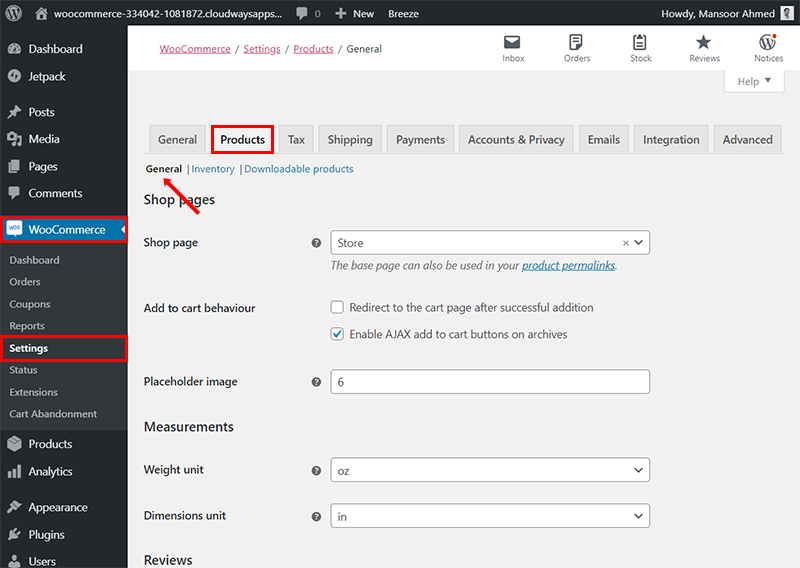
This tab is further subdivided into three sections: General, Inventory, and Downloadable products.
Within the General section, you will see:
- The page where your store’s products are displayed
- Actions to be taken when a product is added to the cart
- Product Ratings configuration options
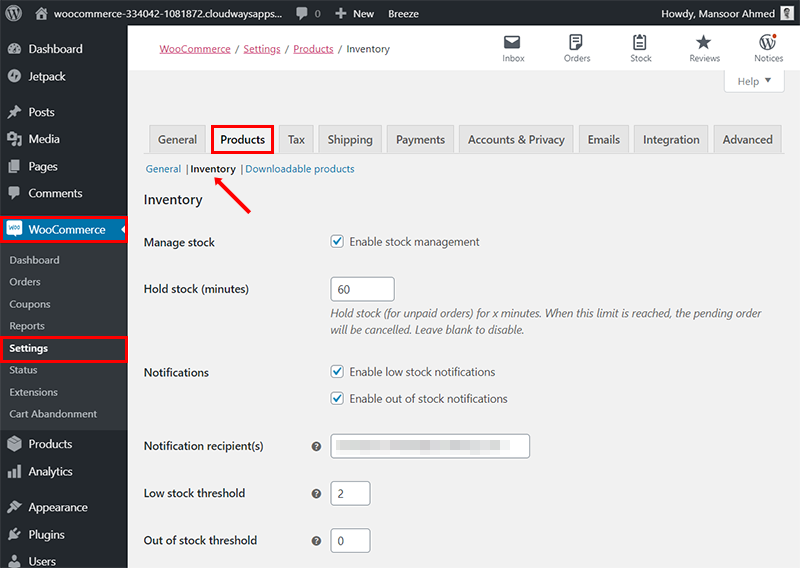
In the Inventory section, you can find the option to activate stock management and setting up low stock alerts.
Finally, in the section Downloadable products, you can manage the options for downloads.
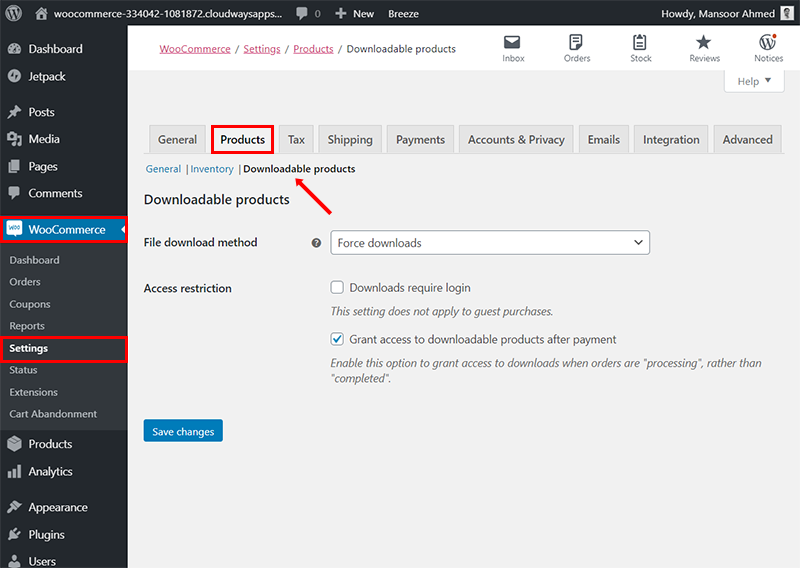
WooCommerce → Settings → Tax
Here you can decide if you want to manage taxes yourself or let WooCommerce Services managed it automatically.
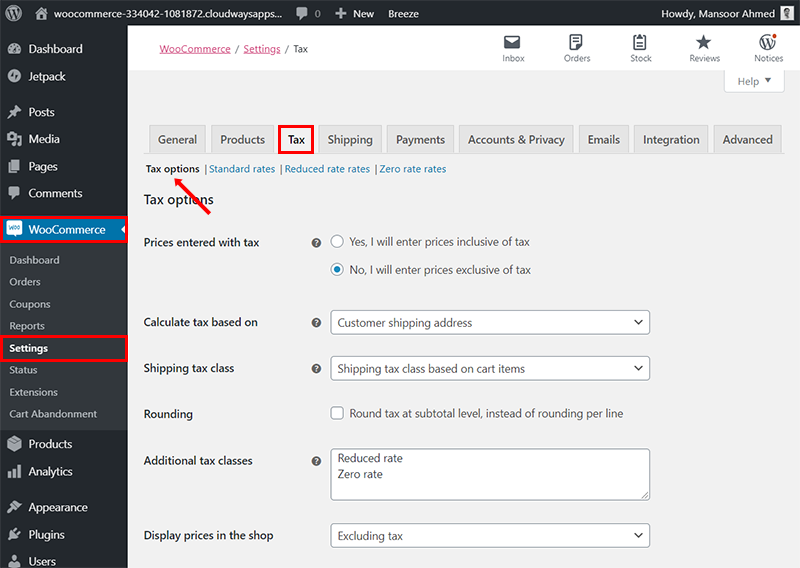
If you decide to opt for the DIY mode, you can change all the settings related to the taxes of the products, how these figures are calculated, the different types of taxes and how the prices (with or without taxes) are displayed at the store frontend.
You will notice that there are as many subsections as types of rates. Within these rates, you must add the following:
- The code of the country where the tax applies. For example, the United States (US).
- The State code, if applicable. For example, Alabama (AL).
- The tax rate
- The tax name
- Whether it also applies to shipping
WooCommerce → Settings → Shipping
If you sell physical goods at your store, setting the shipping related configuration is an essential business requirement. On the other hand, in the case of virtual products, there is little need to deal with these settings.
Distance is an important factor that determines the shipping and logistics costs. For instance, if you sell mobile covers, the distance your packages have to travel is not a big deal due to the weight of the package. On the other hand, if you sell packaged food, weight and product type plays an important factor in determining the shipping costs.
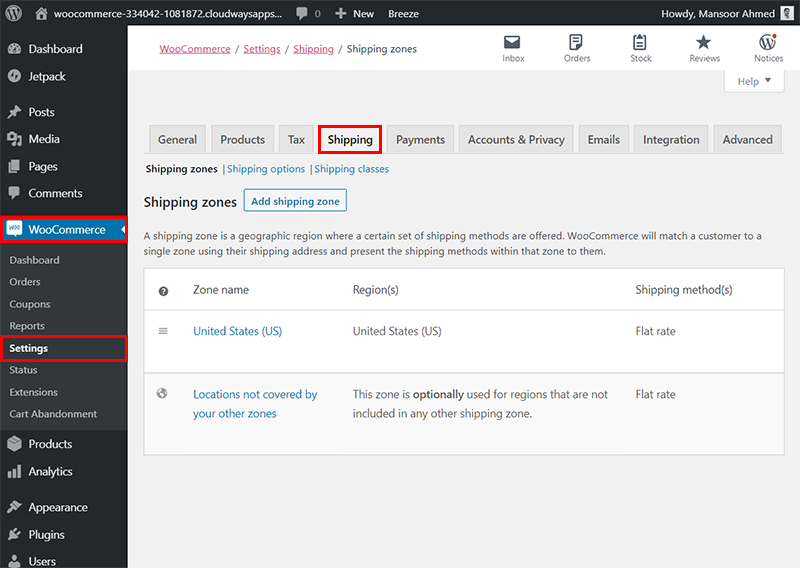
In this section, you can set up Shipping options for activating the shipping calculation and the registration of new Shipping classes.
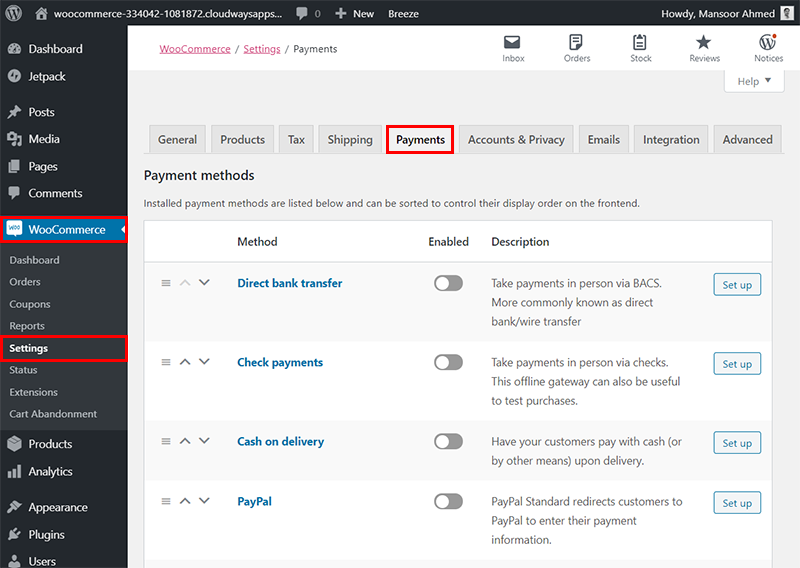
WooCommerce → Settings → Payments
Under this section, you can set the options for all the payment methods available at your WooCommerce store.
You should only activate the payment options that you want to display at the storefront. In addition, you can access individual configuration tabs for each payment method.
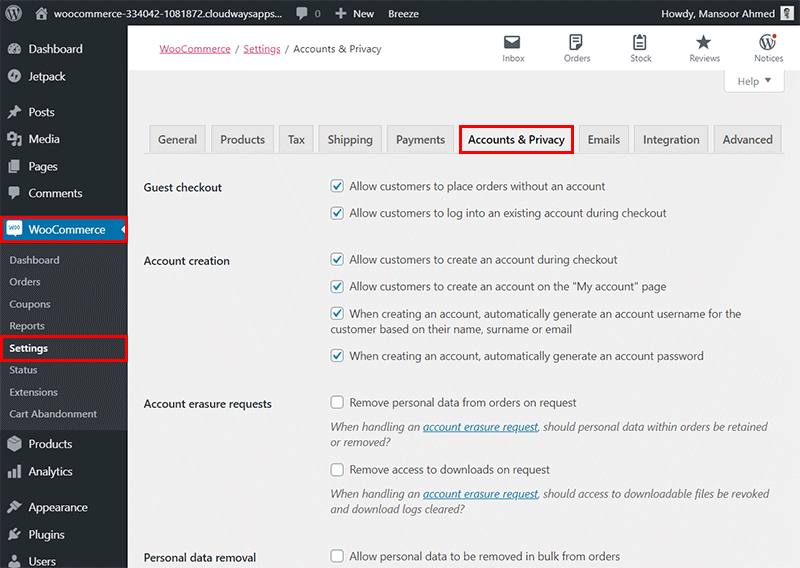
WooCommerce → Settings → Accounts & Privacy
Now comes the essential settings to make sure your online store complies with the current regulations.
You should allow your customer to make purchases as a guest (in other words, do not force them to create an account and provide personal information). You will see an increase in the store’s conversion rate because of the simplicity of the purchase process.
In this tab, you can decide how personal data is treated, the location of the store’s policy page, the notification messages that you must show to buyers, and the time that personal data is retained.
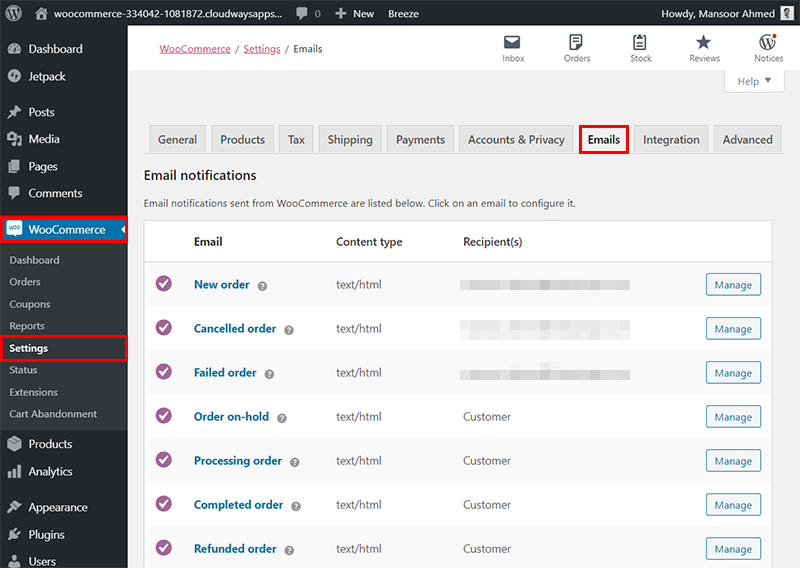
WooCommerce → Settings → Emails
In this tab, you can configure all the messaging and emails (account, order, and shipping information confirmation) sent out on behalf of your online store. Take the time to edit each group of settings and try to add a personal touch to improve the store’s user experience.
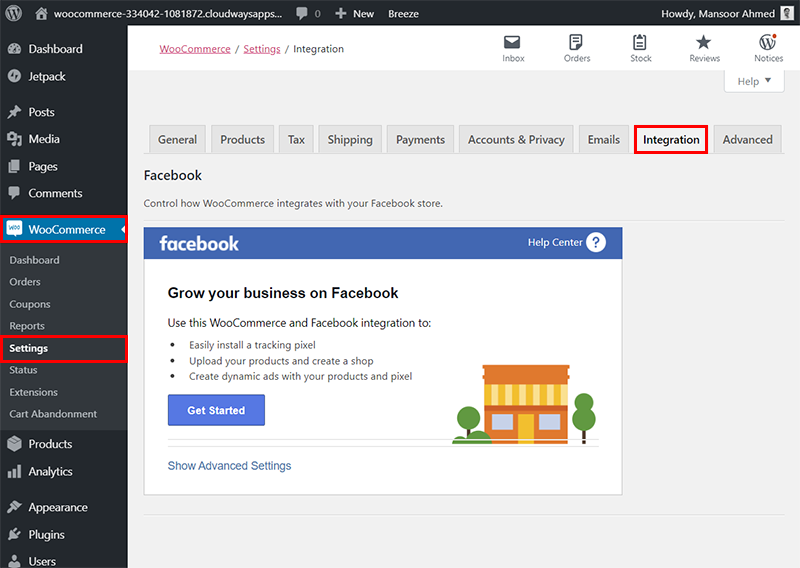
WooCommerce → Settings → Integration
In the WooCommerce store setup wizard, if you opted for integrating a third-party service or product, you can configure the settings in this tab.
WooCommerce → Settings → Advanced
In this last tab, various advanced options are grouped in easy to manage groups. These settings (Page Setup, REST API, Webhooks, Legacy API) are more targeted toward developers. You can see each of the pages that make up your online store as well as different variables that regulate the behavior of the store.
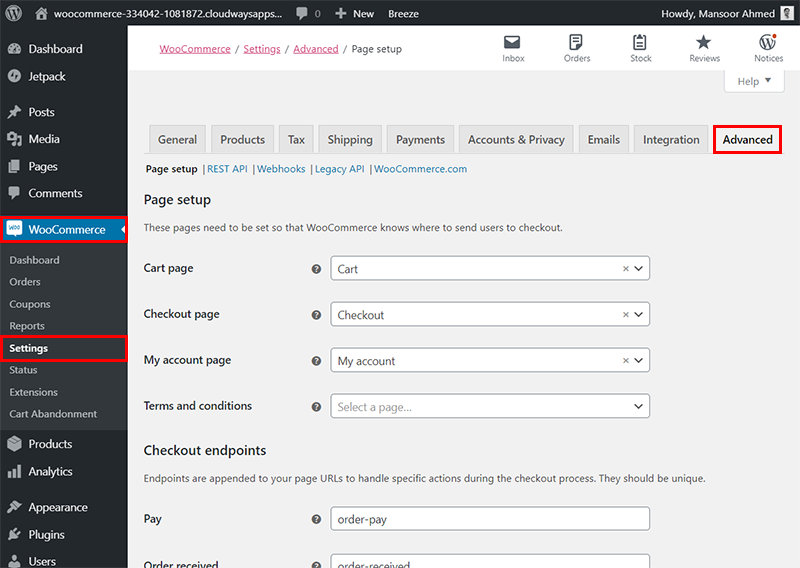
You can also create and setup the Terms and Conditions of the store and how it would be visible at the storefront. If you do not understand the rest of the variables, it is better that you do not touch anything and complete the configuration process.
WooCommerce → Status
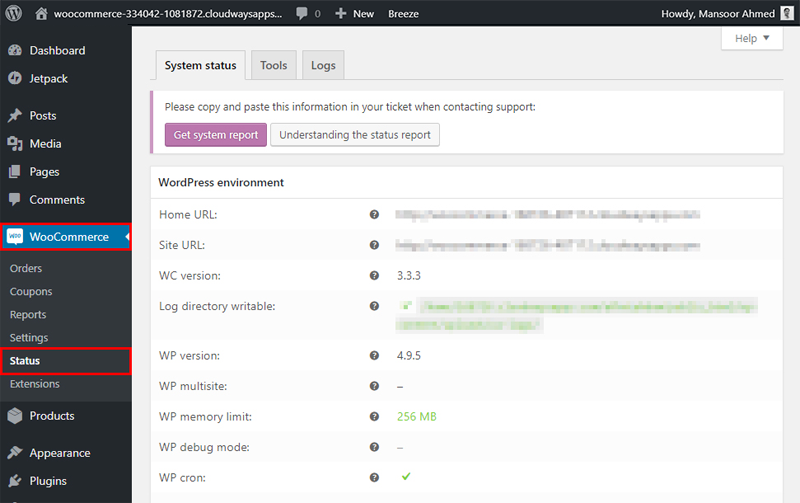
In addition to the regular WooCommerce “Settings” section, you should also consider the “System Status” and “Extensions” sections.
The “System Status” section allows you to access technical information on your WooCommerce store and verify its configuration status. The “Extensions” section is what makes WooCommerce a great platform.
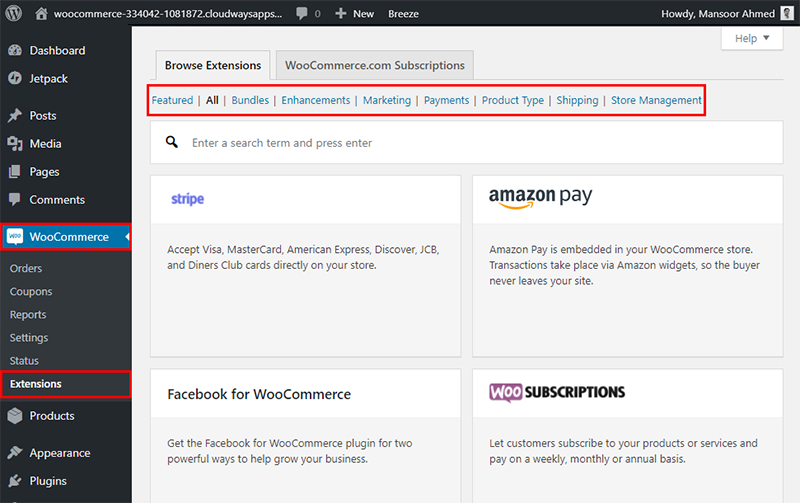
WooCommerce offers a huge store of extensions that extend existing features and add new functionalities to the store.
WooCommerce → Extensions
Extensions simplify the process of extending the store’s functionality without retaining the services of developers. A great example is when you wish to add a new payment method.
Some extensions are free while others are paid. However, even the paid extensions often cost less than the invoice of a developer.
Now that you have finished setting up and installing your extensions, you can now create product pages.
Add WooCommerce Products
Adding products to the store is the first step in launching the business. There is no doubt: to have a functional WooCommerce store, you must first add products. However, before going into the details, it is important to learn the basics of WooCommerce and to discover product categories, attributes, and types.
Product Category
Product categories can help group your products. For example, if you sell clothing, “clothing”, “sportswear” and “sleepwear” are product categories. They allow the customer to quickly locate products in the same category. You can create as many categories as you want and change them at any time.
Product Labels
Labels help filter products. Size, color, fabric, and tastes are product labels and help the user to choose the desired products easily. You can assign labels independently to each product or set up a global label for the entire web page.
Product Data
WooCommerce saves you time by having predefined product types:
- Simple product: They are shipped without any options. For example, a physical book.
- Grouped product: This is a group of similar items. For example, a dozen glasses.
- External/Affiliate product: You present the product on your website, but it is sold elsewhere.
- Variable product: These products have varying qualities like size, color, etc. For example, clothes.
- Virtual: These are products that do not require shipping, such as services.
- Downloadable: You can download these products. For example, songs, pictures, videos, ebooks, etc.
With so many types of products, it can be confusing to add a product to WooCommerce.
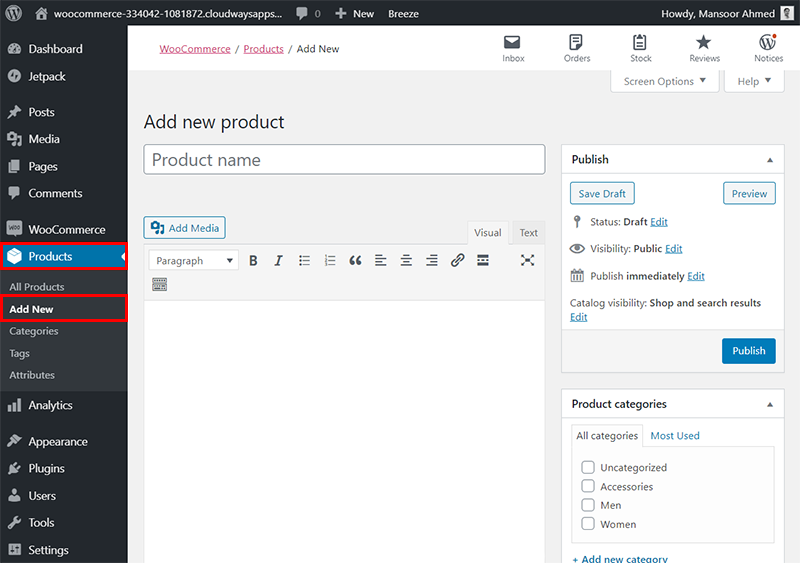
However, do not worry; adding products to WooCommerce is pretty much the same as creating a new post on your blog. To get started, go to Products → Add New and write the title of your product and add a description. The description includes the most important and relevant information about your product.
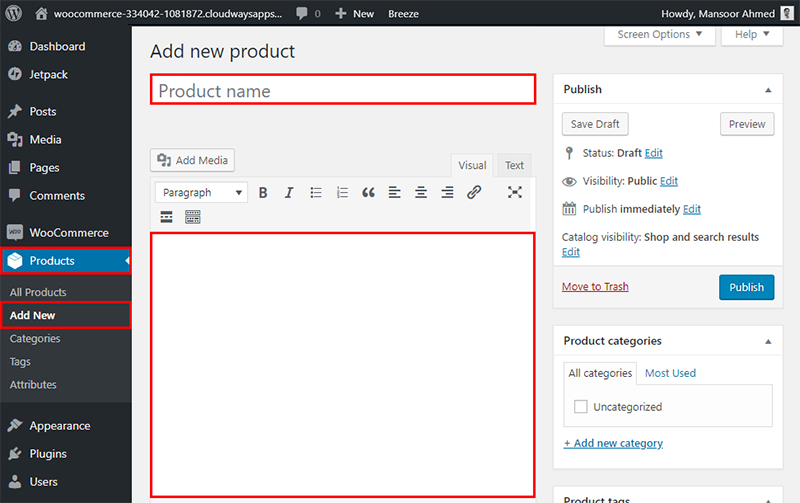
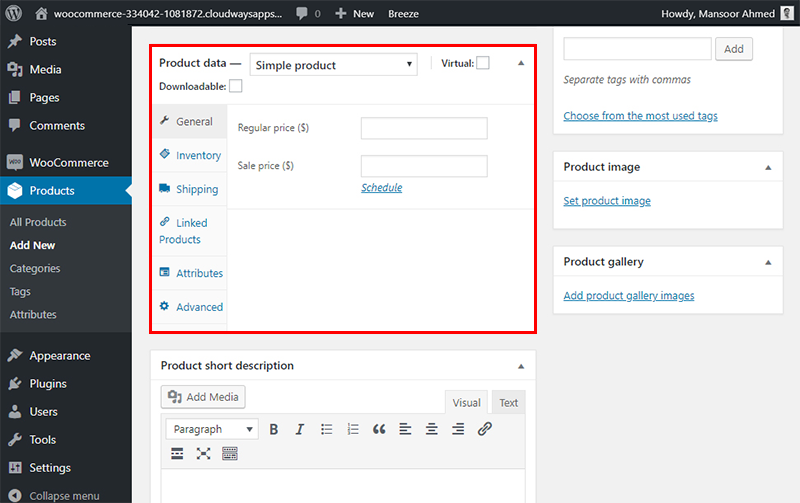
The Product Data section is where most of the work is done. In this section, you can customize your product. Using the drop-down menu, you can change its type. I recommend that you start with a Simple product to familiarize yourself with this section. It has the following options:
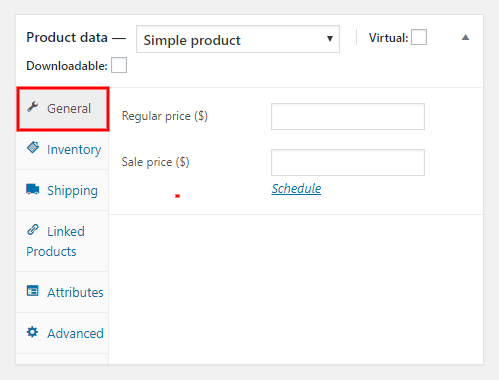
General
In the General section, set the price of the product you plan to sell. You can also set a promotion price and even schedule sales dates.
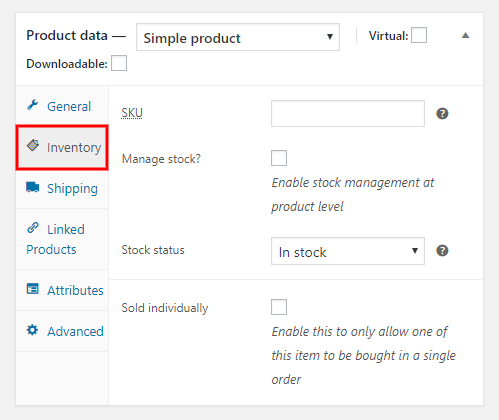
Inventory
The Inventory section helps you organize Stock Management Unit (SKU). Fill in if the product is in stock or out of stock. Check the Sell individually option if you want to sell only one item at a time.
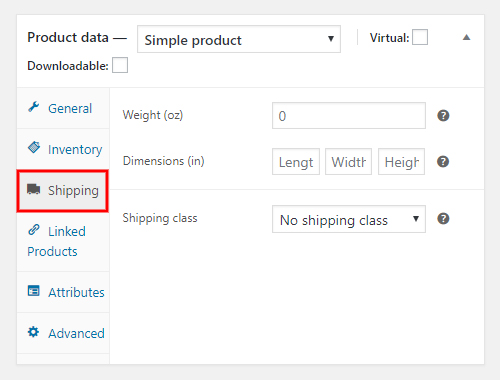
Shipping
The Shipping section deals with delivery and logistics. Here you can provide the dimensions, weight and delivery class of your products.
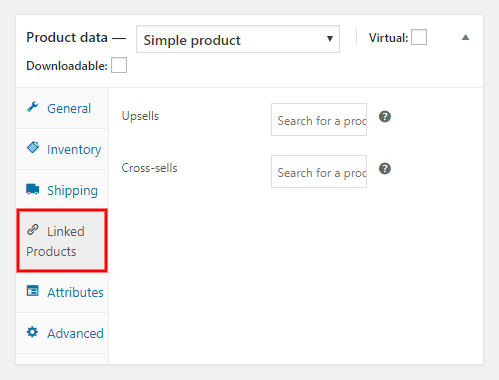
Linked Products
The Linked Products section allows you to add related products and market similar products to the user. This promotes your product by using upsells and cross-sells. Just search for a particular product and select it from the drop-down list.
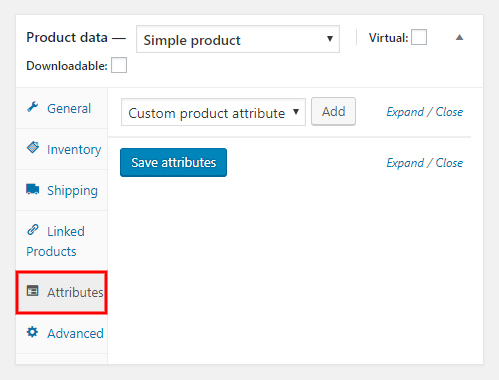
Attributes
The Attributes section allows you to add attributes to your product. For example, if you sell t-shirts in different colors, you can specify the colors here.
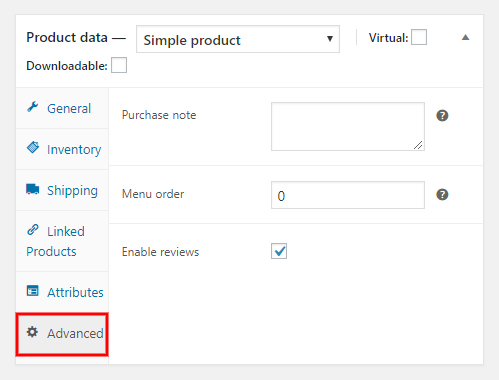
Advanced
The Advanced section allows you to create purchase notes for customers and enable or disable notifications. You can also specify the order in the menu here and choose custom order positions for your product.
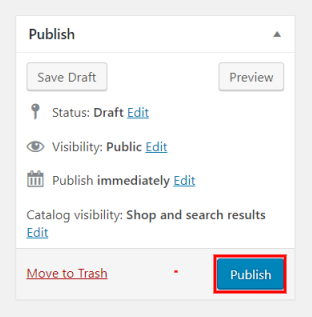
After filling in all the details, Publish your product!
You see that creating a product page on the WooCommerce store is a breeze. It does not take you long to take charge of this publisher. If you want to offer several products on your WooCommerce store (which is certainly the case!), you will have to organize these products into different categories. For this, you need to go to Products → Categories. What is very practical, especially if you have a big catalog, is that you have the possibility to create subcategories.
Wrapping up!
That’s all for install and set up a WooCommerce store!
I wanted to emphasize in this guide the key points take into account to create a WooCommerce store: the first settings, the choice of theme, the particularities of the publisher of product pages, etc. I could have spent more time on some technical points, such as the setting of delivery options for example. Nevertheless, that would have lengthened this guide unnecessarily.
Your WooCommerce Store Needs A Reliable Host
With no compromise on Performance, Security & Support.
Mansoor Ahmed Khan
Passionate about technology, entrepreneurship, and marketing, Mansoor Ahmed Khan is in computing since he knows how to type on a keyboard. His daily life is rocked by his family, projects, and his screen. Probably in this order, he likes to be convinced at least.
Keep reading the article at The Official Cloudways Blog. The article was originally written by Mansoor Ahmed Khan on 2019-12-30 19:00:26.
The article was hand-picked and curated for you by the Editorial Team of WP Archives.

