The principle of least privilege (POLP) states that a subject should be given only those privileges needed for it to complete its task. Because people are prone to error and vulnerable to manipulation, the fewer people with access, the better.
The majority of hacks use the vulnerabilities of human nature as their crowbar into websites.
Examples of these scenarios:
- Trust: Trusting a social engineering scheme via phone and revealing credentials, or falling for a targeted phishing email and downloading its attachment that is infected with malware
- Deal Seeker: Downloading a free premium theme or plugin that is injected with malware to avoid paying the full price.
- Laziness: People look for the path of least resistance. This means it is against our nature to create strong passwords, and a 2020 PCMag survey found that 35% of people never change their passwords at all.
- Revenge: According to the 2020 Verizon Data Breach Investigations Report (VDBR), 30% of all data breaches involved internal actors and 55% involved organized crime.
There are so many possible permutations of risk and motivation that lead to security compromise. The shortest path to a secure WordPress site is simply through removing as many users as possible and being privilege-picky with the ones you keep.
This article will take a look at three ways to put the Principle of Least Privilege into action on your WordPress site. So what can you do?
1 – Set WordPress file write access to only you!
In accordance with POLP, cut back on access wherever possible. As Napoléon Bonaparte once said, “If you want something done, do it yourself.” We agree. Restrict the write privilege access level of the WordPress files to just yourself, the site owner.
Here’s how to change the WordPress file permissions:
Navigate through cPanel or FTP to a root-level folder called public_html
Right-click on each folder and file and select change permissions
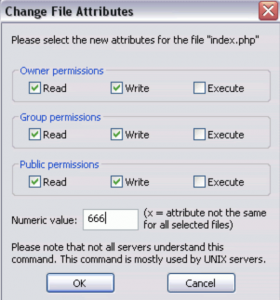
You will see three types of identities – user (you), group (coworkers on your website) and the world (public access), and 3 permissions, read, write and execute.
Each action is assigned a point value.
Read = 4
Write = 2
Execute = 1
Here is an example from WordPress of a 755 and a 666:
In the FTP or cPanel interface it will look a little more like this :

Note that the number that adds up to complete public access is 777. We do not recommend that you leave any file in a 777. In fact, there are some files that the owner should not have write access to other than the moment they need to make a change, but the setting should not stay open and even that setting would never be higher than a 767. It’s dangerous folders to leave in 777. Critical folders to pay special attention to for permissions include wp-content, wp-includes, wp-admin, and htaccess.
If you try to give a 777 to a child folder, but the parent is set to something less like 666, this will not work. You will need to first update the parent folder to 777 to make the change to the child folder. Once you are done with the change needed, remember to return the access back from 777.
If a hacker can access your WordPress files through a shared server, and your permissions are set to public or world, then there is nothing left to do but pray they are white hat!
2 – Disable the file editor
The file editor in the wp-admin dashboard is the perfect place to know just enough to be dangerous. The editor is so powerful, it can be a liability to keep active. While developers may use this when building customizations to the site, it’s not something that website owners need to keep active.
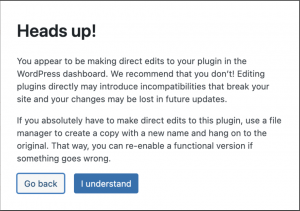
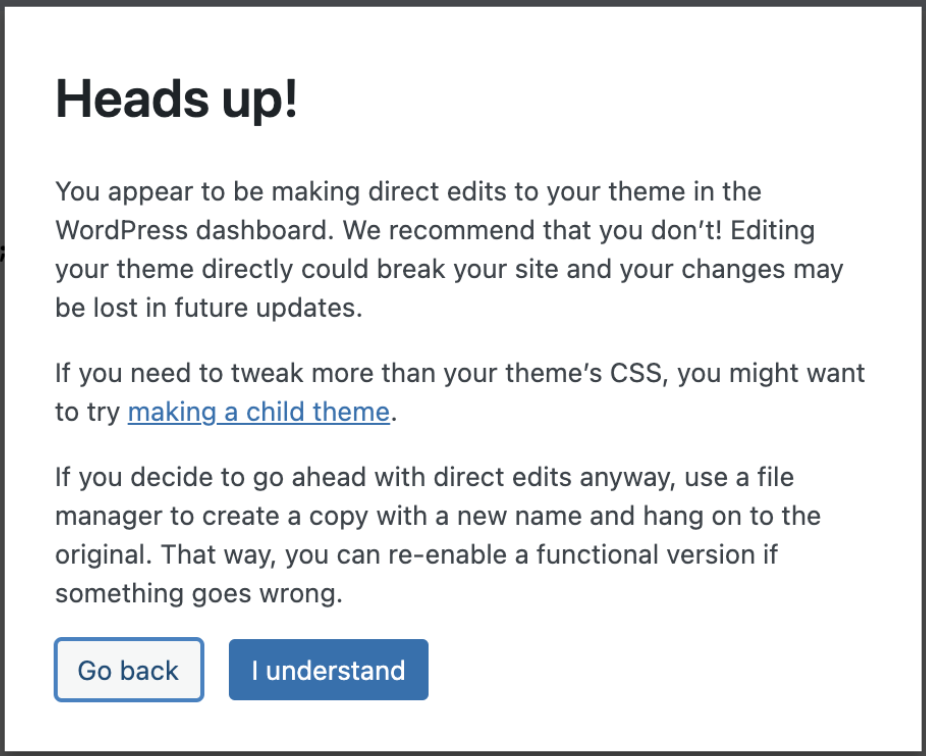
You can always turn it back on if there is a reason to use it – but it’s easy to overshoot and make major changes to a website’s code and themes that are hard to reverse. Not only can you accidentally break your site, but leaving this tool active makes it easy for hackers to install malware into plugins and themes and ruin your site. WordPress will also try to warn you the first time when you click on it, and even suggest alternatives:
For the Plugin Editor:

For the Appearance Editor:

How to disable the file editor:
- First, make sure you have a text editor handy. There are great free and open-source options like Visual Studio Code, Notepad ++, Atom, Bluefish, and Brackets.
- Navigate to the wp-config.php file location
- Select download so you can edit the wp-config.php file locally with your text editor and when done, reupload and replace, OR select edit and use the built-in editor.
- Search the wp-config file for define(‘DISALLOW_FILE_EDIT’, and set it to true
- If you can’t find the line, copy it here define(‘DISALLOW_FILE_EDIT’, true ); and paste it in towards the bottom
- Click Save
- Check the results. The editor links should no longer be clickable under appearance and plugins
3 – Organize your access levels
- Audit existing users by comparing the users on your WP account with your company address book or your company chat application like slack. If the name shows up as inactive, immediately delete the account.
- If the user has published posts in the past to your site, you can always create a generic “Staff” profile to reassign their publications or work to.
- Create and maintain an employee access-level spreadsheet where you can easily see the names and job titles of who has what level of access and who they report to.
- This action will help you avoid privilege creep. This happens when someone switches departments or jobs and no longer needs access to certain systems or maybe only needs it for a short time, and ends up with access to systems they no longer use. This can also happen when a developer or contractor has completed a project but still has the credentials to the system. Maintaining a spreadsheet prevents unnecessary access permissions from going unnoticed.
- Delete Delete Delete. When an employee leaves, immediately deactivate their accounts. This must be built into your company’s off-boarding checklist within 24/hours of termination or resignation.
Conclusion
The principle of least privilege makes sense. It makes employees more productive and more focused by only giving them access to what they need to do their jobs. It reduces the threat surface for cybersecurity attacks and hacks, and it makes data access easier to track in case of audits. Start with these three principles for your WordPress site but don’t let it end there. Contemplate how to expand the POLP philosophy into other areas of your company’s operations to improve security and integrity organization-wide.
Remember, less is always more!
We’d love to hear from you. What are your top tips for using the Principle of Least Privilege on WordPress or otherwise?
Keep reading the article at ManageWP. The article was originally written by Allison Bondi on 2021-11-25 11:00:47.
The article was hand-picked and curated for you by the Editorial Team of WP Archives.

