When running a webshop (or any shop for that matter), there’s a lot of things you need to consider if you aim to be successful – a lot of “moving parts,” as they say. When starting out, you also need to choose a hosting provider that will be perfect for you, according to your need and your budget. One thing that sets WPMU DEV’s hosting platform apart, is that as well as having all the hosting features you’d expect – it also comes built-in with 7 PRO WP plugins – covering performance, security, backups, and more. Get 20% off any of their plans here.
In addition, the “moving parts” would most accurately describe your products. They’re always coming and going, on sale and out of stock; in season or last year’s news; and every other of a myriad of different “statuses” they can be at any point.
Naturally, the more products you have, the harder it is to make sense of all that chaos and structure it in a way your customers will find pleasing (encouraging them to buy), and you won’t lose your mind on the backend sorting. To help out with this problem, you’ll need to use labels and lots of them.
Anyone who’s ever dealt with an inventory that surpasses 50 or so items will need extensive categorization for every attribute associated with a specific product. For example, you have a surplus of winter boots on stock, and it’s already the end of December – you’ll label the whole category as “on-sale,” trying to maximize the winter season.
Adding the label(s) instantly organizes your backend, where your boots are added to the list of other discounted items. Your customers are prompted that the boots are selling at a discount, making them that much more attractive to buyers. Using WordPress, along with WooCommerce, you’ll be able to access some rudimentary labeling options.
However, considering that both platforms’ most significant strength is their open-source nature made for upgrading, why not use a plugin that enhances those options exponentially. The WooCommerce Product Labels plugin offers numerous advanced features combined with a high level of control, making it the perfect tool for all your labeling needs.
School’s in Session
Although most are not near the top of priorities when stacked against the various configurations, features and options are present; the dedicated video tutorial section is the first thing that caught our eye. It’s such a great idea to include something like this within the plugin (as opposed to a YouTube link at best) that we’re stumped why more developers don’t do it.
Many plugins put their user-friendly interface at the forefront of their marketing. Hoping to attract the newcomers (an ever-growing market) to drop pages upon pages of documentation into your lap and leave you with a bewildered look on your face, not much else.
On the other hand, this plugin offers you a quick 3–4-minute video tutorial with captions, where you don’t even have to leave the page. They will explain everything from adding labels, connecting them to your products, configuring how and when they’ll be displayed, and much more.
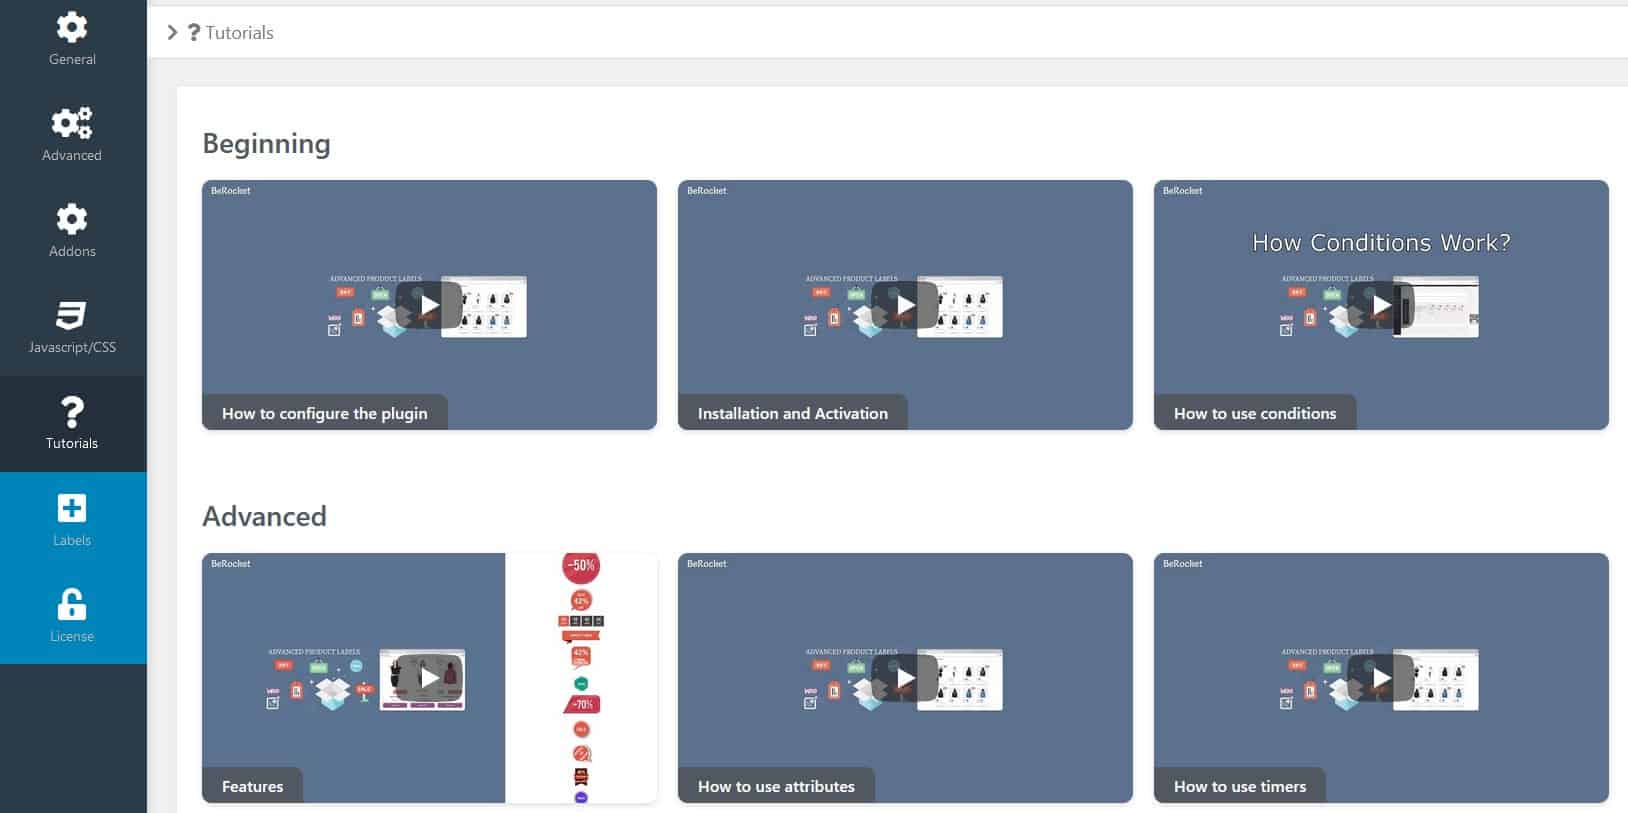
An approach like this will enable you to hit the ground running once you start creating your labels eliminating needles work that’s often present when familiarizing yourself with new software.
The Setup
You’re finished with the tutorials, and you’re ready to go; nobody can stop you; you’re about to label everything, from discounted children’s socks to the high-end sneakers people are already asking about. But wait, before you go down that rabbit hole, check out the basic rules and settings that affect every label you make – who knows, maybe some of it doesn’t align.
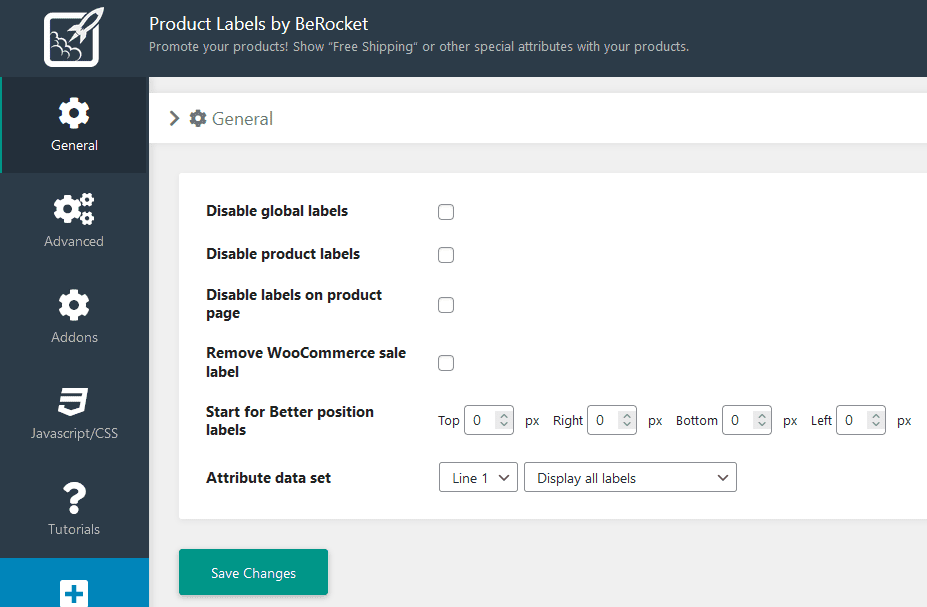
Within the general setting tab, you’ll set rules that will affect all labels present on your site. You’ll be able to disable them on specific pages, choose which ones are visible, remove default ones so they don’t clash with the advanced labels you’re setting up, and choose an optimal starting position.
The advanced settings revolve around hooks, specifically the shop hook and product hook image and label. You’ll be able to choose where to place pictures and the labels concerning other elements that are featured on the page. You’ll also incorporate additional hooks that aren’t present by default. Note that placement varies for different themes, and the plugin takes the data directly from WooCommerce, so if your theme isn’t compatible, your positioning might be off.

By default, all the advanced add-ons you can use are disabled. However, the plugin is built upon following the overall “easy to use” theme. In this section, the add-ons are enabled/disabled. The regular “add new label” tab allows access to the functions they grant. So, depending on the complexity of the products you offer, you’ll get to enable timers, label variations, gradients, and advanced content like images.
For advanced users that are no strangers to coding, you’ll be able to customize even further with CSS and JavaScript. Using CSS, you could elevate the whole thing a couple of notches, and your ultimate goal should be to use it one day, but if you’re new to web management and coding in general, you’re free to leave this section untouched for the time being.

Label Everything
In retail, it’s pretty easy to make an item stand out – just put a big sticker (or label, if you will) that’s a different color and twice the size of those around it. While there’s much more nuance where eCommerce is concerned, you’d be surprised how far along you can get using a similar approach. Before we get into the visuals, let’s first find out how to add new labels to your database.
Adding a label works much like adding anything in WordPress. By choosing the “Add Label” option, you’re brought to a new page where you’ll first need to select the condition. Doing so is important because it’s the main rule for when the label will appear on the frontend.
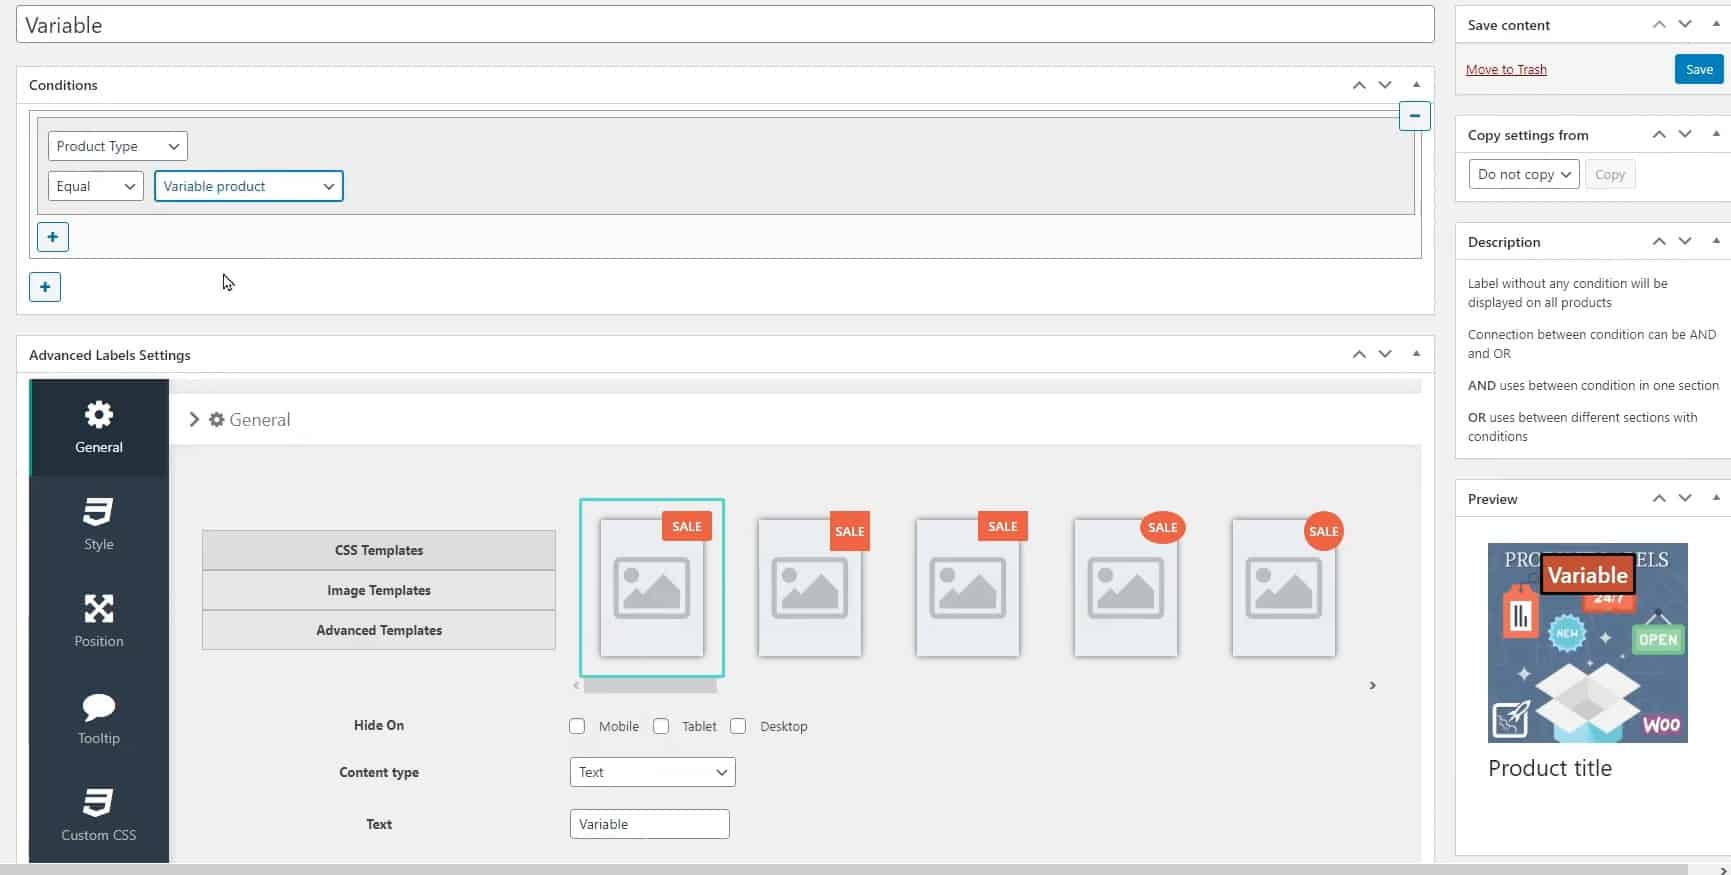
You can add one condition or several, from various options like category (jeans, dress, shoes, etc.), product attribute (color, size, etc.), price, and many more. The condition works both as an affirmative or as an opposite selection.
For example, you can add a label for every black hoodie (affirmative) or a label for every hoodie that isn’t black (opposite). You won’t have to jump through hoops to select one or the other; it’s an added dropdown menu within the condition setup process.
As we’ve said, you can go with one or more conditions, depending on your needs, i.e., single out every pair of jeans you have available, just the blue ones, or just the ones currently on sale. The great thing about conditions is you go as broad as you like or as detailed as you like, all within the configuration setup for a single label.
Visual Options
Naturally, like everything else on your pages, you’ll want your labels to look good, so once you’ve set up your conditions which will determine the product(s) where the labels are displayed, you’ll need to go through all the options that choose how they’re displayed.
Right off the bat, you’ll get a plethora of templates to choose from, divided into CSS, image, and advanced templates, each of which has its unique style. These templates should be viewed just as a good starting point. After you’ve decided on one, that’s where the fun starts.
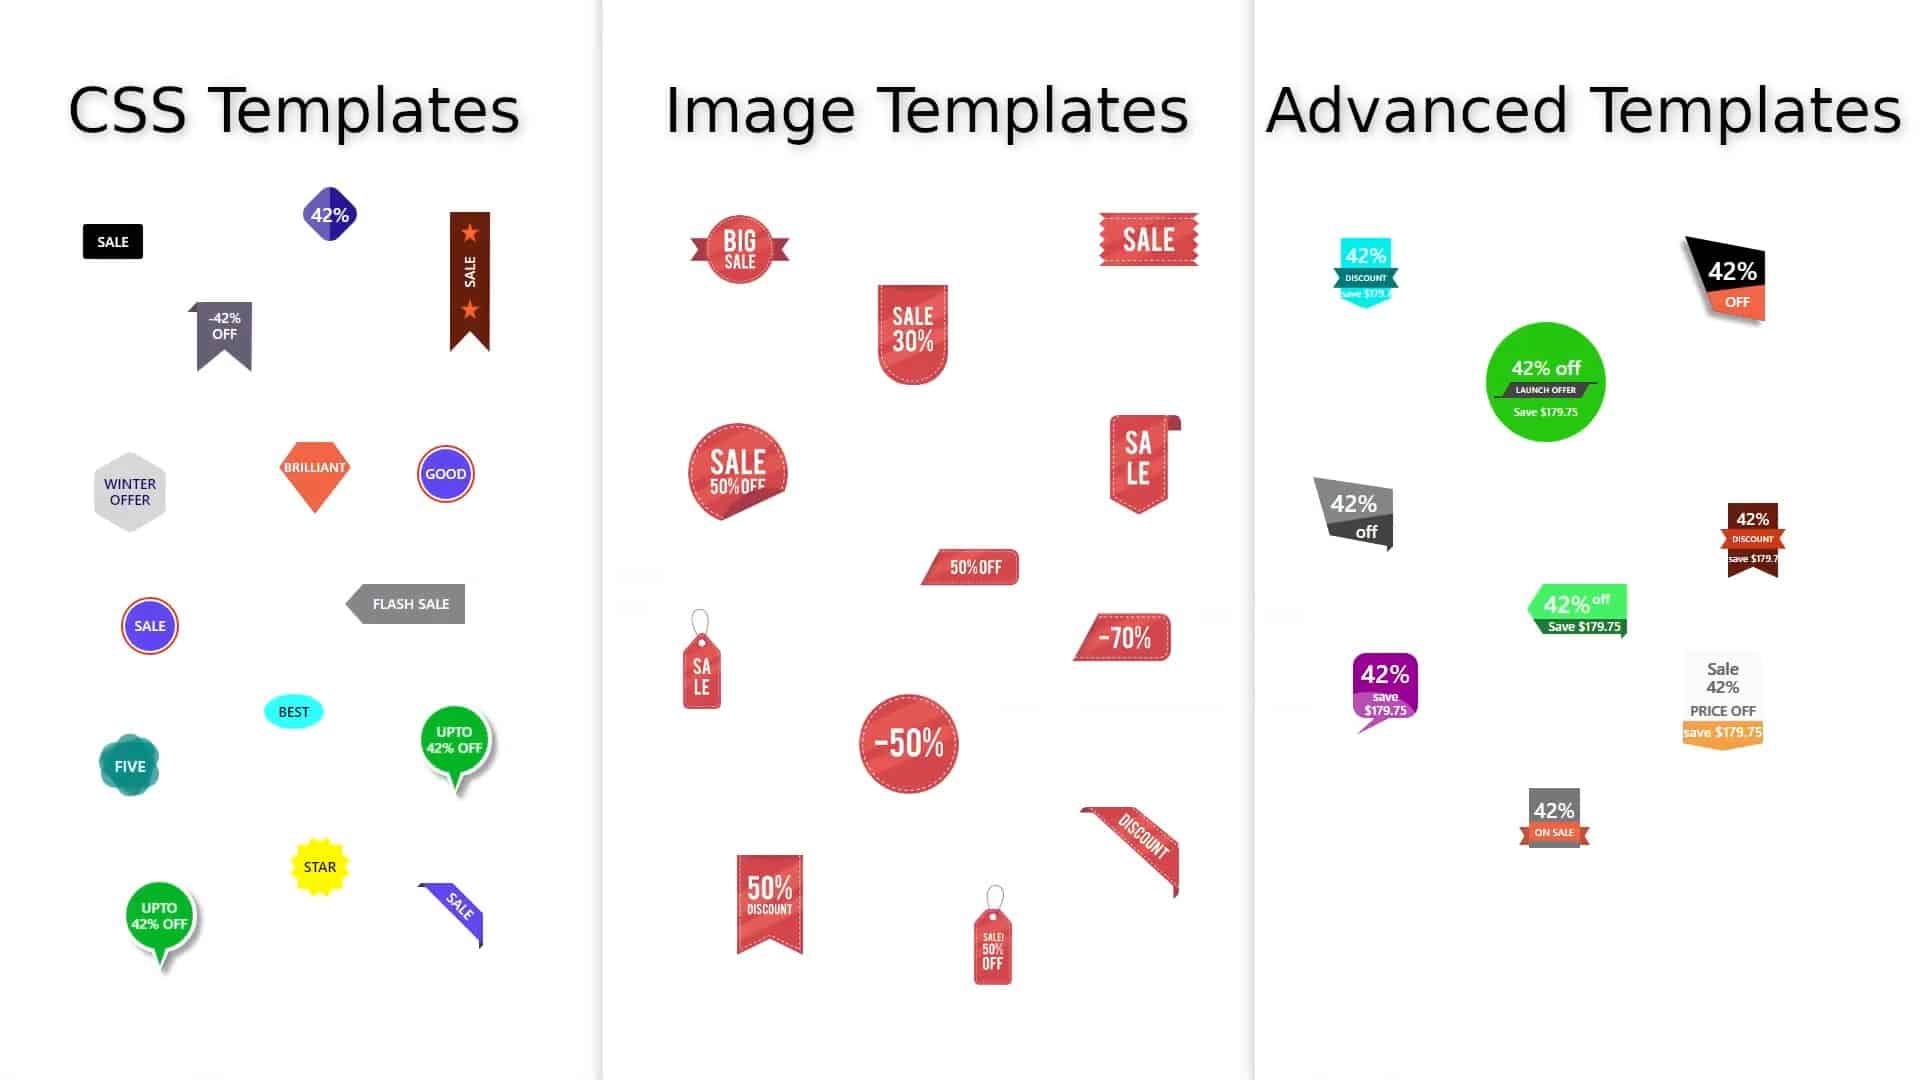
You’ll need to the type of content like text or discount amount. Once you’ve selected the content type, additional options become available depending on your choice. For example, choosing a product attribute leads to things like material, gender, or color. Selecting the attribute leads to determining the value(s) for the selected attribute.
You can choose all the values you have in your database; keep in mind that the labels need to fit on your image – choosing multiple labels that feature long text probably won’t fit your product image. To make your labels pop, you’ll have to customize them to perfectly fit your pages precisely, so the two places where you’ll spend most of your time are the style and position sections.

Style options include all the usual suspects – font and border colors, font type, text size, overall label size, etc. All these options make it relatively easy to create something that seamlessly fits your theme and overall visual identity. As the name implies, the positioning gives you the chance to move the label around the frontend product image (you can even put it on top of the image).
In addition to the central position, you can fine-tune it with paddings, margins, Z index, and rotation. In case you find that you need them, you can even add tooltips to your labels. You can make it open on hover or click, choose the delay, size, content (text or image), and everything else that comes with the territory.
Once more, for advanced users, there’s the custom CSS section that offers even more customization options to those who know how to utilize the given tools. Finally, it’s important to note that through the whole process, you get a real-time image preview that shows every change you make instantly – no multiple tabs or windows, everything you do, you can see.
If you’ve ever done any site designing, you’ll appreciate how much of a time saver something as simple as this can be.
Summary
Often, labels are overlooked in the grand scheme of things because there are more important things to focus on. However, once you get to a certain point in your site’s growth, little details such as these are the only things left that can be improved will make a difference.
Labels are unique in that regard because they help convey messages about your products in a simple way without much fuss, just by adding minor changes to the fronted product display. As a bonus, you can use those same labels to help you keep organized on the backend. The WooCommerce Product Labels plugin gives you the perfect tool for utilizing beneficial aspects.
Used to write about games and gaming in general, but has since switched to testing and writing about web development software. Still plays a lot of games, just for the fun of it.
Latest posts by Matej Milohnoja (see all)
Where Should We Send
Your WordPress Deals & Discounts?
Subscribe to Our Newsletter and Get Your First Deal Delivered Instant to Your Email Inbox.
Thank you for subscribing.
Something went wrong.
Keep reading the article at WP Newsify. The article was originally written by Matej Milohnoja on 2021-12-16 05:08:23.
The article was hand-picked and curated for you by the Editorial Team of WP Archives.

