In this post, we’ll discuss some of the main reasons you may want to configure WordPress to increase upload size. Then, we’ll show you four ways to do it. Let’s get started! 🚀
Why you may need to increase the upload size in WordPress
First things first. If you’re unsure of the meaning of “maximum upload size” – it’s pretty much what it sounds like. When you sign up for web hosting and install WordPress, your hosting provider sets a default limit for file sizes you can upload on your site. This limit varies based on your hosting plan and your particular provider.
👉 Now, let’s go over some reasons you might want to increase the maximum file upload size in WordPress:
- To install larger, premium themes or plugins
- For uploading professional-grade photos/images with large file sizes
- To add rich media like audio, video, or animated content
- For selling hefty digital products such as eBooks
As you can see, there are plenty of scenarios in which you might need to increase the upload size in WordPress. Therefore, knowing how to do it can come in handy.
Still, it’s important to note at this point that uploading lots of bulky media or installing heavy plugins and themes can slow down your site. Therefore, if you’re dealing with a multitude of large files, use an optimization plugin.
Which tool you use depends on your needs. For instance, if you run a photography blog, you might benefit from an image CDN like Optimole.
How to check the maximum file upload size in WordPress
In order to increase your maximum file upload size in WordPress, you’ll need to figure out that limit. So, we’re going to show you how to check it.
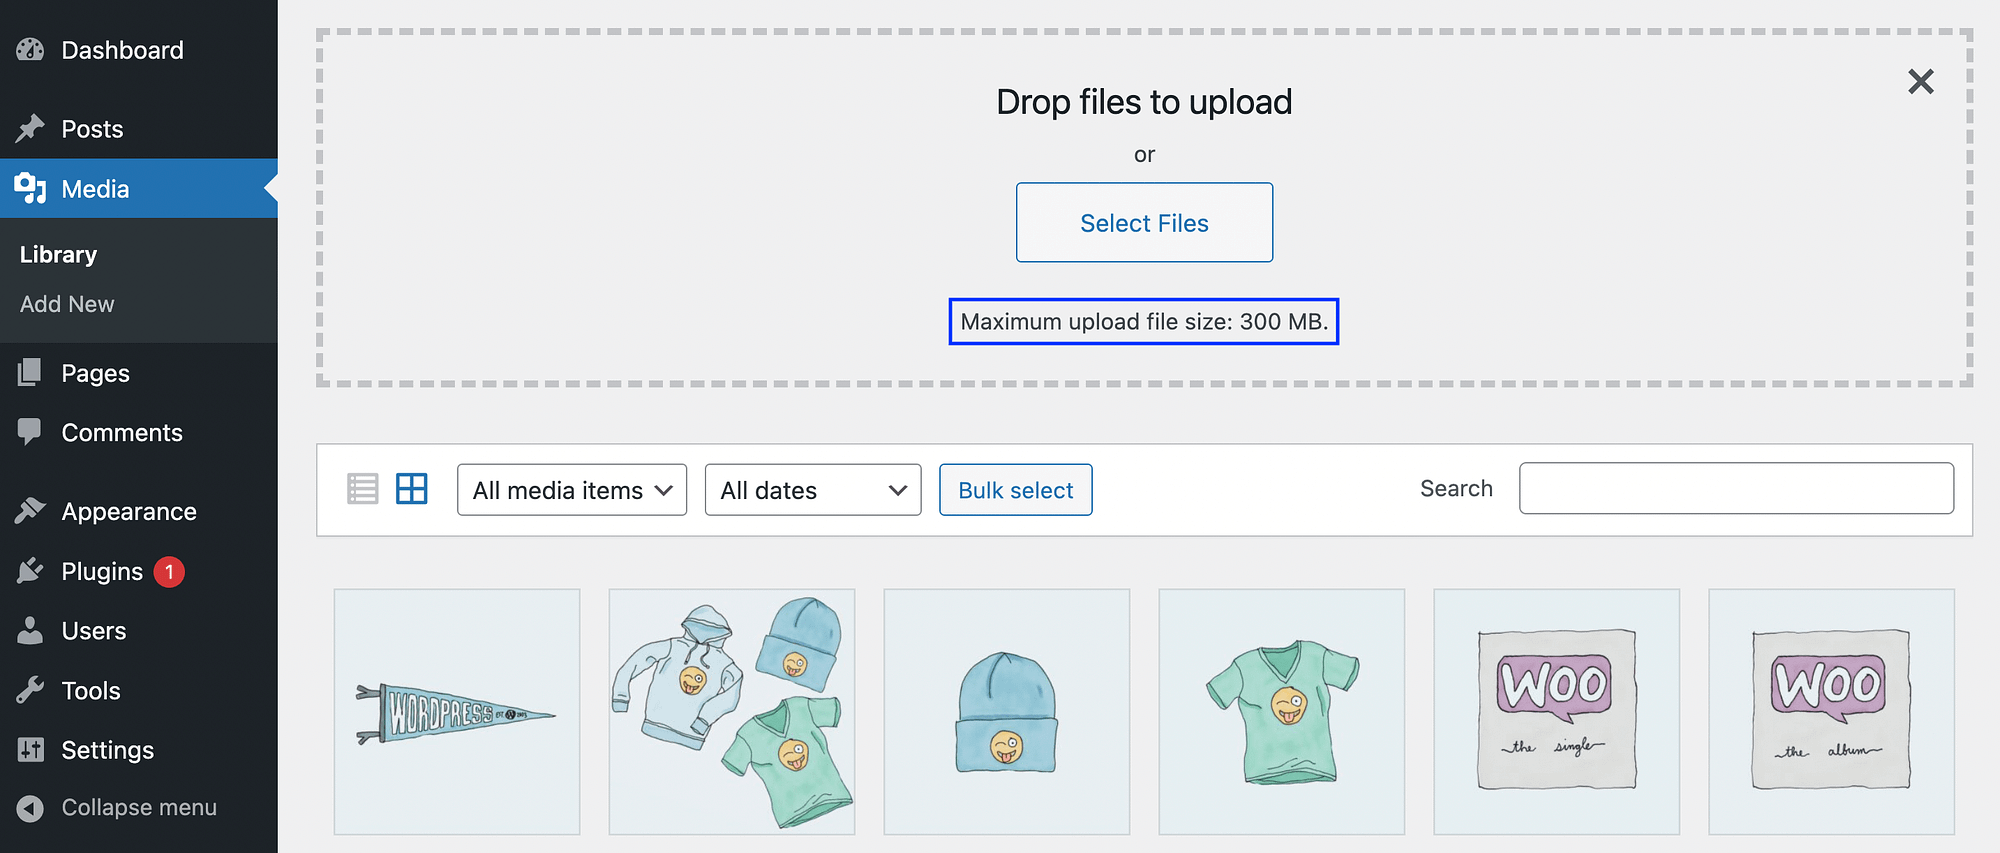
Begin by going to your WordPress dashboard. Then, click on Media → Add New. You should see the maximum upload file size just below the Select Files button. In our case, it’s 300 MB, which is a fairly average limit.
How to increase upload size in WordPress (4 methods)
Now that you know how to check for the maximum file upload size in WordPress, we’re going to show you a number of different ways to increase it.
Method 1: Contact your hosting provider and ask for an increase 💻️
Before moving onto any of the following methods, the easiest option to increase the upload size in WordPress is to simply ask your web host to do it for you.
Most reputable web hosting companies have no problem raising your upload limit; they usually just give the same upload maximum to all users to keep server resources in check. Requesting an increase typically shouldn’t require you to pay an extra fee or upgrade your hosting plan.
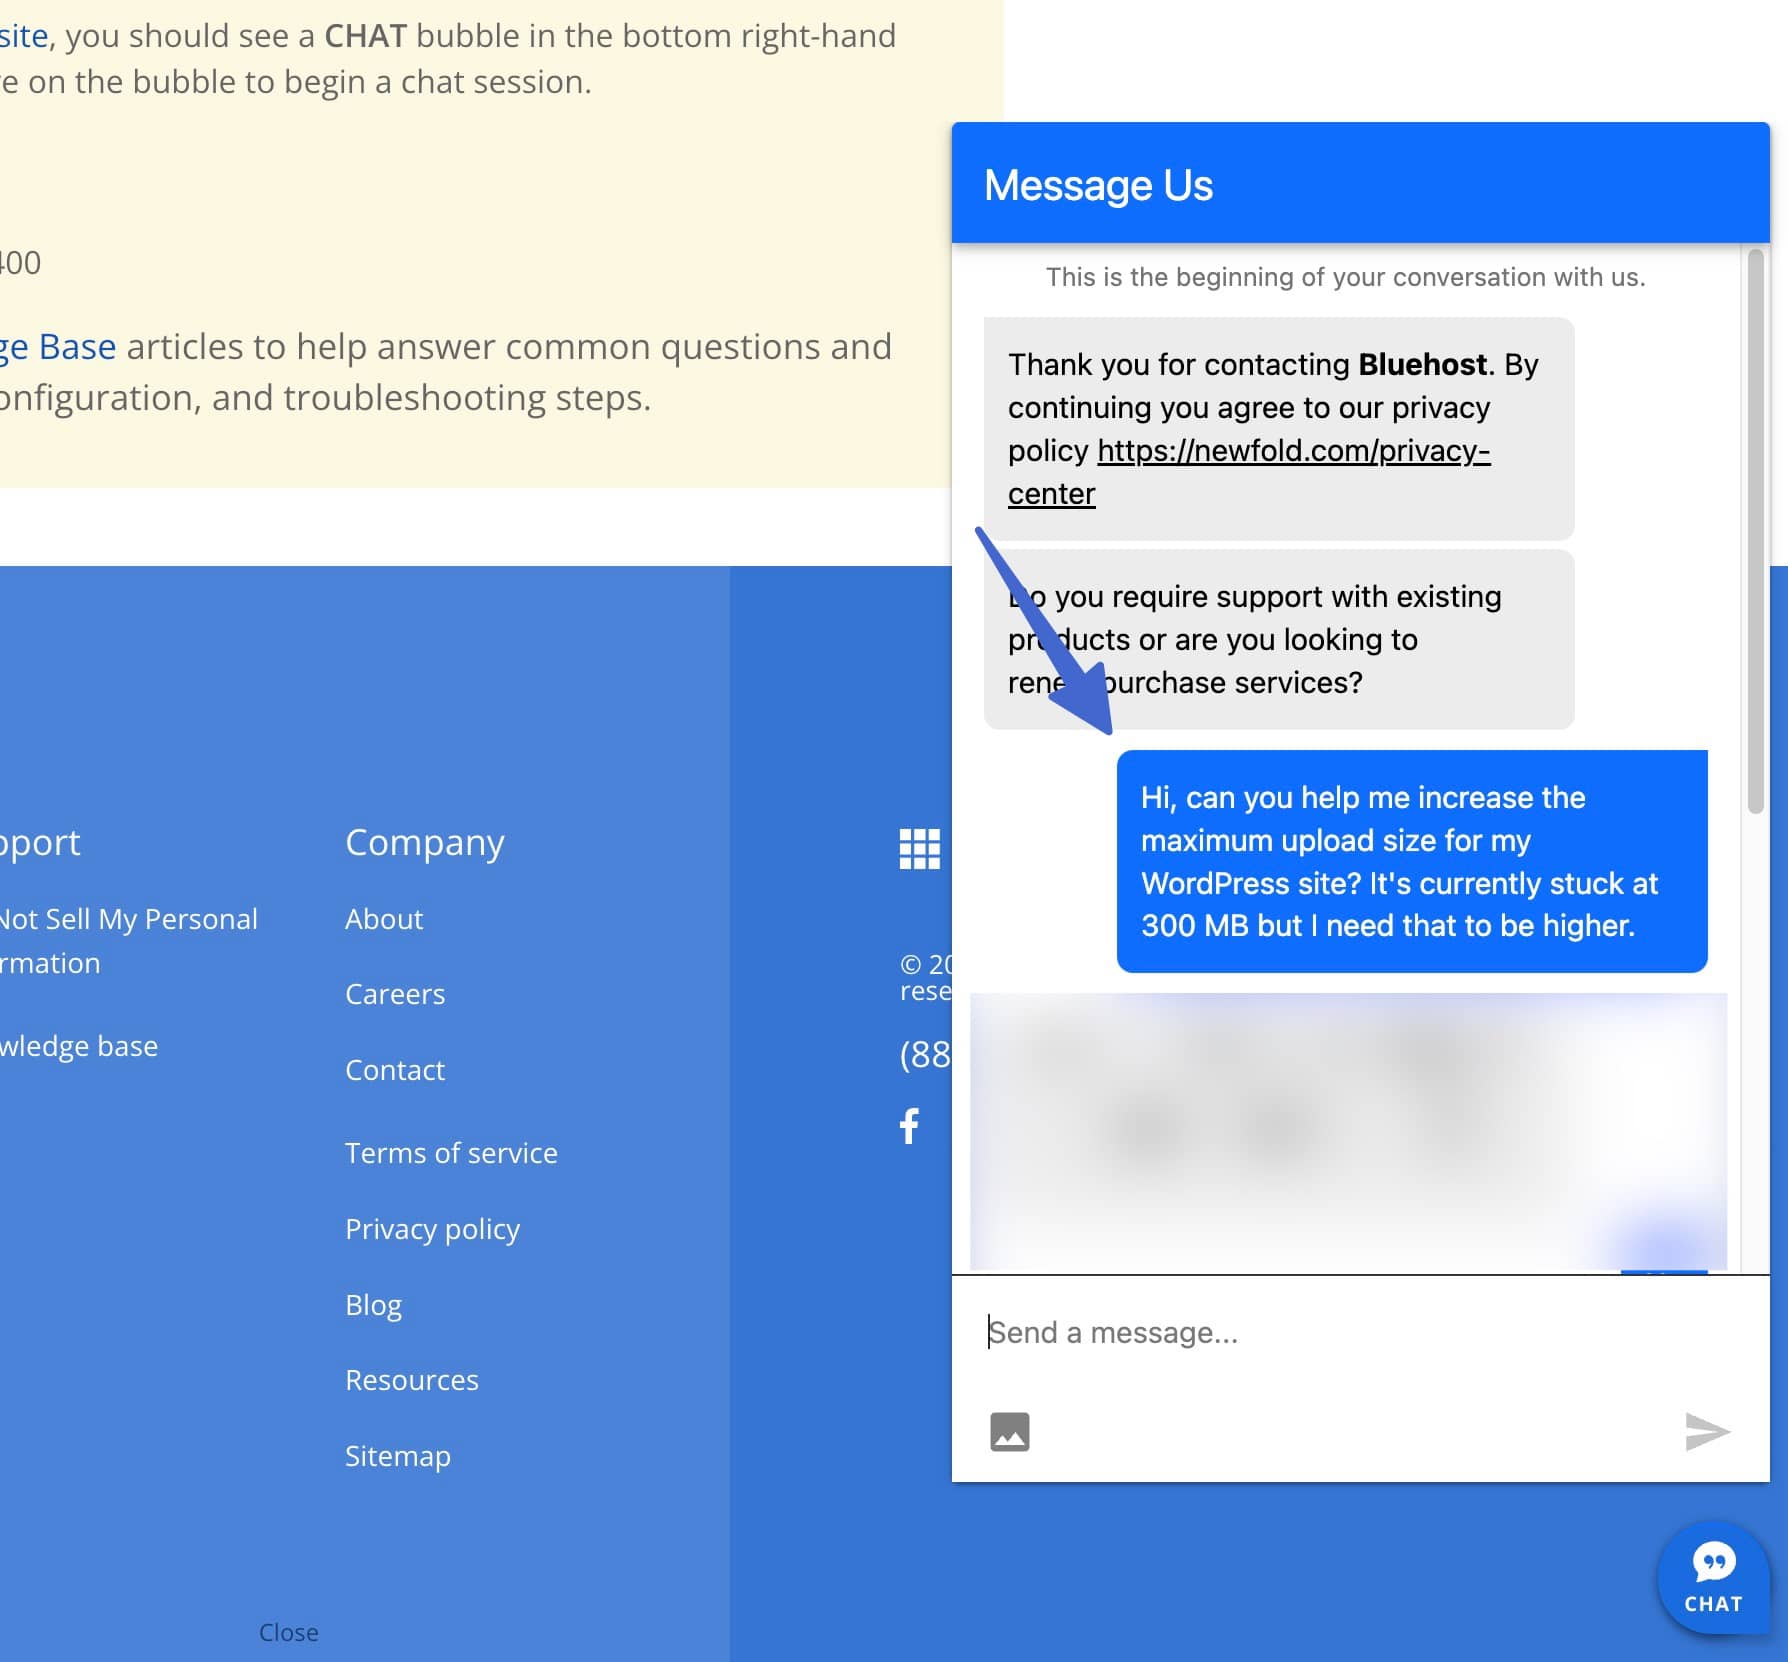
To make this happen, go to your hosting provider’s website and look for the customer support contact options. I’d recommend opening a live chat if that’s available. In my experience, customer support teams for hosting companies immediately try to send you knowledgebase links. If that’s the case, state that you’ve tried to walk through the documentation but can’t figure out the process. Ideally, the representative taps into your backend and raises the maximum upload size for you. Be sure to specify how high you’d like the maximum file size to be.

If you’re planning on uploading lots of large image files or installing a bulky plugin or theme, it might be a good idea to upgrade to a more powerful hosting plan. As a result, your site will be able to handle the added pressure.
When you get in touch with your hosting provider, we recommend also asking them about any optimization features that will help ensure your WordPress site performs well despite the heavy files you’ll be adding to it.
Method 2: Update the php.ini file ⚙️
If your host is unwilling to complete the job for you, we’re going to show you how to change the maximum file size in WordPress by updating the php.ini file. This is a fairly simple process as long as you have access to a cPanel dashboard through your hosting account.
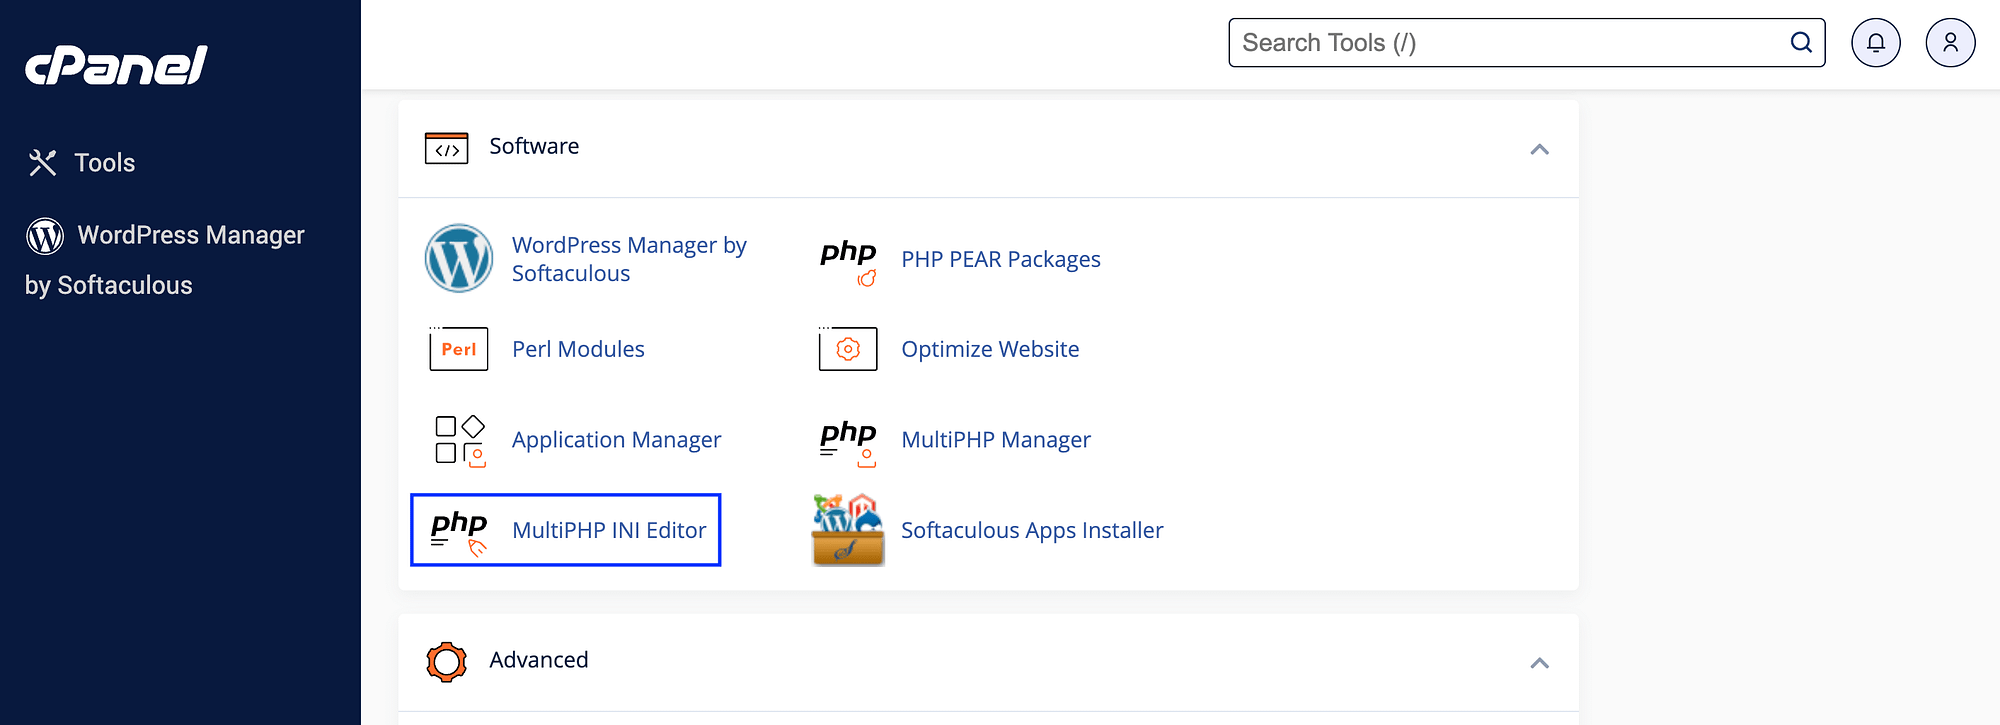
Navigate to your cPanel control panel. Go to the Software section and select MultiPHP INI Editor.

Choose your website’s domain under Select a location.

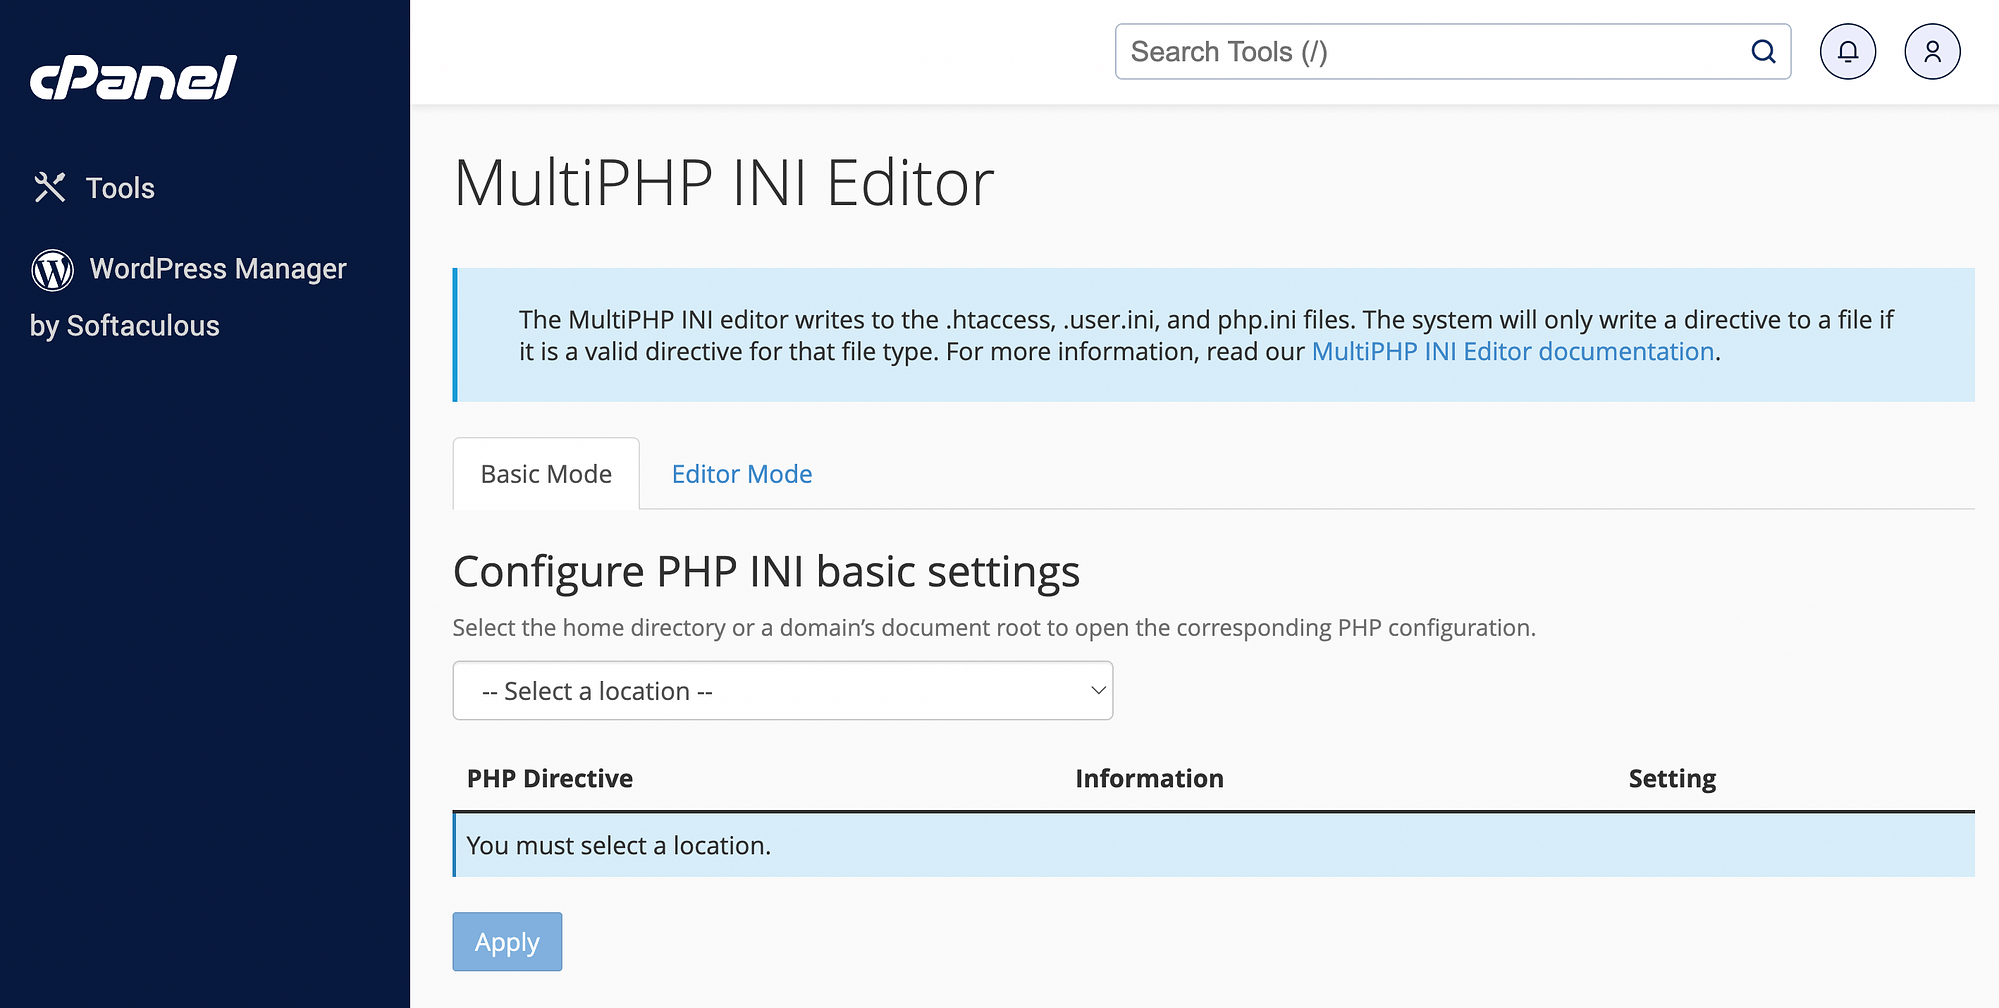
After that, you’ll see all the PHP directives you can modify.

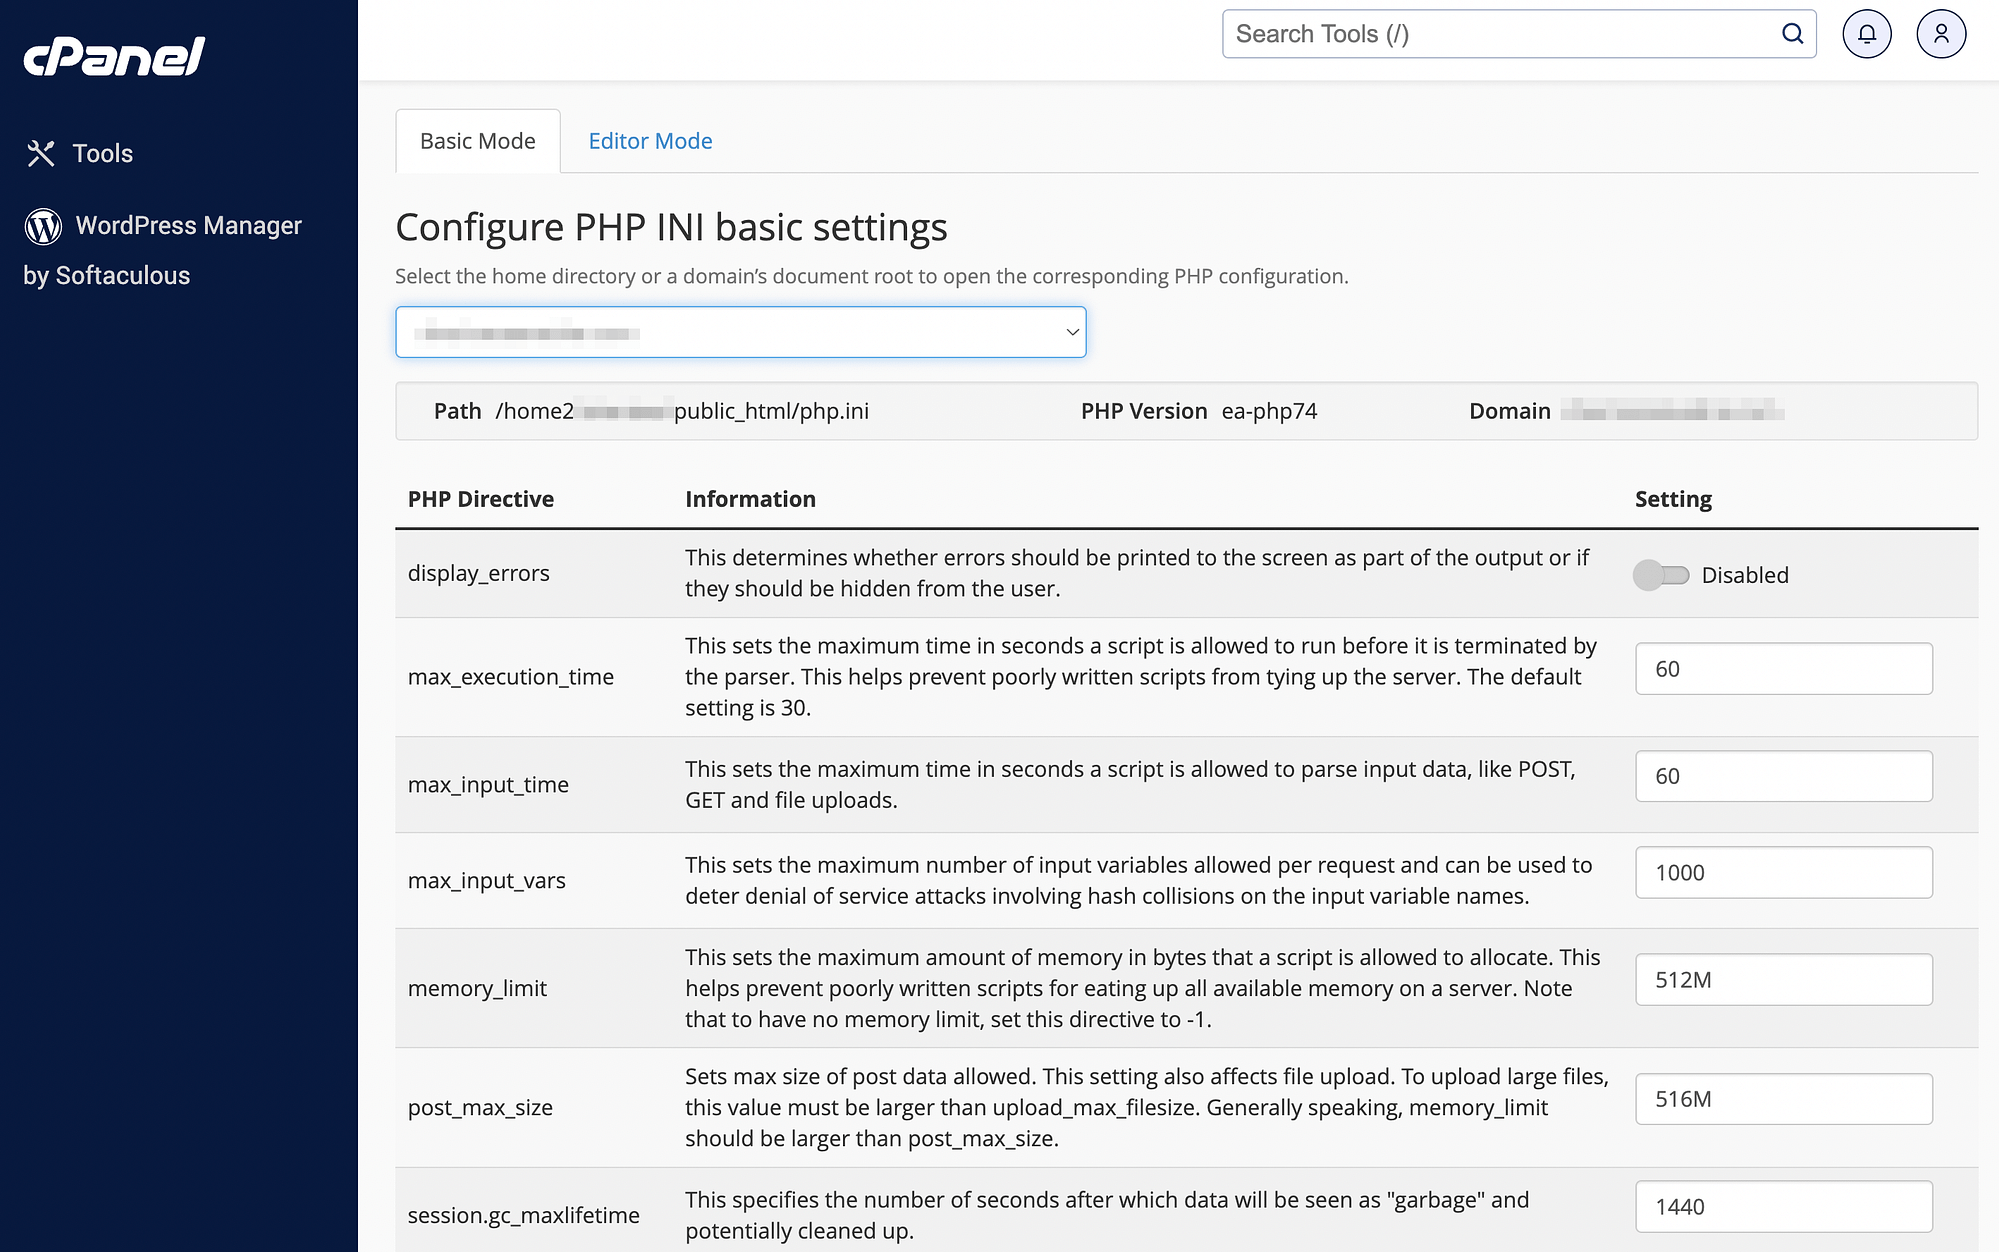
Scroll down to the option for upload_max_filesize.

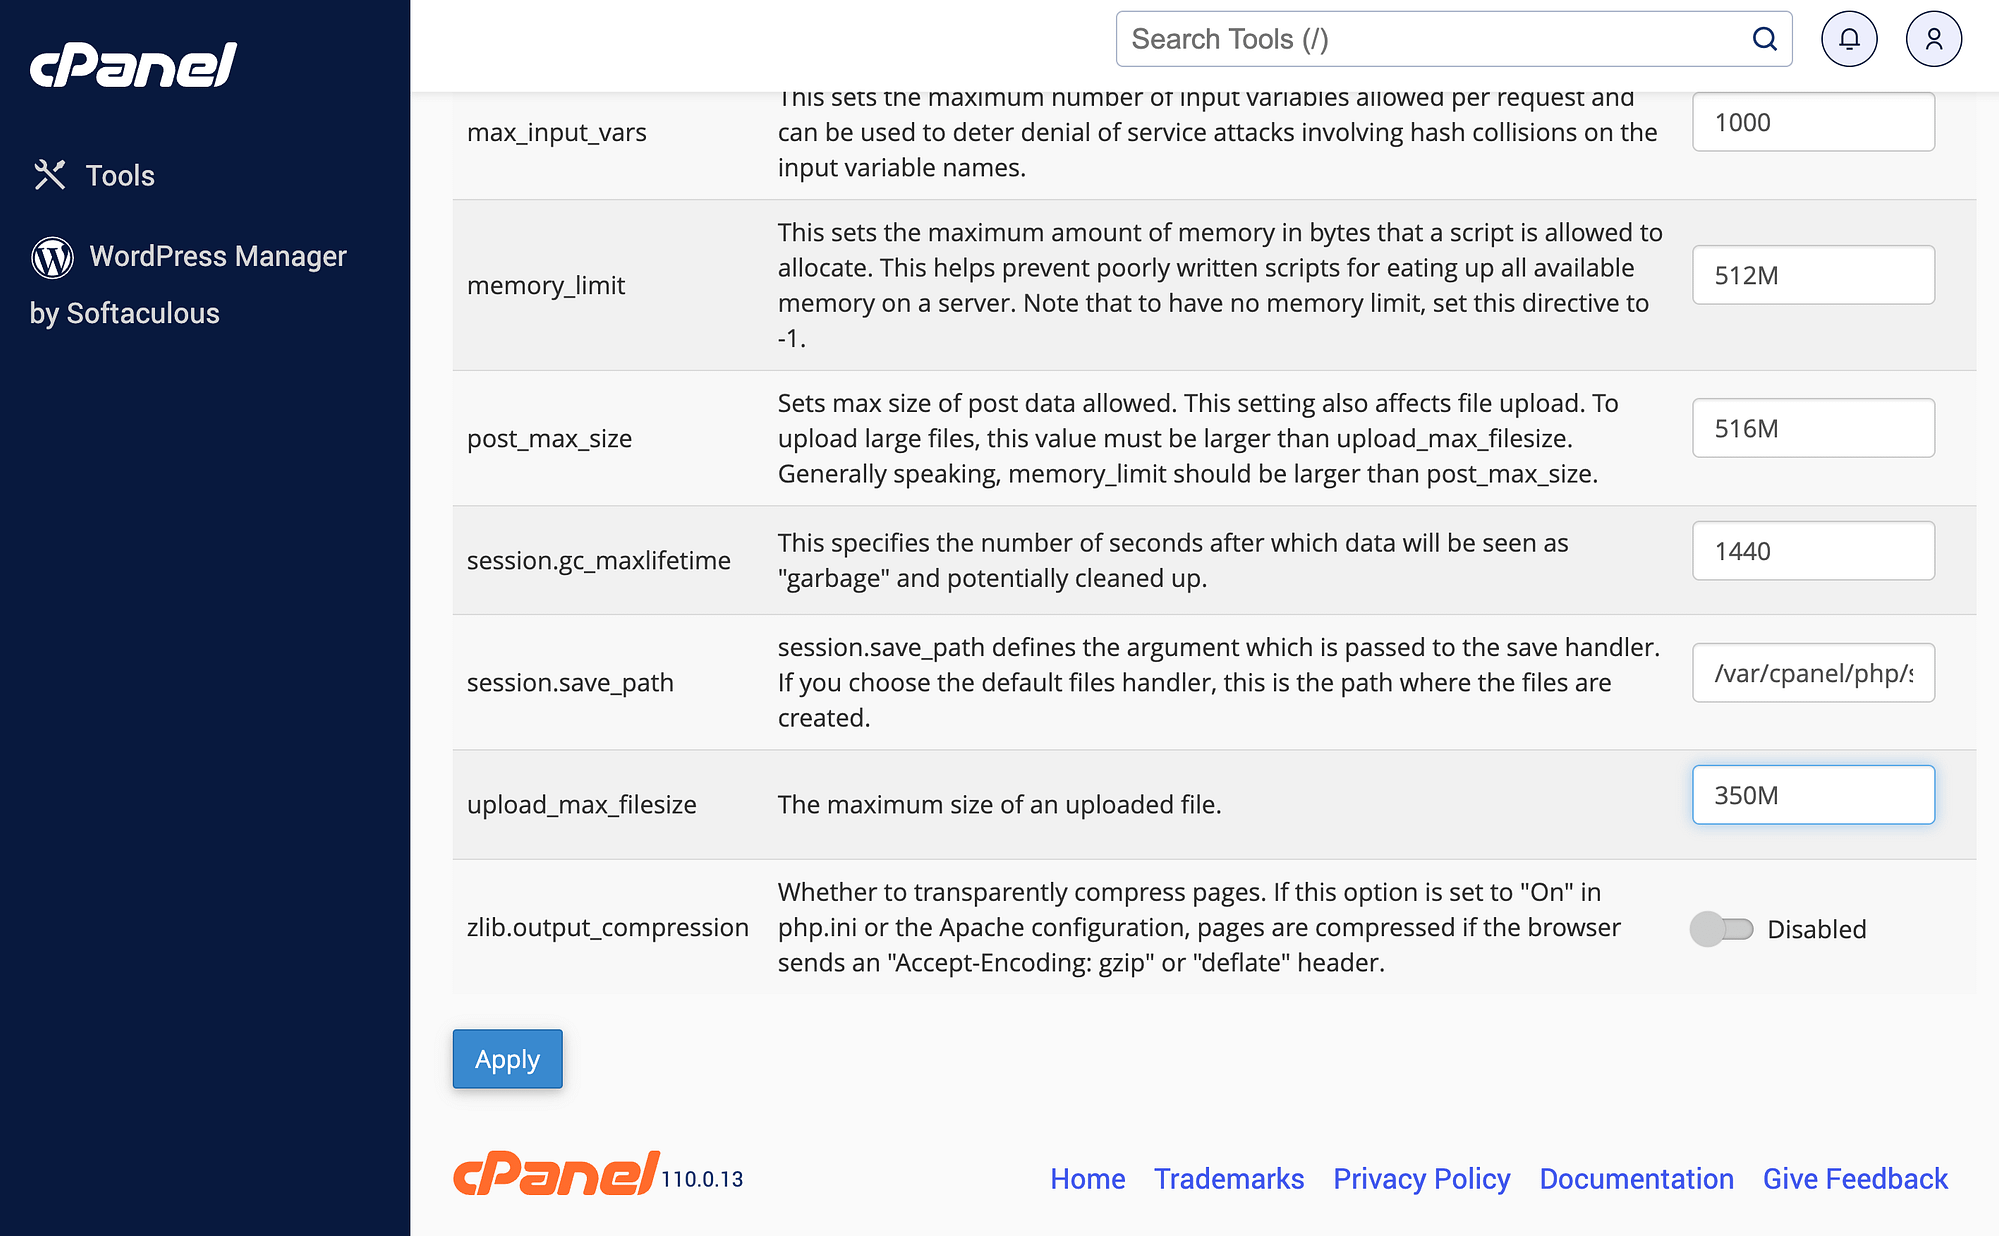
Input your preferred upload size limit and hit Apply when you’re done.
Method 3: Edit the .htaccess file 🖱️
Another (more technical) approach on WordPress to increase upload size is to edit your site’s .htaccess file. Since modifying your website’s files is a delicate process, just be sure to back up your website before you proceed. This way, you’ll have a fresh copy of your site if you make a mistake that affect’s its functionality.
You’ll need to connect your site to an FTP client like FileZilla. This gives you access to modify your site files.
Once that’s done, locate your .htaccess file in the website’s root folder, which should be labeled something like public_html. You may have, however, given it a custom file name.
Keep reading the article at CodeinWP. The article was originally written by John Hughes on 2023-11-29 10:00:00.
The article was hand-picked and curated for you by the Editorial Team of WP Archives.

