Do you want to add a free live chat to WordPress?
Adding Live chat to your business website helps you connect with users quickly. It’s a win-win… your users can quickly talk to you and clear doubts and you can potentially turn those users into paying customers.
In this article, we’ll show you how to properly add free live chat to WordPress.
Why Should You Add a Free Live Chat to WordPress?
With live chat, you can quickly communicate with your potential customers. Your users don’t have to write emails and wait for your response. They will always find someone on your site to help them.
Adding a live chat to your website converts more abandoning users into customers. You can use it on a website offering services and products, or eCommerce stores to help increase sales.
Let’s take a look at our step-by-step guide on adding free live chat to WordPress.
- Choose a Live Chat Plugin
- Create a Live Chat Account
- Customize the Live Chat Box
- Display WordPress Live Chat Box
- Hire Professional Live Chat Agents
Step 1: Choose a Live Chat WordPress Plugin
You may find dozens of live chat software for WordPress on the internet.
There is no good free Live Chat software that we can recommend.
We recommend using LiveChat Inc. which is the best solution and we also use it on one of our websites.
The LiveChat WordPress plugin is completely free. However, you’ll need to buy their premium plan to create an account and integrate it with WordPress.
To start with it, you can sign up for a 14-day free trial and test the live chat service on your website. After the trial, you’ll need to pay for the monthly plan that you choose from the LiveChat Inc. site.
The starting plan costs $16.99 per month.
Not convinced? See our complete LiveChat Inc. review for more information.
Step 2: Create a Live Chat Account
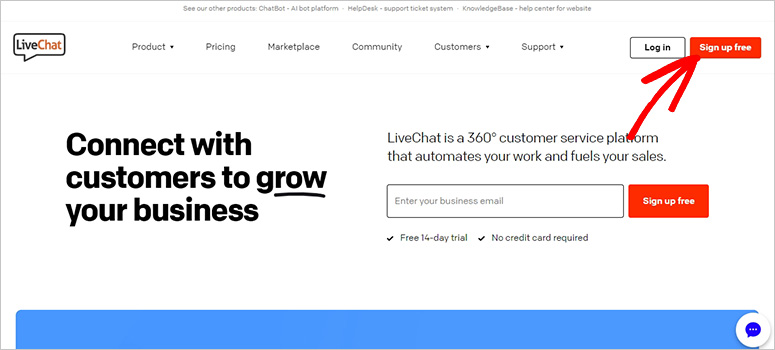
First, you need to visit the LiveChat Inc. website and click on the Sign Up Free button in the top bar.
On the next page, you need to enter your full name, business email, phone number, website URL (like google.com or isitwp.com), and password.
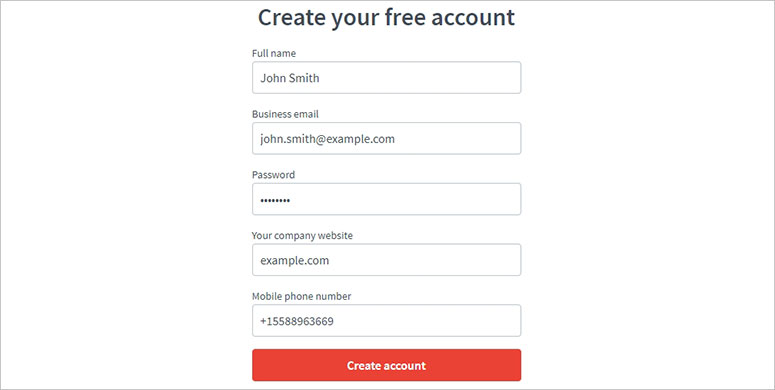
Hit the Create Account button and your new LiveChat account will be ready.
Step 3: Customize the Live Chat Box
LiveChat Inc. is highly flexible and easy to customize. You can match the live chat box with the design of your website and make it look attractive.
On your LiveChat account, you need to go to Settings from the left navigation menu.
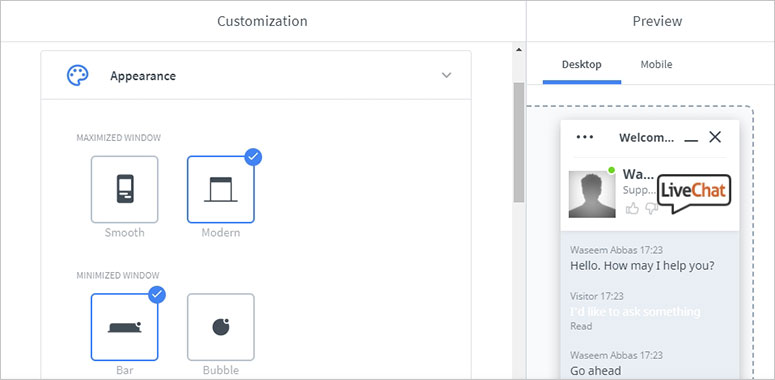
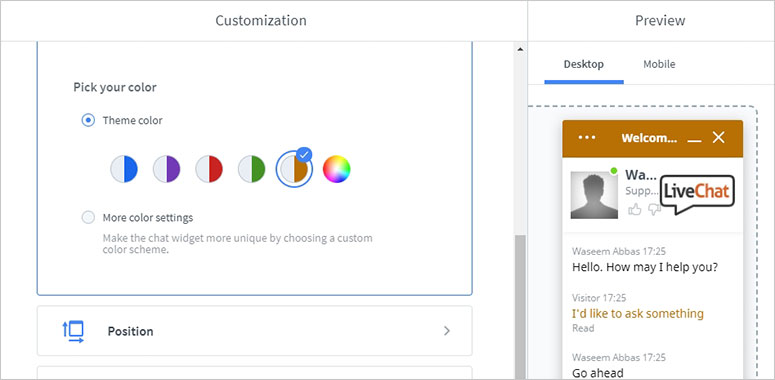
From there, you can choose a live chat theme for minimum and maximum window appearance. You should also select a theme color and position for the live chat box so as to ensure that it blends in with your website design.
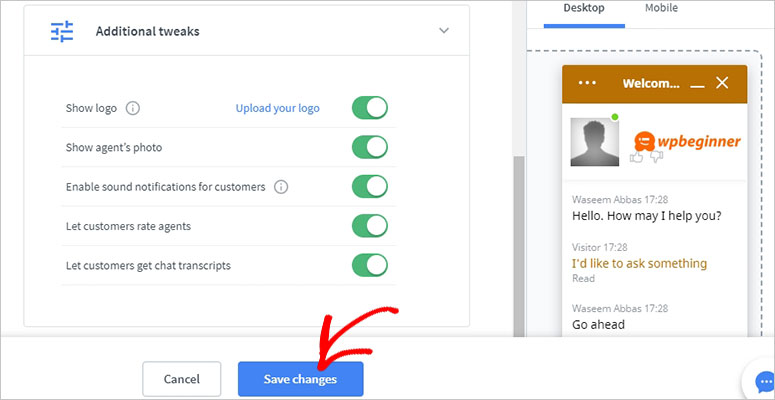
In the next step, you need to click on the Additional tweaks option. Here, you can remove the LiveChat Inc. brand logo and upload your custom website logo. You can also manage other settings like the agent’s photo, notification sound, and more.
Moreover, you can set up the mobile view and desktop view for live chat separately.
Step 4: Display WordPress Live Chat Box on Your Site
You can add the free WordPress live chat plugin to your site via LiveChat Inc..
Start by installing and activating the LiveChat plugin. For more details, you should check out our guide on how to install a WordPress plugin.
After the activation, you need to visit LiveChat » Settings from WordPress admin area.
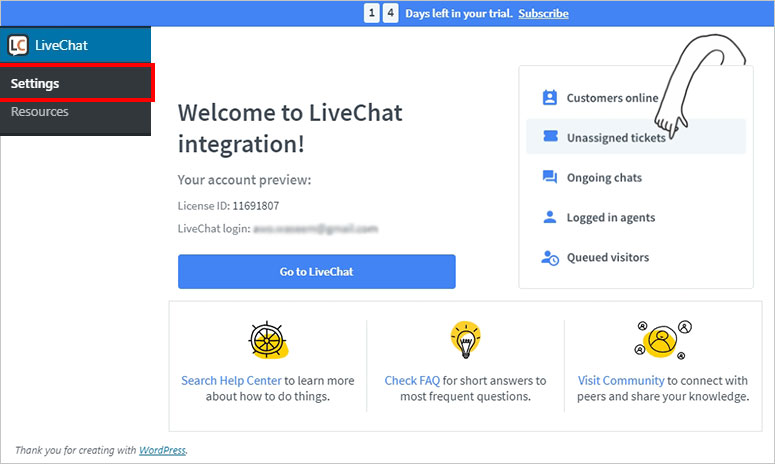
From there, you need to click on the Go to LiveChat button to connect your LiveChat account with your WordPress site.
You need to enter your login information on the LiveChat website (if not logged in), and you’ll see the success message.
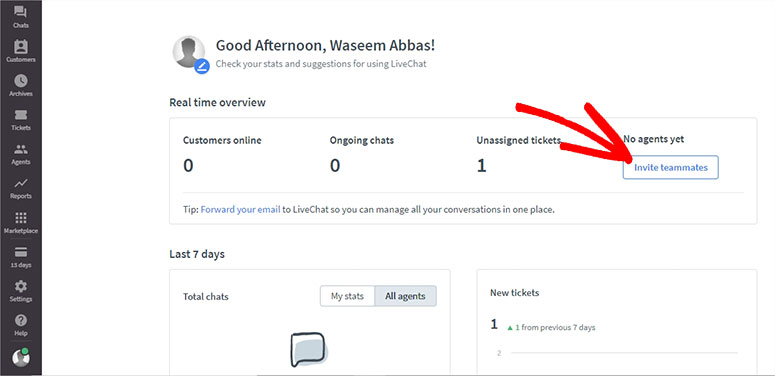
You can invite team members, set up goals, view chat stats, and more.
That’s all. To see the live chat in action, you can visit your website and find the sticky LiveChat bar or bubble as you set it.
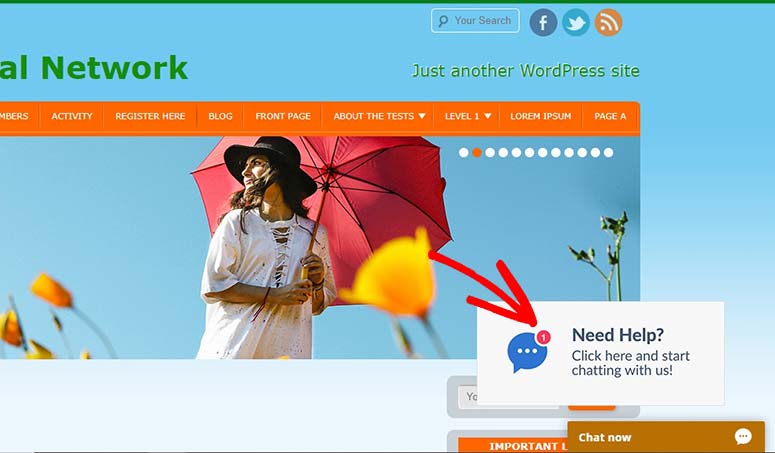
Whenever users try to connect with you, it’ll send a notification to your LiveChat account, and you can start talking with them in real-time.
Step 5: Hire Professional Live Chat Agents
Now your live chat box is ready on your site. Next, you need to find professional live chat experts who can answer the users in real-time.
For this, you’ll have 2 options to consider for your business website:
- Build your sales and support team. But, it’ll take time and require a lot of patience, especially for training them.
- Outsource the live chat to a professional company like LTVPlus and they’ll take care of everything.

LTVPlus provides live chat experts for 24/7 sales and support. These experts need no training, and your live chat will start functioning right away. It’ll also save you time and money, so you can focus on the growth of your business, instead of handling your site users on your own.
We use LiveChat and LTVPlus together on our websites like OptinMonster to maximize our productivity and sales.
We hope this article helped you learn how to add a free live chat to WordPress. You may also want to check out our guide on how to greet WordPress users with a custom welcome message.
Keep reading the article at IsItWP – Free WordPress Theme Detector. The article was originally written by Editorial Team on 2020-01-24 07:01:53.
The article was hand-picked and curated for you by the Editorial Team of WP Archives.

